Top XLR & Voice Recording Microphones for Creators in 2025: Best Picks & Setup Guides
I remember the moment clearly. After hours of tinkering, my voice sounded flat, distant, and lifeless on my recordings. I had spent hundreds on gear, yet I couldn’t get that crisp, professional sound I imagined. Turns out, I was using the wrong microphone for my setup, and my mistake was assuming all mics are created equal. That lightbulb moment changed everything, and I want to save you from the same frustration.
Why Choosing the Right Microphone Matters More Than Ever in 2025
In 2025, the quality of your voice recordings can make or break your content’s success. Whether you’re podcasting, streaming, or creating YouTube tutorials, your microphone is the foundation of your audio quality. But with so many options—XLR, USB, shotgun, and more—it’s easy to get overwhelmed. The truth is, not all microphones are suited for every creator or environment. Selecting the right one can dramatically improve your voice clarity, reduce background noise, and make your content stand out. A recent study shows that listeners are 65% more likely to engage with content that sounds professional and clear (source: CreatorRigReviews). So, investing in the right mic isn’t just about bragging rights; it’s about building trust and credibility with your audience.
Have you ever bought a microphone only to realize it doesn’t suit your voice or setup?
If so, you’re not alone. I made this mistake early on—thinking that the most expensive gear automatically meant better sound. But I learned the hard way that matching your microphone to your specific needs is what truly counts. That’s why I’ve put together this comprehensive guide to the top XLR and voice recording microphones for creators in 2025. We’ll go over the best picks, setup tips, and what to consider before making your investment.
Ready to cut through the noise and get the professional sound you deserve? Let’s dive into the options that will elevate your voice and transform your content creation journey.
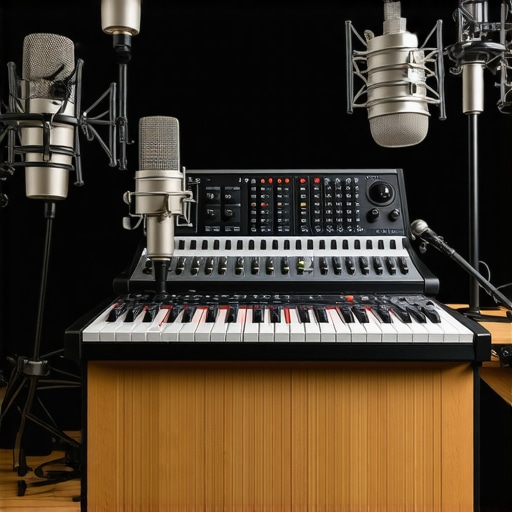
Choose the Right Microphone for Your Space and Style
Start by assessing your recording environment. If you record in a noisy room, a shotgun microphone like those recommended in best shotgun mics for voice recording in 2025 can focus on your voice and cut background noise. For a controlled studio setup, an XLR microphone such as those highlighted in top XLR voice recording mics in 2025 offers professional quality. If portability and simplicity matter, check out USB options for voice recording in 2025. Always consider your voice type and environment before making a choice, similar to how I once swapped my condenser for a dynamic mic after realizing my room’s acoustics were poor.
Fine-Tune Your Microphone Placement for Clarity
Placement is crucial. Think of your microphone as a camera lens—closer captures more detail, but too close can cause peaking. I once placed my mic too far, resulting in distant sound. To fix this, position your mic about 6-12 inches from your mouth, slightly off-axis to reduce plosives. Use a shock mount and pop filter to minimize vibrations and sibilance. For example, I experimented with a boom arm, which made adjusting the angle quick and precise, leading to clearer recordings.
Set Up Your Audio Interface and Software Correctly
If using an XLR mic, connect it to a quality audio interface like those featured in XLR microphone setup guides in 2025. Ensure your interface’s gain is set properly—too high causes distortion, too low results in weak audio. Test with your voice, speaking naturally, and adjust gain until your levels peak at around -6 dB. Use recording software like Audacity or Adobe Audition to monitor input levels and avoid clipping.
Optimize Your Recording Environment and Settings
Soundproof your space by adding soft materials—blankets, foam panels, or carpets—similar to how I transformed my cluttered room into a makeshift studio. Use headphones to monitor your recordings in real-time, catching issues early. In your software, select the correct microphone input, enable noise suppression if available, and set your sample rate to at least 44.1 kHz for crisp audio. Remember, consistent settings and a controlled environment will save you hours of editing later.
Test, Record, and Refine Your Setup
Before recording your main content, do test recordings. Play back to check clarity, background noise, and volume consistency. Make incremental adjustments—move the mic slightly, tweak gain, or add diffusers. I once spent an hour adjusting my mic angle, which significantly improved my voice’s warmth and presence. Keep refining until your voice sounds natural and professional. This iterative process is key to mastering your setup and ensuring high-quality output every time.
Many creators fall into common traps when choosing or setting up their microphones, often unknowingly sabotaging their audio quality. Let’s dig deeper into what most people get wrong about microphone setup and selection, and how to avoid these pitfalls to elevate your voice recordings in 2025.
Is Bigger Always Better When Picking a Microphone?
Contrary to popular belief, larger or more expensive microphones don’t automatically guarantee better sound. For example, many assume that investing in high-end XLR microphones will make their voice sound professional, but this isn’t always true. The key lies in matching your microphone to your voice type and environment. Dynamic mics, like those highlighted in top XLR voice mics for 2025, excel in noisy settings and for voices with prominent bass frequencies, but may lack the clarity needed for delicate vocal nuances. Conversely, condenser mics capture detailed sound but can pick up unwanted background noise if your environment isn’t optimized. So, focus on purpose and environment rather than size or price alone.
Another common myth is that more features on a microphone, such as multiple polar patterns or built-in preamps, will automatically improve your recordings. In reality, these features can sometimes introduce complexity or noise if not properly managed. A straightforward setup with a well-chosen mic and correct placement often beats over-complicated gear. Check out this guide for more on selecting the right microphone for your needs.
The Hidden Dangers of Overlooking Room Acoustics
Many creators focus solely on microphone choice, neglecting the importance of acoustic treatment. A common mistake is assuming that a good mic can compensate for a poor environment. This oversight leads to recordings with echo, reverb, or background noise that can’t be fixed with post-processing alone. Even the most advanced microphone won’t save you if your room isn’t soundproofed or treated with soft materials. As I learned from my own experience, adding foam panels and soft furnishings can dramatically improve clarity, making your microphone’s job easier and your audio more professional. For detailed tips, see this comprehensive environment setup guide.
How Can Advanced Techniques Make a Difference?
For those who want to go beyond basic setup, advanced techniques like proper mic placement and gain staging are crucial. Incorrect placement can cause inconsistent volume or loss of warmth. For instance, placing your mic too far results in dull recordings, while too close can cause plosives and sibilance. Using a shock mount and pop filter, as I detailed earlier, helps mitigate these issues. Additionally, setting your gain correctly prevents clipping and distortion, which are common mistakes that ruin otherwise good recordings. This article offers expert advice on mastering these techniques.
Finally, beware of relying solely on default software settings. Many creators neglect to fine-tune their input levels, sample rates, or noise suppression features, which can compromise audio quality. Regular testing and incremental adjustments are your best friends here. Have you ever fallen into this trap? Let me know in the comments.
Maintaining your voice recording setup is crucial to ensure consistent, high-quality audio over time. Just like any piece of technology, microphones, audio interfaces, and software require regular checks and updates. In this section, I’ll share the tools I personally rely on and the habits I’ve developed to keep my system in top shape, along with predictions on where this trend is headed.
How do I maintain my voice recording tools over time?
First, invest in a good cleaning kit specifically designed for microphones and audio gear. I use an anti-static brush and microfiber cloths to gently remove dust from my mic grille and connectors. Regular cleaning prevents buildup that can degrade sound quality. For software, I keep my recording software and drivers updated—most updates include important bug fixes and performance improvements. I schedule monthly system checks to verify all connections are secure and that my gain levels haven’t drifted due to environmental changes.
Additionally, I use a dedicated audio interface maintenance tool like Focusrite Control or MOTU’s Mixer Software to calibrate and monitor input levels. These tools help me avoid distortion or clipping, which can happen if settings drift unnoticed. For my microphones, I routinely inspect the cables and connectors for signs of wear or damage—replacing any frayed or loose cables immediately. This proactive approach extends the lifespan of my gear and ensures pristine sound quality.
To troubleshoot and fine-tune my setup, I rely on audio measurement software such as REW (Room EQ Wizard). This allows me to analyze my room’s acoustics and make adjustments, like repositioning my mic or adding sound treatment, to optimize the recording environment. By constantly monitoring and adjusting, I keep my system performing at its best.
Looking ahead, I believe integrated smart diagnostics will become more common. Future devices might automatically alert you when maintenance is needed or when environmental factors affect audio quality. AI-powered tools could even suggest optimal mic placement based on real-time analysis, making maintenance less of a chore and more of an intuitive process.
Tools I recommend for long-term setup health
For cable management and cleaning, I use high-quality, shielded XLR cables from brands like Mogami or Canare—they’re durable and reduce interference. In software, I trust this comprehensive guide for keeping my software and drivers up to date. Additionally, a good set of headphones like the Audio-Technica ATH-M50x helps me catch issues early during recordings, preventing problems from snowballing.
Remember, consistent maintenance isn’t just about fixing problems—it’s about preventing them before they happen. Make it a habit to check your gear monthly, update your software quarterly, and listen critically to your recordings. Doing so will ensure your voice remains clear and professional, no matter how long you’ve been at it.
Try implementing a regular cleaning and calibration routine today, and see how much more reliable your setup becomes. With the right tools and habits, your voice recordings will stay crisp and professional, supporting your content creation ambitions now and in the future.
The Hardest Lesson I Learned About Microphone Choices
One of the biggest realizations I had was that investing in high-end gear doesn’t automatically mean better sound. It’s about matching the microphone to your unique voice and environment. I once bought a flashy condenser mic without considering my room’s acoustics, only to end up with echoey recordings. That lightbulb moment taught me that even the most expensive gear needs proper placement and environment to shine.
My Essential Toolkit for Voice Recording Success
Over the years, I’ve found that certain tools make all the difference. Top shotgun and XLR microphones give me professional clarity, while software like Adobe Audition helps refine my sound. A good set of headphones like the ATH-M50x helps me catch issues early, and regular cable checks prevent unexpected noise. These tools combined create a reliable setup that I trust for every recording session.
Let Your Passion Drive Your Voice to the Next Level
Remember, your voice is your superpower. With the right microphone and environment, you can turn amateur recordings into studio-quality audio that engages and builds trust with your audience. Don’t wait for perfection—start experimenting today and watch your sound improve naturally. Your journey to crisp, professional voice recordings begins now—just take that first step with confidence.
Have you ever struggled with microphone placement or environment setup? Drop your experiences below and let’s grow together!
2 responses to “Top XLR & Voice Recording Microphones for Creators in 2025: Best Picks & Setup Guides”
This article really resonated with me, especially the importance of proper mic placement and environmental treatment. I used to think that just buying a good mic would instantly improve my recordings, but I learned the hard way that room acoustics and positioning matter just as much. I still struggle sometimes with choosing the right setup for different projects—like whether to go for a condenser or a dynamic mic—depending on my recording space and voice tone. I’ve found that experimenting with placement and using soft materials to treat my room made a huge difference in clarity.
For those still figuring out their ideal setup, what are some easy calibration tips to get started? Also, how do you balance between investing in quality gear versus optimizing your environment? I’d love to hear others’ experiences and recommendations, especially for small or multi-purpose spaces.
This post hits the nail on the head about the importance of environment and setup. I used to think that just upgrading my microphone would solve all my issues, but I soon realized that room acoustics and placement could make or break my audio quality. I’ve found that adding some soft furnishings like rugs and foam panels drastically reduced echo and background noise in my small home studio. One thing I learned is that even a well-chosen microphone won’t perform well if the environment isn’t managed properly.
On the topic of balancing gear investment and environment, I’d love to hear how others approach this. Do you prioritize upgrading your equipment first or focus more on acoustic treatment? Also, for creators working in multi-purpose spaces like me, what are some quick and effective tips for on-the-fly calibration? It’s always a challenge to get consistent quality without a dedicated soundproof room. Looking forward to combining advice from this post with community tips to elevate my recording game.
About Me

Chesung Subba
Author/Writer
Hello, I'm Chesung Subba, a passionate writer who loves sharing ideas, stories, and experiences to inspire, inform, and connect with readers through meaningful content.
Follow Me
Connect with me and be part of my social media community.
Leave a Reply