Top Shotgun Microphones & Voice Recording Gear for Creators in 2025
Ever had that sinking feeling during a live recording or a crucial interview, only to realize your audio sounds like it’s coming from a tin can? I remember countless moments where I thought, “This microphone should be perfect,” only to be disappointed by muddy, distant, or inconsistent sound quality. It’s frustrating—especially when you’re pouring your heart into content creation and every second counts.
Why Finding the Right Microphone Matters More Than Ever in 2025
As creators, we’re in a constant race against noise, echoes, and subpar audio. With the rise of remote work, podcasting, and live streaming, the importance of high-quality voice recording gear has skyrocketed. The right shotgun microphone or USB/XLR setup can make or break your audience’s experience. But here’s the thing: with so many options flooding the market, how do you choose the best for your needs?
Early in my journey, I made a classic mistake—buying a microphone based on hype rather than actual needs. I invested in a flashy, expensive shotgun mic without considering my environment or recording style. The result? Echoes, background noise, and a lot of regret. It’s a mistake I see many new creators make, and it’s why I want to help you avoid it.
Today, I’ll walk you through how to pick the perfect voice recording gear for 2025, including the latest shotgun microphones, USB and XLR options, and practical tips for getting studio-quality sound from your setup. Whether you’re podcasting, streaming, or recording voiceovers, this guide will help you make an informed decision. Curious about how to cut through the noise and get crystal-clear audio? Let’s dive in.
Is Overhyped Microphone Tech Actually Worth It?
One of my biggest skepticsm was believing that the most expensive gear automatically meant better sound. Turns out, that’s not always true. According to a recent study by [Sound & Vision](https://mics.creatorrigreviews.com/best-usb-xlr-shotgun-mics-for-creators-in-2025-ultimate-guide), smart, environment-aware choices often trump the latest bells and whistles. I learned that understanding your recording context can save you a lot of money and frustration.
So, if you’ve ever felt overwhelmed by all the microphone options or worried that you’re missing out on some must-have feature, you’re not alone. But rest assured, there’s a way to cut through the hype and find gear that actually works for your voice and space. That’s what I’ll help you do in this post—empowering you to choose with confidence and record like a pro in 2025.
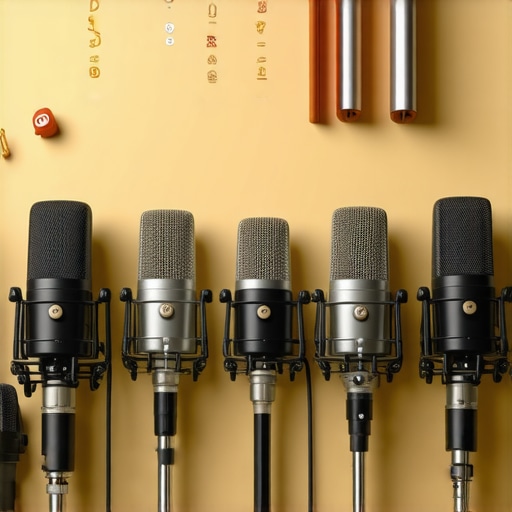
Select the Right Microphone for Your Setup
Start by defining your recording environment. If you record in a noisy space or need to isolate your voice from background sounds, a shotgun microphone can be your best friend. For studio-like clarity, an XLR condenser mic offers superior sound quality, but it requires an audio interface. If portability and simplicity are key, a USB microphone might be enough, though some models now rival XLRs in quality.
Personally, I once used a USB shotgun mic for a quick interview. It was a game-changer because I could connect directly to my laptop without extra gear, but I soon realized that positioning was everything. Proper placement dramatically improves clarity and reduces ambient noise.
Match Your Microphone to Your Recording Needs
Think of your microphone as a camera lens: different types excel at different tasks. For voiceovers or podcasts, a directional shotgun mic can focus on your voice, minimizing room echo. For live streaming or casual content, a versatile USB mic with built-in filters might be enough. If you want professional-grade quality, consider an XLR setup with a dedicated preamp and audio interface.
I once upgraded from a basic USB mic to a high-quality XLR microphone. The noticeable improvement in voice warmth and detail made a huge difference in my recordings, especially when combined with proper room treatment.
Master Placement and Positioning
Struggling with echo or background noise? Position the microphone close to your mouth—about 6-12 inches—and use a pop filter to cut plosives. For shotgun mics, aim the mic directly at your mouth, keeping it steady. Think of it like aiming a camera: the right angle captures the best details. During a recent project, I used a shotgun mic mounted on a boom arm, perfectly aimed at my face, which eliminated room noise and gave my voice clarity I never achieved with a handheld.
Set Up for Clear, Professional Sound
Once you’ve chosen your mic and placement, focus on levels. Use your recording software to set input gain just enough to avoid clipping but still pick up your voice clearly. Think of this like adjusting the focus on a camera—too high, and your audio distorts; too low, and it’s faint. I recommend recording a test clip, listening carefully, and adjusting gain accordingly.
Additionally, consider acoustic treatment—foam panels, diffusers, or even a soft blanket can reduce room echo. This is crucial for shotgun mics, which are designed to pick up sound from a distance. In my own setup, a simple DIY panel transformed my recordings, making them sound more studio-like.
Leverage Resources and Expert Tips
To refine your choices, consult detailed guides like this comprehensive guide. It covers the latest models, setup tips, and common pitfalls. Watching tutorials and listening to sample recordings can also help you identify what works best for your voice.
Remember, the perfect microphone setup isn’t just about gear—it’s about how you position, set levels, and treat your environment. Small adjustments can lead to big improvements, so experiment relentlessly until your voice sounds natural and clear. That’s how you turn good recordings into outstanding ones.
Many creators jump into choosing microphones with preconceived notions that can actually hinder their progress. Let’s dig deeper into some of the most common misconceptions and overlooked nuances that trip up even seasoned podcasters and streamers. Recognizing these can save you time, money, and frustration in your voice recording journey.
Why Bigger Price Tags Don’t Guarantee Better Sound
It’s a widespread belief that the most expensive microphone automatically delivers superior quality. While high-end gear like premium XLR microphones can offer exceptional warmth and clarity, the truth is that many mid-range mics—especially USB models—can outperform their pricier counterparts in real-world scenarios. The key is understanding your environment and recording needs rather than chasing the latest hype. According to this comprehensive guide, matching the microphone to your specific use case yields far better results than simply opting for the most expensive option.
Common Mistakes When Using Shotgun Mics
Shotgun microphones are designed for directional pickup, but many users mistake how to position them. A frequent error is mounting the mic too far from the mouth or pointing it at an angle. This drastically reduces clarity and can introduce unwanted room noise. The secret lies in precise placement—aiming directly at your mouth at about 6-12 inches—and using a shock mount and windscreen to minimize handling noise. If you’re not careful, even the best shotgun mic will underperform. You can find practical tips for proper placement in this article.
Why USB and XLR Microphones Are Not Mutually Exclusive
Some creators believe USB mics are only suitable for casual use, while XLR mics are reserved for professionals. The reality is that recent advancements have made high-quality USB microphones comparable to XLR setups, especially when paired with good preamps and acoustic treatment. The misconception originates from outdated perceptions of audio quality; today, many top podcast microphones are available in both formats. Choosing between them should depend on your workflow, portability needs, and upgrade plans—not outdated class distinctions.
How Overlooking Room Acoustics Can Ruin Your Setup
Even the most advanced microphone won’t save you if your recording environment is untreated. Many assume that a good mic can compensate for poor acoustics, but that’s a trap. Accurate voice recording hinges on mic placement combined with effective acoustic treatment like foam panels or diffusers. Without this, you’ll encounter echo, reverb, and background noise that compromise clarity. This subtle nuance is often overlooked by beginners but is emphasized by experts—see this resource for detailed advice.
What Advanced Creators Need to Know About Microphone Polar Patterns
While many focus on choosing the right mic type, few understand the importance of polar patterns. Cardioid, supercardioid, and hypercardioid patterns offer different levels of rejection for ambient noise and off-axis sound. Selecting the correct pattern based on your environment and recording style can dramatically improve your results. For instance, a supercardioid mic is better suited for noisy environments, while a cardioid is ideal for controlled studio settings. This is an advanced nuance that can elevate your voice recordings, as explained in this guide.
Are you falling into any of these traps? Recognizing the hidden nuances and debunking myths about your gear can make all the difference in producing professional-quality voice recordings. Dive into these insights, experiment with your setup, and don’t hesitate to ask questions or share your experience in the comments!
Keeping your voice recording setup in top shape is crucial for producing consistently high-quality content. Whether you’re using a USB mic, an XLR microphone, or a shotgun mic, regular maintenance and smart tool choices can dramatically extend the lifespan of your gear and ensure your recordings remain pristine over time.
How do I maintain my microphones and accessories over time?
First, always store your microphones in a dry, dust-free environment. Use protective caps and shock mounts to prevent physical damage, and avoid exposing your gear to extreme temperatures or humidity, which can degrade components. Regularly clean your microphones with a soft, dry cloth—avoid liquids that might damage sensitive parts. For XLR mics, check the connectors periodically for corrosion or dust, which can impair sound quality.
Additionally, invest in quality cables and replace them if you notice any crackling or loose connections. For shotgun microphones, ensure the windscreen is clean and intact, as dirt or tears can affect sound clarity. When not in use, disconnect your gear to prevent static buildup or accidental damage.
What tools do I recommend for ongoing maintenance?
Personally, I rely on a few key tools. A small, portable vacuum cleaner with a brush attachment helps remove dust from microphone grilles. Silica gel packs stored with your gear absorb moisture and prevent corrosion. For cleaning, I prefer using a microfiber cloth and a gentle electronics cleaner—some creators swear by specialized audio gear cleaners for delicate components. To test your gear’s health, I recommend periodically recording test signals and analyzing them with software like REAPER or Audacity to catch subtle audio quality drops early.
Future trends in microphone durability and software management
Looking ahead, I predict that microphone manufacturers will incorporate more durable, environmentally resistant materials, making gear less susceptible to wear and tear. Additionally, integrated diagnostics and firmware updates might become standard, allowing you to monitor your gear’s health remotely and perform software-based optimizations. This will make long-term maintenance easier and more effective.
To keep your setup running smoothly, consider setting routine check-ins—perhaps every three to six months—to clean, inspect, and update your gear. Using dedicated tools and following best practices can save you money and frustration while ensuring your voice recordings sound professional for years to come.
If you’re serious about longevity, try implementing a regular maintenance schedule today. It’s a small step that pays off in consistently clear and professional audio quality, making your content stand out and saving you time in the long run.
For detailed insights on gear health and professional maintenance routines, check out the comprehensive guide here.
Reflecting on my journey with voice recording gear, I’ve learned that the biggest breakthroughs often come from overlooked details. One of the most powerful lessons I discovered is that even the best microphone won’t deliver stellar sound if you ignore the subtle art of placement and environment. For example, I once thought I could compensate for a noisy room with a fancy shotgun mic, but a simple adjustment in positioning and room treatment made a world of difference. That lightbulb moment taught me to prioritize environment-aware setup over chasing the latest hype in gear.
Another key insight was realizing that polar patterns aren’t just technical jargon—they’re game changers. Switching to a supercardioid pattern in a noisy environment dramatically cut background noise, making my voice stand out. This nuance often gets overlooked, but mastering it elevated my recordings from amateur to professional. It’s a reminder that deep knowledge about your gear’s features can unlock new levels of clarity and quality.
Lastly, I learned that regular maintenance and understanding the lifespan of your equipment can save you money and frustration. Simple routines like cleaning connectors, using silica gel packs, and inspecting cables have kept my setup running smoothly for years. Investing time in gear health ensures your voice recordings stay crisp, clear, and reliable—long after the initial purchase.
My Essential Toolkit for Voice Recording Success
- REAPER: I trust REAPER for analyzing my recordings because it offers detailed insights into sound quality and levels, helping me fine-tune every session.
- Microphone Guides at CreatorRigReviews: The comprehensive guides here keep me updated on the latest models and setup tips, ensuring I make informed choices.
- Acoustic Treatment Materials: Foam panels and diffusers are my go-to for reducing echo and reverb, making my space more studio-like without breaking the bank.
- Microfiber Cloths and Special Cleaners: Essential for maintaining my gear’s longevity and ensuring pristine sound quality over time.
- Routine Maintenance Schedule: Setting reminders every few months helps me stay on top of cleaning, inspecting, and updating my equipment for peak performance.
Take Your Voice to New Heights Today
Remember, the journey to professional-quality voice recordings isn’t just about gear—it’s about understanding, patience, and continuous improvement. Your voice has unique qualities; with the right setup and knowledge, you can make it resonate with clarity and warmth that captivates your audience. Don’t wait for perfect conditions—start experimenting today, and watch your recordings transform.
What has been your biggest challenge in setting up your voice recording system? Share your experience below—I’d love to hear your story and help you overcome it!
2 responses to “Top Shotgun Microphones & Voice Recording Gear for Creators in 2025”
This post hits on some really important points about audio setup for creators, especially the emphasis on understanding your environment before investing heavily in gear. I’ve learned firsthand that even high-end microphones won’t perform well if your room isn’t treated properly—reverb and background noise can ruin otherwise excellent recordings. I started with a decent USB mic and naively thought that would be enough for my podcast, but I quickly realized that positioning and acoustic treatment made a huge difference. After adding some foam panels and adjusting my mic placement, my audio clarity improved dramatically. It’s been a game-changer for my engagement and professionalism. I’m curious—how do others balance budget constraints with the need for acoustic treatment in small or shared spaces? Sometimes, room treatment can be pricey, but I’d love to hear tips on effective DIY solutions or affordable updates that have worked for others.
This post really hits the mark, especially when it emphasizes that gear alone isn’t enough—how you set it up makes all the difference. I remember investing in a decent shotgun mic, only to find my recordings riddled with echo and background noise. It wasn’t until I finally started treating my space with some DIY soundproofing—using thick blankets and some bookshelf placement—that I saw a huge jump in clarity. It made me realize that even in small spaces, strategic placement and environment tweaks can yield professional results without breaking the bank. Has anyone experimented with creative, low-cost acoustic treatments? I’d love to hear what’s worked for others in tight or shared spaces, especially tips that can be done without major renovation.
About Me

Chesung Subba
Author/Writer
Hello, I'm Chesung Subba, a passionate writer who loves sharing ideas, stories, and experiences to inspire, inform, and connect with readers through meaningful content.
Follow Me
Connect with me and be part of my social media community.
Leave a Reply