Top Podcast & Voice Recording Microphones: XLR, USB & Shotgun Tips 2025
Ever spent hours recording, only to realize your voice sounds flat, distant, or just plain off? I’ve been there. I once thought that simply plugging in a decent mic was enough. Then I heard myself in the playback—crisp, clear, and professional. That lightbulb moment changed everything. Today, I want to share how you can avoid the common pitfalls and get studio-quality sound, even if you’re just starting out. Trust me, the right microphone setup makes all the difference. Ready to transform your voice recordings? Let’s dive into the essentials that will elevate your content in 2025.
Why Microphone Choice Can Make or Break Your Podcast or Voice Project
Choosing the right microphone isn’t just about brand names or fancy features. It’s about capturing your voice authentically and clearly, which is crucial for engaging your audience. Think about it—your microphone is your voice’s microphone. If it’s not suited to your environment or style, your message gets lost. I learned this early on when I kept recording with a generic USB mic, only to realize my audio lacked depth and warmth. After switching to a dedicated XLR setup, my sound quality skyrocketed. This isn’t just theory—studies show that good audio quality significantly increases listener retention and perception of professionalism (source). So, what’s the secret to finding the right mic? Well, it depends on your needs, environment, and budget. Don’t worry—I’ll guide you through the essentials so you can make informed choices without breaking the bank or losing your mind.
Is Better Microphone Hardware Actually Worth the Investment?
This is a question I hear a lot. Honestly, I made the mistake early on of thinking a fancy mic would instantly improve my recordings. But the truth is, many factors influence sound quality—room acoustics, positioning, and of course, the microphone itself. My mistake was ignoring the importance of proper placement and environment, which made even the most expensive gear sound muffled or echoey. Now, I recommend focusing on the right type of microphone for your situation—whether it’s a versatile USB mic for beginners or a professional XLR setup for serious creators. Want a quick overview of the best options for 2025? Check out this comprehensive guide.
Next, we’ll look at how to choose the perfect microphone for your voice and environment, so you can avoid costly mistakes and achieve that broadcast-quality sound you’ve been dreaming of. Ready to get started? Let’s go!
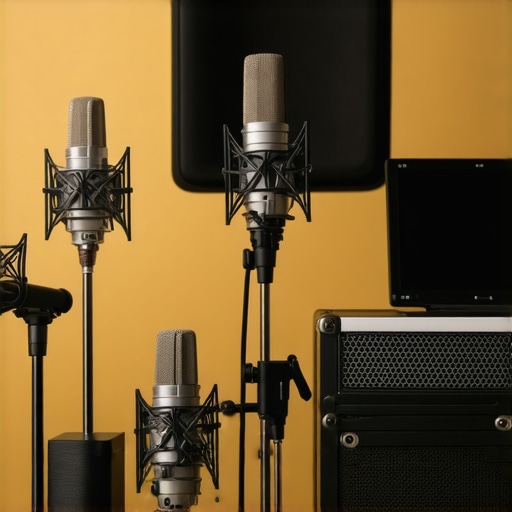
Pick the Right Microphone for Your Space
Start by evaluating your environment. Do you have a dedicated recording room or a shared space? For tight budgets and casual projects, a good USB microphone like the Blue Yeti or Audio-Technica ATR2100x can deliver impressive results with minimal setup. If you want professional-grade quality, consider investing in an XLR microphone such as the Rode Procaster or Shure SM7B, but remember, these require an audio interface and proper cabling.
Position Your Microphone Correctly
Proper placement is key to capturing clear, natural sound. Think of your microphone as a camera lens—angle and distance matter. For *dynamic mics* like the Shure SM7B, position it about 6-12 inches from your mouth, slightly off-axis to avoid plosive sounds. Use a pop filter—this is your first line of defense against harsh plosives and sibilance. For *shotgun mics*, aim directly at your mouth from a distance of 2-3 feet, ensuring the focus stays on your voice while minimizing background noise. I once recorded with a shotgun mic in a noisy room, and adjusting the angle by just a few degrees made a huge difference in clarity. Check out top shotgun mics for 2025 for more options.
Secure Your Microphone and Reduce Vibration
Use a sturdy boom arm or mic stand to keep your microphone stable. Vibrations and handling noise can ruin a good recording. I learned this the hard way when I kept knocking my mic stand during late-night recording sessions. Adding a shock mount—especially for XLR mics—absorbs unwanted vibrations and ensures your voice stays crystal clear. For USB mics, a simple desk clamp or foam pad underneath can cut down on desk noise. Think of it as giving your mic a comfy pillow—less noise, better sound.
Configure Your Audio Interface and Settings Properly
If you’re using an XLR mic, connect it to a quality audio interface like the Focusrite Scarlett series. Set the gain just enough to pick up your voice clearly without clipping—this takes some experimentation. For USB mics, select the device as your default recording source in your computer’s sound settings. Always check your levels with a quick test recording. Too high, and your audio will clip; too low, and it’ll sound weak. Use a digital audio workstation (DAW) or recording app to monitor your input levels visually—aim for peaks around -6dB. For more detailed setup tips, visit ultimate guide to XLR and USB mics.
Test and Fine-Tune Your Setup
Before recording your main content, do a quick test. Speak naturally at your typical volume and listen critically. Adjust mic position, gain, or acoustic treatment as needed. Over time, I found that adding a simple foam panel behind my mic drastically improved my recordings by reducing echo and background noise. For professional environments, consider acoustic treatments like bass traps and diffusers. Remember, good sound starts with consistent testing and adjustments—never settle for the first setup. For comprehensive tips, check podcast mic setup tips.
Many voice content creators and podcasters fall into traps that seem minor but can significantly degrade their audio quality. The most widespread misconception is thinking that investing in high-end gear alone guarantees professional sound. In reality, even the most expensive microphone will underperform if you overlook the nuances of setup and environment. For example, positioning your mic too close or too far from your mouth can cause uneven frequency response or unwanted plosives, leading to a harsh or muffled sound. Proper placement is crucial—about 6-12 inches for dynamic mics and a few feet for shotgun mics, depending on your environment. Don’t assume that a good microphone can fix poor positioning or acoustics. This false belief is a common trap that many beginners fall into, thinking gear alone can compensate for poor technique or setup.
Myth: The Costliest Microphones Are Always the Best
While premium mics like the Shure SM7B or the Rode Procaster are staples for professionals, they won’t automatically elevate your recordings if other factors are neglected. Many creators spend thousands on gear without addressing room acoustics or proper gain staging—mistakes that cause echoes, background noise, or clipping. Instead, focus on a balanced approach: pair good equipment with intentional acoustic treatment and correct gain control. For instance, a quality XLR microphone setup can outperform a pricier model in a untreated room. Remember, the synergy between gear, environment, and technique matters more than price alone.
What about the Advanced Techniques That Most Overlook?
Many advanced users overlook the importance of proper gain staging and frequency response tailoring via equalizers. Incorrect gain settings can cause your audio to clip or sound weak, regardless of mic quality. Additionally, subtle equalization adjustments—like reducing muddiness around 200Hz or boosting presence at 3kHz—can dramatically improve clarity and warmth. According to sound engineer expert advice, mastering these nuances elevates your audio from good to broadcast-quality. Have you ever fallen into this trap? Let me know in the comments.
Maintaining your recording setup over time is crucial to ensuring your voice projects remain professional and consistent. Just like any piece of equipment, your microphone gear and software need regular care, updates, and tweaks to keep performing at their best. I’ve learned this through years of experience, and I’ll share the exact methods I use to keep my tools in top shape. Whether you’re a hobbyist or a seasoned creator, these tips will help you enjoy long-term success with minimal headaches.
How do I keep my microphone and gear running smoothly?
The first step is establishing a routine check-up schedule. Every few months, I go through a checklist: inspecting cables for wear, cleaning connectors, and testing my microphones with a quick recording. For instance, I make sure my XLR cables are free of kinks or corrosion, which can cause audio issues down the line. When it comes to microphones, I use a soft brush or compressed air to remove dust from the grille and capsule area—this simple step prevents buildup that can muffle sound quality.
Software updates are just as important. Firmware updates for audio interfaces and drivers can fix bugs, improve compatibility, and bring new features. I set a reminder to check for updates quarterly, ensuring my system benefits from the latest improvements. Additionally, I keep my digital audio workstation (DAW) and plugins updated so that I can utilize new tools and optimizations that enhance my recordings.
Investing in reliable tools for longevity
For long-term durability, I recommend investing in quality accessories. A sturdy shock mount and a professional-grade boom arm, for example, not only improve sound quality by reducing vibrations but also extend the life of your mic’s internal components. I personally use a shock mount from Rode, which has held up well over years of daily use. Similarly, high-quality cables—like those from Mogami—resist wear and signal degradation, saving you money in the long run.
Another piece of advice is to create a controlled environment. Acoustic treatments like foam panels and bass traps help your gear deliver consistent results, especially if your recording space is prone to echoes or background noise. I’ve found that maintaining a dedicated, treated space reduces the need for frequent repairs or replacements of equipment due to environmental damage.
Future-proof your setup with scalable solutions
As your needs grow, so should your tools. For example, if you start working on multi-person podcasts or high-quality voiceovers, consider upgrading your interface or adding more microphones. Modular setups allow for easier expansion—look for interfaces with multiple inputs and high-quality preamps, such as the Focusrite Scarlett series. These are designed with future growth in mind and support seamless scaling.
Regularly reviewing your gear and setup can also reveal opportunities for improvement. I recommend keeping a log of recording issues or gear problems to identify patterns. This proactive approach prevents small issues from becoming costly repairs or replacements later. For an in-depth look at maintaining your equipment, check out this comprehensive guide.
Stay ahead with ongoing education and upgrades
Finally, staying informed about new technology trends helps you anticipate future needs. Industry advancements like improved digital interfaces, new microphone models, and innovative acoustic treatments are constantly emerging. I keep up by subscribing to trusted review sites and participating in online communities. This ongoing education ensures I’m always aware of the best tools for my setup, saving time and money in the long run.
Remember, maintaining your tools isn’t just about fixing problems—it’s about optimizing your entire workflow. Try implementing a quarterly check-in routine and upgrading your accessories as needed. This proactive approach will ensure your setup remains reliable, and your recordings stay crisp and professional for years to come.

When I first started recording my voice, I thought a decent microphone was all I needed. But I quickly learned that even top-tier gear can fall flat without proper setup and environment. Over the years, I discovered that the real secret to professional sound isn’t just the microphone—it’s how you use it. If you want your recordings to stand out in 2025, embrace these lessons I wish I knew from the start.
Why I Almost Missed the Mark on Microphone Setup
One of my biggest missteps was believing that upgrading to an expensive mic would instantly improve my audio. I spent thousands on gear, only to realize that poor placement and untreated acoustics sabotaged my efforts. The revelation came when I finally took the time to learn about mic positioning and room treatment. It’s then I understood: gear is just part of the equation—technique and environment are equally crucial.
How I Discovered the Power of Proper Positioning
Initially, I placed my mic too close, causing harsh plosives, or too far, resulting in muffled sound. Experimenting with angles and distances—about 6-12 inches for dynamic mics—transformed my recordings. Using a pop filter and shock mount further cleaned up my voice. These small adjustments made a dramatic difference, proving that mastering mic placement is often more impactful than gear upgrades.
The Best Tools That Changed My Approach
- Focusrite Scarlett 2i2: Reliable, scalable, and perfect for expanding setups.
- Shure SM7B: A versatile mic that responds well to proper placement and acoustic treatment.
- Acoustic foam panels: Simple, cost-effective way to reduce echo and background noise.
- Pop filters and shock mounts: Essential for professional clarity and vibration dampening.
My Final Tip: Consistency and Continuous Learning
Maintaining your gear and environment is an ongoing process. Regularly test your setup, update your software, and keep refining your technique. Staying proactive keeps your voice crisp and professional over time. For more detailed guidance, I recommend checking out the ultimate guide to XLR microphones.
Keep Improving and Don’t Be Afraid to Experiment
The most valuable lesson I learned is that perfection comes from continuous tweaking. Even small changes—like adjusting gain or acoustic panels—can unlock new levels of clarity. Don’t settle for a static setup; keep exploring, testing, and learning. Your future self will thank you for the effort.
My Secret to Long-Term Voice Recording Success
Invest in quality accessories, routine maintenance, and ongoing education. These habits preserve your gear’s performance and sharpen your skills. Remember, great sound isn’t just about the equipment—it’s about your dedication to mastering your craft. Ready to elevate your voice recordings in 2025? Start today, and don’t look back.
What’s Your Biggest Challenge with Voice Recording?
Have you ever struggled with mic placement or environment issues? Share your experience below—I’d love to hear what’s been holding you back and help you overcome it.
One response to “Top Podcast & Voice Recording Microphones: XLR, USB & Shotgun Tips 2025”
Reading this post really hits home for me. When I first started podcasting, I thought simply buying a decent microphone would solve all my problems. But I quickly learned that proper positioning and room acoustics are just as crucial. I remember stubbornly recording in a small, untreated room, which caused a lot of echo and muffled sound. It wasn’t until I invested in some foam panels and learned about mic angles that everything changed. Now, I aim for about 8 inches from a dynamic mic, slightly angled off-axis, with a pop filter in place—huge difference!
I’m curious, has anyone tried using environmental acoustic treatments like bass traps or diffusers along with their microphone setup? Did it noticeably improve your sound quality? I’ve found that creating a dedicated, well-treated space makes a tremendous difference and helps avoid re-recording sessions. Would love to hear some tips or experiences from others who’ve optimized their recording environment!
About Me

Chesung Subba
Author/Writer
Hello, I'm Chesung Subba, a passionate writer who loves sharing ideas, stories, and experiences to inspire, inform, and connect with readers through meaningful content.
Follow Me
Connect with me and be part of my social media community.
Leave a Reply