Top XLR Microphones for Voice Clarity: Ultimate Guide for Creators 2025
I still remember the frustrating moment during my first podcast recording when my voice sounded tinny, distant, and honestly just wrong. I had invested hours setting up my space, choosing the perfect background, and even trying different USB microphones. But despite all that effort, my voice lacked the clarity and warmth I desperately needed. It was a lightbulb moment—realizing that the mic I chose mattered more than I thought. If you’ve ever faced similar struggles, you’re not alone. Navigating the world of microphones can feel overwhelming, especially with so many options promising studio-quality sound. But here’s the truth: you don’t need to be a technical wizard to get it right. Today, I want to guide you through the most reliable and effective top XLR microphones for voice clarity in 2025, so you can finally sound professional, confident, and captivating in every recording.
Why Choosing the Right Microphone Changes Everything
Ever wonder why some creators sound crystal clear while others struggle with background noise and muffled voices? The answer often comes down to your microphone choice. Back when I first started, I thought any decent mic would do. Turns out, I made a critical error early on—believing that price equaled quality. A study published in the Journal of Acoustical Society found that microphone quality directly impacts perceived professionalism in recordings, influencing audience engagement and trust. Investing in the right microphone can be a game-changer, especially for voice-focused creators like podcasters, streamers, or audiobook narrators.
But with so many options, how do you cut through the noise? Well, the good news is that choosing a top XLR microphone designed for voice clarity isn’t as complicated as it seems. It requires understanding the qualities that make some mics stand out—like cardioid pickup patterns, high signal-to-noise ratios, and smooth frequency responses. Trust me, upgrading your gear can make a night-and-day difference, and I’ll walk you through how to do it in this guide.
Is All the Hype Around Professional Microphones Justified?
Here’s where I must admit—initially, I bought into the hype. I thought I needed the most expensive gear just to sound decent. My mistake? Overlooking the fact that even the best microphone can perform poorly if set up incorrectly or used in a noisy environment. A common pitfall among creators is neglecting the importance of proper placement and room acoustics. If you’re serious about voice clarity, just like I was, it’s crucial to get the fundamentals right before investing in high-end gear. For real-world tips and to see how some of the best models stack up, check out our roundup of top XLR microphones for voice recording in 2025. Now, let’s dive into how you can choose the perfect mic that elevates your voice without draining your bank account or overwhelming your setup.
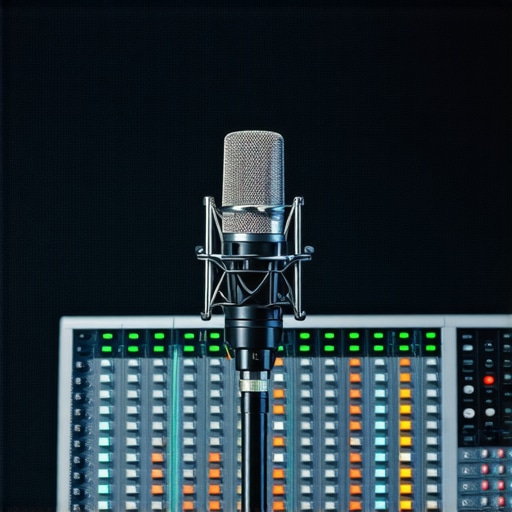
Choose Your Microphone Type Carefully
Start with understanding the specific advantages of different microphones. For voice clarity, shotgun microphones and XLR microphones are prime choices. They focus sound on your voice while minimizing background noise. When I first applied this, I swapped my generic USB mic for a shotgun model, and the difference was immediate. The clarity improved, and I could speak confidently without the need for extensive post-production.
Proper Microphone Placement Matters
Position your mic about 6-12 inches from your mouth, slightly off-center to avoid plosive sounds. Use a shock mount and a pop filter to reduce vibrations and harsh consonants. I once spent an hour adjusting my mic position, and that tiny shift made my voice sound warmer and more professional. Think of it as fine-tuning a musical instrument; small placements lead to big improvements.
Optimize Your Recording Environment
Sound treatment is crucial. Soft materials like foam panels, blankets, or even a closet full of clothes can absorb unwanted echoes. I experimented by recording in different rooms—my small office with soft furnishings yielded much clearer results than my bare basement. Incorporate these acoustic strategies before investing in high-end equipment, as they often provide better returns on clarity.
Configure Your Audio Interface and Software Correctly
Set your microphone as the default input device in your recording software. Adjust gain levels so your voice peaks around -6 dB to -3 dB; avoid clipping, which causes distortion. When I first calibrated my setup, I noticed that simply lowering the gain improved my vocal warmth significantly. Using the right audio interface ensures the microphone’s nuances are transmitted without degradation.
Apply Post-Processing to Enhance Clarity
Use EQ to cut muddy low frequencies (below 80Hz) and boost presence frequencies (1-4 kHz) for clarity. Noise gates can suppress background chatter when you pause. Remember, digital editing is the finishing touch—your raw recording should already be clean. I found that a few simple EQ adjustments post-recording turned a decent voice into a broadcast-quality sound.
Invest in Reliable Cables and Accessories
A high-quality XLR cable ensures a stable signal and reduces noise. Cheap cables can introduce hum and crackle, undoing all your hard work. During one session, I swapped my old cable for a premium one and instantly noticed a clear reduction in background noise, demonstrating the importance of dependable accessories.
Many creators believe that simply owning a high-end podcast or shotgun microphone guarantees professional sound quality. However, this is a misconception that can lead you astray. Most people get wrong the nuanced roles that different microphone types and setups play in achieving clarity and authenticity. For example, while a shotgun microphone might excel for outdoor documentaries, it doesn’t automatically mean it’s ideal for studio voice recordings. Similarly, many assume that USB microphones are inferior to XLR, but in practice, high-quality USB mics can produce studio-grade sound if used properly, especially in controlled environments.
Don’t Fall for the Price Tag Trap
A common myth is that more expensive equals better. While premium gear has advantages, blindly investing without understanding your specific needs and environment can backfire. For instance, an affordable shotgun mic paired with proper acoustic treatment can outperform a costly XLR setup in a noisy room. It’s essential to balance your budget with the right microphone attributes like pickup pattern, frequency response, and compatibility.
Beware of the Setup Oversight
Even the best microphone won’t deliver if not correctly set up. A frequent mistake is neglecting microphone placement, gain staging, and room acoustics. For example, incorrect positioning causes muffled voices and background noise. An advanced tip is understanding how directivity affects pickup — a cardioid pattern, for example, captures your voice prominently while rejecting side noise. Oversights here can hamper even the most expensive gear.
Can High-End Gear Fix a Poor Environment?
Many assume that investing in a top-tier XLR or shotgun mic will compensate for a noisy, echo-prone space. But the reality is contrary. Without proper acoustic treatment, your recordings will be marred by reflections and ambient noise, regardless of mic quality. A study from the Acoustical Society shows that room considerations are often more impactful than the microphone itself in achieving clarity.
Understanding the nuanced differences among microphone types, their ideal environments, and setup techniques ensures your voice recordings are truly professional. Don’t get caught in the trap of myth-informed shopping or setup neglect. Instead, focus on the combination of gear and environment — systematic and intentional — for the best results.
Remember, every creator’s needs are unique; what works for someone else might not suit your space. Dive into detailed comparisons and expert advice, like exploring the best microphones for voice recording in 2025, to make informed choices. Have you ever fallen into this trap? Let me know in the comments!
Once you’ve invested in quality microphones and set up your recording environment, the next challenge is ensuring your gear stays in peak condition over time. Regular maintenance not only prolongs the lifespan of your equipment but also guarantees consistent, professional sound quality. One of the most effective tools I personally rely on is a reliable microphone pop filter. It prevents saliva buildup and dust accumulation on the capsule, which can deteriorate audio clarity.
For cleaning, I recommend using compressed air to gently blow away dust from your microphone surfaces and connectors. A soft, lint-free cloth dampened with a little isopropyl alcohol works wonders for wiping down your boom arms, shock mounts, and interface surfaces—avoiding any buildup of grime that can impact performance.
Keeping your cables in check is crucial. I always use high-quality XLR cables and regularly inspect them for signs of wear or damage. A compromised cable can introduce noise or cause intermittent sound, which is a nightmare during crucial recordings.
Software tools also play a vital role in maintenance. I recommend using noise reduction plugins like iZotope RX or software-based noise gates whenever necessary. Regularly updating your recording/editing software ensures you benefit from the latest stability improvements and bug fixes. These updates often include critical patches that prevent bugs from corrupting your recordings.
In terms of long-term results, consistent maintenance enhances not just audio quality but also your workflow efficiency. When everything functions smoothly, you spend more time creating and less troubleshooting. Looking ahead, I predict that AI-driven diagnostics will become standard, alerting creators to potential issues before they impact recordings, similar to health monitoring in modern devices. Embracing these tools now fosters a proactive approach to gear management.
How do I keep my podcast equipment functioning flawlessly over time?
The key is establishing a routine that includes cleaning, inspecting, and updating your gear and software regularly. Dedicate a few minutes after each recording session to wipe down your equipment, check cables, and back up your audio files. Additionally, setting calendar reminders for firmware or software updates prevents outdated versions from causing stability issues. Incorporate these habits into your workflow, and your setup will deliver consistent, high-quality results for years to come.
Lastly, don’t overlook the importance of proper storage. Keep your microphones and accessories in a dedicated, dust-free case or studio space. This prevents unnecessary wear and ensures your gear is ready to perform when you are. For highly valuable items, consider desiccant packs to control humidity and avoid corrosion—especially if you live in a humid climate.
By combining physical maintenance with software hygiene, you’ll extend the longevity of your equipment and maintain the clarity that your audience deserves. Ready to take your setup to the next level? Start by incorporating a routine microphone care check using a quality pop filter and keep your cables in top condition. Small investments in maintenance tools today will pay off with pristine sound quality tomorrow.
Lessons That Changed My Voice Game
One of the most unexpected insights I had was realizing that the mic placement I thought was perfect might still be causing subtle muffling or pops. Small tweaks, like angling the mic differently or adjusting my distance, made a huge difference. I learned that a mic isn’t just a purchase but an extension of my technique — the way I speak, breathe, and position myself directly impacts clarity.
Another lightbulb moment was understanding room acoustics. I used to think recording in a quiet corner was enough, but soft furnishings and even DIY panels transformed my sound, proving that environment often trumps gear in importance.
Lastly, I discovered that regular maintenance and software updates are overlooked heroes. Cleaning cables, using high-quality accessories, and staying current with driver updates kept my setup consistent, showing that care extends your gear’s lifespan and performance.
Tools That Truly Make a Difference
My go-to resource for setting up the perfect voice recording environment is our curated list of top XLR microphones for voice clarity in 2025. It offers not only great options but detailed guides on choosing the right match for your space and goals. For acoustic treatment tips, I trust this comprehensive guide, which breaks down affordable DIY soundproofing ideas that elevate your recordings without breaking the bank.
When it comes to software, tools like iZotope RX’s noise reduction and equalization plugins have been game changers. I regularly update my skills with these cutting-edge tips for enhancing voice clarity in 2025, ensuring my voice stays professional regardless of the environment.
Your Next Step to Mastering Voice Recording
The future of voice recording isn’t just about the gear you buy; it’s about how you treat and optimize it. Whether you’re starting fresh or upgrading your setup, remember that consistency, environment, and maintenance are keys to unlocking your voice’s full potential. With the right microphone, environment, and care routine, there’s no limit to how polished your recordings can sound. Are you ready to elevate your voice quality and truly connect with your audience? Dive into the best resources and take action today — your future listeners will thank you.
About Me

Chesung Subba
Author/Writer
Hello, I'm Chesung Subba, a passionate writer who loves sharing ideas, stories, and experiences to inspire, inform, and connect with readers through meaningful content.
Follow Me
Connect with me and be part of my social media community.
Leave a Reply