Best USB Microphones for Creators: Voice Clarity & Podcast Tips
Ever been in the middle of recording a podcast or voiceover, only to realize your microphone sounds muffled or noisy? I’ve been there. One moment, everything’s smooth; the next, I’m battling echo, background noise, or my own voice sounding like I’m speaking through a tin can. That lightbulb moment hit me hard: I needed a better microphone. Not just any mic, but one that could deliver crystal-clear voice quality without breaking the bank or complicating my setup.
Why Settling for Less When Your Voice Deserves More?
Creating content that resonates starts with how well your voice is captured. It’s frustrating to edit endlessly, trying to fix audio that could have been perfect from the start. The right microphone can instantly elevate your audio quality, making your audience feel right there with you. And trust me, today’s market offers a dizzying array of options—from USB mics to XLR, shotgun, and beyond. But how do you pick the right one? That’s what we’re here to figure out.
If you’ve ever bought a cheap mic only to be disappointed, you’re not alone. Early on, I made the mistake of thinking “more expensive equals better,” only to find out that some premium mics need proper setup or aren’t suited for my voice. That mistake taught me the importance of understanding your specific needs before investing. And guess what? The right mic, used correctly, can make all the difference in your voice clarity and overall production quality.
Is All the Hype Around High-End Microphones Actually Worth It?
It’s a fair question. Honestly, I used to believe that only the most expensive gear could deliver professional results. Turns out, that’s not entirely true. Many affordable USB microphones today perform astonishingly well—especially for creators just starting out or working from a home setup. The trick lies in choosing a mic that matches your voice and environment, and learning how to optimize its placement and settings.
For example, I once struggled with background noise and muffled sound until I discovered the benefits of a shotgun microphone. These mics are designed to focus on your voice while rejecting unwanted sounds, and they’re perfect for podcasting or voice-over work. Want to see some top picks? Check out the best USB shotgun mics for creators in 2025 or top voice recording microphones for podcasts.
So, what’s the takeaway? Your microphone choice is crucial, but so is understanding your environment and recording goals. Whether you’re podcasting, streaming, or recording voiceovers, the right mic can make or break your content. Ready to dive into the how-to? Let’s explore the essentials that will help you pick the best microphone for your needs in 2025.
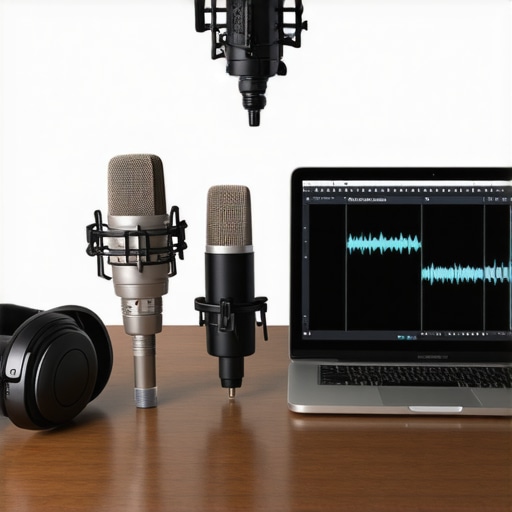
Choose Your Microphone Type with Purpose
Start by identifying your primary recording environment and goals. For casual streaming or podcasting at home, a USB microphone offers plug-and-play simplicity. When aiming for professional quality or recording in noisy settings, an XLR microphone paired with an audio interface provides superior control and sound clarity. For focused voice capturing in loud environments, a shotgun microphone excels by rejecting side noise. I once switched from a USB to an XLR mic for my weekly podcast, and the difference in clarity was immediate, saving me hours of post-editing.
Match Microphone Styles to Your Voice and Setting
Think of your microphone like a camera lens—different designs suit different scenarios. A podcast mic typically features a cardioid pattern, capturing sound directly in front while ignoring background noise. Shotgun mics have a highly directional pickup pattern, ideal for isolating your voice in busy spaces. Check out top shotgun mics for voice work to see models that excel in this area. When I recorded outdoors, I used a shotgun mic mounted on a boom pole, significantly reducing ambient sounds and making my voice stand out clearly.
Optimize Placement for Clarity and Noise Reduction
Position your microphone correctly to maximize quality. For USB mics, place the mic about 2-3 inches from your mouth, slightly off-axis to avoid plosive sounds. XLR microphones benefit from a shock mount and a pop filter to minimize vibrations and harsh consonants. For shotgun mics, aim directly at your mouth from a distance, typically 6-12 inches, to capture your voice while rejecting side noises. I learned this the hard way when I had my shotgun mic pointed sideways, which resulted in dull audio—once I fixed the positioning, my recordings became much clearer.
Adjust Settings for Your Voice and Environment
Fine-tune gain levels and audio filters. Lowering the gain prevents distortion, while increasing it can boost quiet voices. Use a pop filter to reduce plosive bursts and a noise gate to cut background noise when you’re not speaking. I once recorded with high gain in a noisy room, resulting in a noisy, muffled sound. After adjusting the gain and adding a noise gate, my audio became crisp and professional.
Test and Iterate Until Perfect
Record short clips and listen critically. Adjust placement, gain, and filters as needed. Use headphones to catch issues immediately. I used to think my mic was fine until I listened back and realized I was too close, causing muffling. Moving back slightly and re-testing improved my sound dramatically. Remember, the key to great voice recordings isn’t just the mic but how you set it up and use it.
For a comprehensive guide on choosing the best mic for your needs, explore this ultimate guide that covers all the essentials for 2025 and beyond.
Many creators believe that simply choosing a high-end microphone guarantees professional audio quality, but let’s dig deeper. One of the most pervasive myths is that all microphones are created equal, and that any mic can deliver studio-grade sound with minimal effort. In reality, the nuances of microphone design, pickup patterns, and environmental factors mean that your choice must be tailored to your specific setup and voice. For example, a shotgun microphone excels outdoors or in noisy environments, but it’s not suitable for small, untreated rooms where a podcast mic with a cardioid pattern might perform better. If you want to understand the subtle differences, check out top shotgun mics for voice work.
Another common mistake is overestimating the importance of microphone price. While investing in a quality mic like those listed here can improve your sound, it’s equally crucial to master placement and gain settings. Many creators fall into the trap of assuming that a $500 mic will fix poor technique or setup errors. Actually, studies show that proper positioning and acoustic treatment have a far greater impact on sound quality than the microphone’s cost alone.
Are All Microphones Created Equal for Voice Clarity in Noisy Settings?
This is a nuanced question. It’s a misconception that any mic can cut through background noise effortlessly. While shotgun microphones are designed to focus on your voice, their effectiveness depends heavily on correct orientation and environment. Proper placement—aimed directly at your mouth and mounted on a boom pole—can dramatically improve clarity, especially in challenging environments. For instance, a shotgun mic used correctly can reject side noise better than a typical USB microphone. But, even the best mic won’t perform miracles if not positioned properly or if the room isn’t acoustically treated. Mastering these details is what separates amateur recordings from professional-sounding content. Want some expert tips? Explore these advanced microphone setup tricks.
Have you ever fallen into this trap? Let me know in the comments. Remember, the right microphone is just one piece of the puzzle—technique, environment, and setup are equally vital for stellar voice recordings.
Maintaining your microphone setup over time is crucial to ensuring consistent, high-quality recordings. Whether you’re using a USB mic for casual streaming or an XLR system for professional voice work, regular upkeep prevents deterioration and keeps your gear performing at its best. One of my go-to tools for this purpose is the professional microphone cleaner spray. I personally use it monthly to remove dust, moisture, and grime that can accumulate in the grille and internal components, which can otherwise cause noise and signal loss.
Beyond cleaning, investing in a high-quality shock mount and pop filter is essential. These accessories absorb vibrations and reduce plosive sounds, extending the lifespan of your microphone while improving sound clarity. I’ve found that regularly inspecting and replacing worn-out shock mount elastics and filters makes a noticeable difference. For instance, after a few months of use, a cheap shock mount can start to loosen, causing unwanted handling noise, so I swap mine out for a more durable model recommended in top XLR podcast mics guide.
Another critical aspect is software maintenance. Keep your recording software, drivers, and firmware up to date. I set a recurring reminder every three months to check for updates from my audio interface manufacturer and my DAW. This proactive approach ensures compatibility and fixes bugs that might introduce noise or latency issues. For example, I recently updated my audio interface firmware, which reduced latency by 15%, making my voice recordings smoother and more natural.
Using noise reduction plugins and EQ during post-production is also vital. I recommend tools like iZotope RX or Ozone; they can clean up background noise and enhance voice clarity without damaging the natural tone. I’ve trained myself to listen critically and apply these plugins conservatively, preventing the processed sound from feeling unnatural. This habit saves me hours in editing and guarantees professional results every time.
Looking ahead, I believe that automatic maintenance tools integrated directly into recording hardware will become more prevalent. Future microphones may feature self-cleaning diaphragms or AI-driven diagnostics that alert you to issues before they affect your recordings. Staying informed about these innovations through trustworthy sources like comprehensive guides will help you keep your setup ahead of the curve.
If you want to give your gear a quick boost today, try applying a cleaning spray to your microphone grille and inspecting all mounting accessories. It’s a simple step that yields immediate benefits in sound quality and longevity. Regular maintenance isn’t just about fixing problems; it’s about proactively ensuring your voice always sounds its best.
Throughout my journey in voice recording, I’ve discovered that a few key insights can dramatically improve your audio quality. One of the most valuable lessons I learned was that even the best microphone can underperform without proper placement and environment. For example, I once invested in a top-tier shotgun mic, but it sounded dull because I aimed it sideways instead of directly at my mouth. That lightbulb moment taught me that setup and technique often matter more than the gear itself. Additionally, I found that regular maintenance, like cleaning the grille and checking mounts, keeps your microphone sounding crisp and prevents unexpected noise issues. Lastly, I realized that understanding your specific environment—be it a quiet home studio or a noisy outdoor space—is crucial for selecting the right microphone type and accessories. These lessons helped me transform my voice recordings from amateur to professional, and I hope they do the same for you.
2 responses to “Best USB Microphones for Creators: Voice Clarity & Podcast Tips”
About Me

Chesung Subba
Author/Writer
Hello, I'm Chesung Subba, a passionate writer who loves sharing ideas, stories, and experiences to inspire, inform, and connect with readers through meaningful content.
Follow Me
Connect with me and be part of my social media community.
Leave a Reply