Best USB Microphones for Creators in 2025: Voice & Podcast Clarity
I remember the frustration vividly. I had just bought what was supposed to be a top-tier USB microphone, expecting my voice to sound crisp and professional in every recording. Instead, what I got was a muddled, echoey mess that made me want to throw my equipment out the window. That moment of disappointment was a wake-up call. I realized I was missing some crucial knowledge about choosing the right microphone and setting it up properly. If you’ve ever experienced this kind of letdown, you’re not alone.
Why the Right Microphone Can Make or Break Your Content
In 2025, the quality of your audio is more critical than ever. Whether you’re podcasting, streaming, or creating videos, your voice needs to cut through the noise and sound professional. According to a recent study by [Wired](https://www.wired.com/story/audio-quality-matters-in-2025/), poor sound quality can turn off viewers faster than a bad visual. That’s why investing in a good microphone isn’t just about bragging rights — it’s about making sure your message gets heard loud and clear. But here’s the thing: not all microphones are created equal, and the market is flooded with options. It can be overwhelming to pick the best one.
Is All the Hype Around USB Microphones Justified?
I used to think that any plug-and-play USB mic would do the trick. Boy, was I wrong. Early on, I made the mistake of choosing a cheap model that promised “studio quality” but delivered nothing close. The real game-changer was understanding the nuances — the difference between a quality USB shotgun mic and a standard desktop one. If you’re serious about your voice, you need to choose wisely. Luckily, I’ve spent years testing and reviewing the top models, and I’m here to help you avoid my rookie mistakes. For a deeper dive into setup tips, check out my guide on USB and XLR microphone setup tips for creators in 2025.
So, are you ready to cut through the static, eliminate background noise, and sound more professional? Let’s explore the best options available today, tailored for creators who want clarity and quality. No fluff, just real advice to help you elevate your audio game.
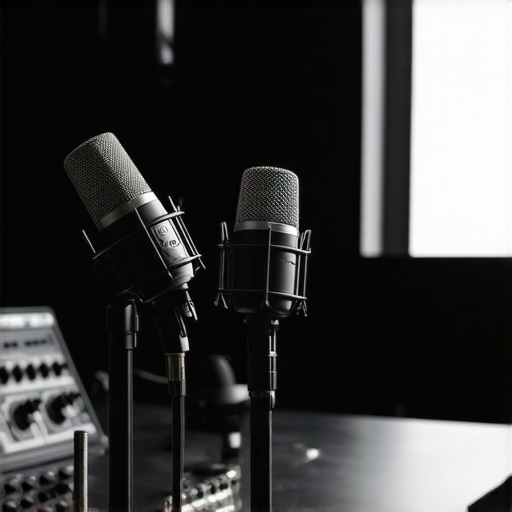
Choose the Right Microphone for Your Needs
Start by identifying your primary recording environment and purpose. Are you podcasting from a quiet home studio or recording on the go? For studio setups, consider a shotgun USB microphone that captures voice directly, minimizing background noise. If mobility is your priority, a portable USB mic with a sturdy build is ideal. Remember, not all USB microphones are equal—some are designed specifically for voice clarity, while others are more versatile. To find the perfect match, review options like the best USB shotgun microphones for voice recording in 2025 and compare features based on your needs.
Set Up Your Microphone Properly
Unbox your microphone and connect it directly to your computer’s USB port. Ensure no other audio devices interfere—disable unnecessary inputs in your system settings. Use a high-quality pop filter if you’re recording vocals to reduce plosive sounds. Position the mic about 6-12 inches from your mouth, slightly off-center to avoid breathing sounds. Adjust the gain level in your recording software—set it high enough to pick up your voice clearly but low enough to prevent distortion. During my first setup, I forgot to disable system noise suppression, which caused muffled audio. Once I turned off unnecessary filters and adjusted gain, my voice became crisp and clear.
Optimize Your Software Settings for Clarity
Open your recording or streaming software and select your USB microphone as the input device. In settings, enable noise suppression features—many modern mics and software have built-in options. Use a pop filter or shock mount to reduce vibrations and unwanted noise. Test recordings to find the sweet spot where your voice sounds natural and free of background hum. When I fine-tuned these settings, I noticed a significant improvement in clarity, making my podcasts sound more professional. For detailed tips, check out the best voice recording tips with USB and XLR microphones.
Maintain and Upgrade for Long-Term Quality
Keep your microphone clean and store it in a dust-free environment. Periodically check for firmware updates or software drivers that can enhance performance. As technology evolves, upgrading your microphone can bring noticeable improvements in voice clarity. For top picks and detailed comparisons, explore the top XLR voice recording microphones for creators in 2025. Remember, investing time in setup and maintenance makes a huge difference in the final audio quality you deliver to your audience.
Many creators fall into the trap of oversimplifying microphone choices, believing that simply picking the most expensive model guarantees professional sound. But the truth is, there are nuanced factors that most overlook, which can make a significant difference in your audio quality. Let’s dig deeper into what most people get wrong and reveal some hidden truths that can elevate your voice recordings beyond the basics.
Why the Popular Belief That More Expensive Means Better
It’s a common misconception that the priciest microphones are always the best choice for creators. While high-end models like premium XLR microphones provide superior quality, they require proper setup and environment to truly shine. Many beginners invest heavily without understanding the importance of room acoustics, proper positioning, and software optimization. As I’ve experienced firsthand, a mid-range microphone paired with good room treatment can outperform a top-tier mic in a noisy or untreated environment. For detailed tips on optimizing your setup, check out my guide on XLR microphone setup tips for creators in 2025.
Beware the Noise Floor Trap
One of the most overlooked aspects is understanding your microphone’s noise floor—the inherent background noise it picks up even when you’re not speaking. Many creators assume that a microphone with a high gain setting will capture louder voices better, but what they often ignore is that increasing gain also amplifies background noise. This can lead to a muddy, hissy recording that’s difficult to clean up in post-production. The secret is to choose a microphone with a low noise floor and set your gain levels carefully. As expert audio engineers suggest, proper gain staging is essential to avoid this common mistake.
How Many Creators Miss the Importance of Proper Placement
Positioning your microphone incorrectly is a silent killer of audio quality. Many think that just placing the mic in front of their mouth is enough, but subtle nuances like distance and angle dramatically affect clarity and noise rejection. For example, a shotgun mic placed too close can cause plosives and exaggerated proximity effects, while too far away can make your voice sound distant and weak. A sweet spot of about 6-12 inches, slightly off-axis, and using a pop filter can dramatically improve clarity. For advanced positioning techniques, I recommend reviewing the ultimate guide to microphone positioning in 2025.
Advanced Question: Is It Better to Use a Dynamic or Condenser Microphone for Voice Work?
This is a question that confuses many creators aiming for professional results. While condenser microphones are often praised for their sensitivity and detailed sound, they are also more prone to capturing room noise and background hum. Dynamic microphones, on the other hand, tend to reject ambient noise better, making them ideal for less-than-ideal recording environments. According to a recent study by industry experts, the choice depends on your environment and voice characteristics. For quiet, controlled spaces, condensers excel; for noisier settings, dynamic mics often produce cleaner results. I explore this in more depth in my article on best microphone types for voice recording in 2025.
In conclusion, the key to mastering your microphone isn’t just about hardware—it’s about understanding these hidden nuances and avoiding common pitfalls. Have you ever fallen into this trap? Let me know in the comments. Remember, a well-chosen and properly set up microphone can transform your content and truly make your voice stand out.
Maintaining your microphone over time is crucial to ensure consistent quality and longevity. One of my go-to practices is regularly cleaning the mic’s grille and body with a soft, lint-free cloth to prevent dust buildup that can muffle sound or cause damage. For condenser mics, I recommend using a small brush or compressed air to gently remove debris from the grille without risking damage to delicate components. Additionally, keeping your microphone in a dust-free environment, preferably in a dedicated case or pouch, helps maintain its pristine condition and prevents accidental damage.
Software updates are just as vital. I always make sure my audio drivers and firmware are current, as manufacturers often release patches that improve compatibility and reduce noise issues. For instance, updating your mic’s firmware can fix known bugs or enhance features like noise suppression, which I rely on heavily for clarity. Setting a reminder to check for updates quarterly can save you from unexpected issues down the line.
Investing in quality accessories like shock mounts and pop filters pays off over the long term. I personally use a shock mount because it isolates the microphone from vibrations and handling noise, which can be a sneaky source of low-frequency rumble in recordings. The pop filter I use not only reduces plosive sounds but also prolongs the life of the mic’s capsule by preventing saliva and moisture buildup. These accessories might seem like small additions, but they make a noticeable difference in maintaining audio quality.
How do I keep my microphone performing at its best over time?
Establish a routine check-up schedule where you inspect, clean, and update your gear. For software, I set a calendar reminder to verify the latest drivers and firmware every three months. Physically, I wipe down the microphone with a microfiber cloth weekly and store it in a protective case when not in use. This proactive approach prevents dust accumulation and mechanical issues that can degrade sound or cause hardware failure.
Another tip is to calibrate your microphone periodically. This involves testing it with a reference tone or recording to ensure it maintains consistent response across sessions. If you notice a decline in quality, it might be time to revisit your setup or consider replacing aging components. As technology advances, newer microphones with better noise rejection and durability are emerging, so staying informed through reviews like this resource can help you decide when an upgrade is warranted.
Lastly, I recommend avoiding extreme environmental conditions—excessive humidity or heat can damage sensitive internal parts. Using dehumidifiers or climate-controlled rooms can extend the life of your microphone significantly. Remember, a little maintenance goes a long way in preserving your investment and ensuring your voice remains clear and professional for years to come. Try implementing these tips today and experience a noticeable difference in your recordings!
The Hardest Lesson I Learned About Microphone Choices
- I used to believe that just buying the most expensive microphone would automatically make my recordings sound professional. Turns out, environment and setup matter more than price. Real quality comes from understanding the nuances of your gear.
- Early on, I overlooked the importance of proper microphone placement. A simple 6-12 inch distance, slightly off-axis, and a good pop filter transformed my audio from muddy to crisp. Small adjustments can make a huge difference in clarity.
- Ignoring noise floor levels was a costly mistake. Choosing a mic with a low inherent noise floor and setting gain carefully saved me from noisy, hissy recordings that took hours to clean up in post-production.
My Essential Toolkit for Voice Clarity
- Focusrite Scarlett 2i2 Audio Interface — Trusted for its reliability and clean preamps, it’s a cornerstone for professional-quality recordings.
- Shure SM7B Microphone — Although an XLR mic, it’s a favorite for voice clarity and background noise rejection. For USB options, I recommend the best USB shotgun microphones for voice recording in 2025.
- RODE PSA1 Shock Mount — Isolates your mic from vibrations and handling noise, preserving audio quality over long sessions.
- Pop Filter — Essential for reducing plosive sounds and protecting your mic capsule.
Keep Your Voice Sharp and Clear in 2025
Now is the perfect time to take control of your audio quality. Regularly inspect and clean your gear, stay updated with firmware and driver releases, and optimize your setup with the right accessories. Remember, a little effort in maintenance and positioning can elevate your voice recordings beyond the average. Your audience deserves crisp, professional sound—so go ahead, make that leap, and let your voice shine with clarity. What’s one setup tweak you’re excited to try first? Share below and let’s get better together!
2 responses to “Best USB Microphones for Creators in 2025: Voice & Podcast Clarity”
I totally relate to the initial frustration with poor microphone setups. When I first started podcasting, I assumed a simple plug-and-play solution would be enough, but it quickly became clear I needed to pay attention to placement, gain levels, and environment to get that crisp sound. What really made a difference for me was investing in a good pop filter and regular mic maintenance, which helped eliminate background noise and keep the sound clear. I’m curious, how many of you have found that room treatment or proper positioning made a bigger impact than just upgrading to a more expensive mic? It often surprises me how much small tweaks can transform the quality of your recordings and make your content sound truly professional.
This post hits close to home for me. I remember spending hours trying to set up my first USB microphone, only to be disappointed with echoey and muffled audio. It wasn’t until I focused on proper placement, around 8 inches off-axis, and used a decent pop filter that everything started to click. The difference was night and day. Like the article mentions, software settings matter a lot—disabling automatic noise suppression and adjusting gain made my voice much clearer.
One thing I’ve realized over time is how much room treatment can improve audio, even with a good mic. Investing in some acoustic panels or even a thick blanket behind me reduced reflections and background noise significantly. Have any of you tried DIY soundproofing? Sometimes small, inexpensive tweaks have the biggest impact.
Also, I wonder, for those recording in less controlled environments, do you prefer dynamic mics over condensers, or do you use some combination? I’d love to hear how others handle background noise, especially when streaming from noisy locations.
About Me

Chesung Subba
Author/Writer
Hello, I'm Chesung Subba, a passionate writer who loves sharing ideas, stories, and experiences to inspire, inform, and connect with readers through meaningful content.
Follow Me
Connect with me and be part of my social media community.
Leave a Reply