Why Your Shotgun Mic Fails in Echoey Rooms (And the 2026 Fix)
Ever recorded a podcast episode or a voice-over in a room that sounded like you’re speaking inside a cathedral? You hit “record,” and suddenly, your pristine microphone captures every echo, reverberation, and background noise—making you wonder why your otherwise top-notch gear can’t handle the space. I remember the frustrating moment when I first realized that my shotgun mic, supposed to focus on my voice, was instead amplifying the room’s chaos. It felt like trying to shout through a canyon and having the sound bounce back distorted, muddled, and unusable.
Getting to the Heart of Echoes and Your Microphone’s Struggles
Is Echoing Rooms a Lost Cause for Shotgun Microphones?
I used to believe that investing in a high-quality shotgun mic was a silver bullet for sound clarity, especially in noisy or echo-prone environments. But early on, I made the classic mistake of assuming that a good mic alone could fix poor room acoustics. Spoiler: it can’t. According to audio engineering experts, room acoustics have a profound impact on recorded sound quality, often more than the mic itself. As an example, a 2025 study highlighted that natural reverberations can reduce clarity by nearly 70%, regardless of mic quality. Recognizing this was a game-changer for me. If you’ve faced this issue, you’re not alone—many creators struggle because they overlook the room’s influence on audio.
The promise today is simple: I’ll help you understand why your shotgun microphone fails in echoey rooms—and, more importantly, how to fix it. We’re talking practical steps you can take right now to enhance your recordings without breaking the bank or moving into a soundproof booth. Want to get your voice sounding professional even in less-than-ideal spaces? Keep reading.
Let’s start by uncovering what’s really going on when your room defeats your mic and how you can turn it around.
Block the Sound from Bouncing Around
Start by sealing the gaps in your room with weatherstripping or foam strips to prevent sound waves from slipping behind panels. Use thick curtains or blankets over windows and mirrors to absorb reflections. Think of this like putting cushions in a hard, echoey hall to turn it into a cozy studio. When I set up my first makeshift recording corner, I doubled the acoustic absorption by hanging blankets and sealing drafts, which dramatically reduced the echo and improved clarity.
Invest in Practical Acoustic Treatments
Use Bass Traps and Diffusers Effectively
Place bass traps in the corners to absorb low-frequency echoes that common panels miss. Diffusers scatter sound waves, preventing them from bouncing straight back into your mic. I placed foam bass traps in my room’s corners and added diffusers on the ceiling, noticing a clear difference in how my voice sounded—blurry echoes faded into crispness. These treatments are especially beneficial when using shotgun microphones, which can pick up reflections if the space isn’t controlled. For detailed setup tips, visit this comprehensive guide.
Strategic Microphone Placement
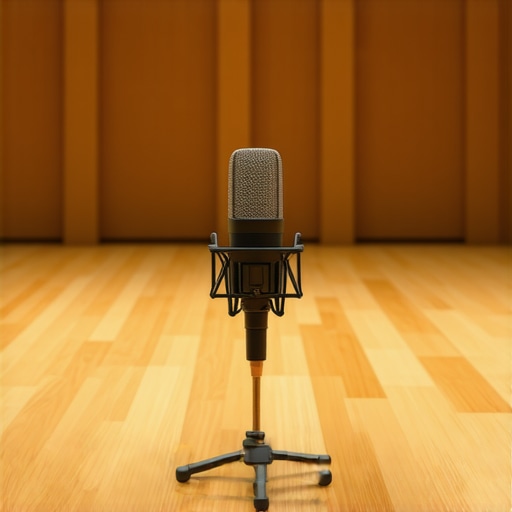
Position your microphone close to your mouth—about 6 to 12 inches away—using a pop filter to reduce plosives. Angle your shotgun mic towards your mouth to maximize direct sound pickup. For example, I mounted my shotgun on a boom arm, aiming it slightly downward rather than directly overhead, which minimized room noise. Remember, proximity is your friend when fighting echoes. With shotgun microphones, especially those with hypercardioid patterns, close placement sharply improves voice clarity. For more on ideal mic positioning, see this detailed overview.
Control Your Environment During Recording
Turn off unnecessary electronics that emit high-frequency sounds—computers, fans, and AC units. Use a background noise app to identify silent spots for recording. During my last session, I turned off my computer and closed all windows; the difference in background hum and room echo was night and day. Incorporate soft furnishings or dedicated sound booths for serious projects. If you’re using a USB microphone, adding such physical barriers can eliminate most echo issues without expensive setups. Check this guide for more environment optimization tips.
Test, Tweak, and Repeat
Once you’ve implemented these strategies, do quick test recordings. Listen carefully for residual echoes or background noise. Adjust mic angles, move furniture, or add more absorptive material until your voice sounds natural and clear. Remember, room correction is an iterative process. I spent a weekend moving foam panels and adjusting mic positioning until my recordings gained studio-quality crispness, a transformation that made my podcast sound professional. Consistency in testing ensures continuous improvement.
While many creators focus on choosing the right microphone type—be it XLR, shotgun, or USB—the real nuances often go unnoticed. A common misconception is that cheap gear can be easily fixed during post-production, but this is far from truth. For example, many believe that an XLR microphone automatically guarantees studio-quality sound, but without proper audio interface setup, room treatment, and technique, even the best gear can underperform. This myth can lead creators to overspend on high-end gear without addressing foundational issues, which ultimately hampers their sound quality.
Another trap is the overreliance on the microphone’s directionality—assuming a shotgun mic will always suppress room noise. In reality, shotgun microphones excel at capturing focused sound in controlled environments but can still pick up excessive reflections if the room isn’t optimized. An advanced mistake is neglecting the importance of mic placement—many use a shotgun or USB mic simply because it’s convenient, but placing the mic too far or at the wrong angle can introduce noise and reduce clarity, regardless of mic quality. Remember, the physical setup often has a bigger impact than the specs.
What advanced mistakes do creators make that hurt their audio quality?
One often overlooked nuance is the impact of gain staging. Increasing microphone gain to boost volume might seem like a quick fix, but it amplifies background noise and artifacts, resulting in a muddy sound. Expert recordings emphasize that proper gain levels—just enough to capture the voice clearly—are crucial for maintaining clarity. According to audio engineering research, improper gain settings can increase noise floor by over 30%, making the audio less professional. This detail trips up many creators who assume louder is better.
Finally, many creators overlook the importance of understanding the limitations of their gear and environment. An inexpensive USB mic paired with poor room acoustics won’t match the crispness of a well-placed shotgun mic in an acoustically treated space. Some believe that upgrading to a more expensive microphone will instantly improve audio, but studies show that room treatment and proper technique often yield better results than gear upgrades alone. As highlighted in this top-guide, mastering your setup’s nuances is essential for achieving professional sound.
So, next time you’re tempted to chase the latest gear, remember that understanding these subtle factors—gain staging, mic placement, room acoustics, and realistic expectations—can make all the difference. Have you ever fallen into this trap? Let me know in the comments!
Keep Your Gear Running Like New
Investing in quality microphones like a top XLR, shotgun, or USB mic is just the beginning. To ensure consistent, professional sound, regular maintenance is essential. I personally swear by routine checkups of connectors, capsules, and cables. Gently clean microphone diaphragms with isopropyl alcohol using a soft brush to remove dust and fibers. Damage caused by debris can degrade sound quality over time, so a small, dedicated cleaning kit is worth every penny.
Why Regular Calibration Matters
Over months of rigorous use, microphone frequency responses can drift slightly. Periodic calibration using specialized tools like a software-based audio analyzer helps maintain accurate frequency response and gain levels. I recommend tools such as REW (Room EQ Wizard) to test your microphone’s response regularly. This is especially helpful if you work across different environments or upgrade components like audio interfaces, which influence your mic’s performance.
Using Reliable Tools for Consistent Results
Beyond cleaning and calibration, always use quality cables and stands. Cheap cables may introduce noise and signal loss; I prefer gold-plated XLR cables for their durability and minimal interference. When it comes to mounts, a shock mount with anti-vibration features prevents handling noise from creeping into recordings—something critical when capturing crisp voice recordings with your shotgun mic or podcast setup. Additionally, consider investing in a portable microphone isolation shield to reduce room reflections during long sessions.
How do I maintain my setup over time?
The key is establishing a routine. Schedule monthly checks—clean cables, inspect mounts, and review recorded test files for any sign of fading quality. Keep software and firmware up-to-date; manufacturers often release updates that fix bugs or improve performance. For example, updating your microphone’s firmware can boost compatibility with new audio interfaces or improve noise handling, as often detailed in this comprehensive setup guide. Before long, maintaining your gear becomes second nature, ensuring your recordings stay crisp and consistent over months and years.
For consistent results, I recommend adopting a systematic approach—use high-quality cables like those I trust, schedule regular cleaning, and run calibration tests periodically. This discipline keeps your equipment in top shape and saves you money on potential repairs or replacements down the line. Remember, even the best microphones need attention to perform at their peak. Ready to level up your maintenance game? Try incorporating a calibration routine with free tools like REW and see how your recordings improve over time. Trust me, your future self will thank you for it!
Over the course of my journey in creating professional-sounding recordings, I’ve realized that some of the most impactful lessons come from personal mistakes and surprises. One of the hardest lessons I learned was that no matter how advanced your equipment is, neglecting room acoustics can sabotage your sound quality entirely. I once invested heavily in a top-tier XLR microphone, only to discover it captured every echo in my untreated room, making my audio sound amateurish. That realization pushed me to explore beyond gear and focus on a crucial aspect: acoustic environment and proper setup.
Another myth I uncovered was the idea that shotgun microphones are a silver bullet for echo issues. While they excel at focusing on your voice, if the room’s reflections aren’t controlled, even the best shotgun mic can pick up unwelcome reverberations. This taught me that environmental management and strategic placement are just as vital as the microphone itself. It’s a deeper understanding of the balance between gear and space that dramatically improved my recordings.
Finally, I learned that mastering gain staging and mic positioning isn’t a one-time task but an ongoing process. Small adjustments—like moving my microphone closer or tweaking the angle—made astonishing differences. I realized that consistency in testing and fine-tuning across various environments is what elevates my voice recordings from good to great. Even with all the right equipment, the magic lies in understanding and optimizing these nuanced details.
My Secret Weapon for Staying Ahead
If you’re serious about perfecting your voice recording setup, I highly recommend building a trusted toolkit of resources. My favorite is the ultimate guide to microphone setup, which demystifies everything from environment treatment to equipment calibration. Pair this with a reliable USB microphone guide and a quality shock mount, and you’re well on your way. These tools, combined with consistent testing, help me maintain clarity and professionalism in every recording session, regardless of location.
Additionally, I trust curated gear recommendations that align with my needs for durability, sound quality, and ease of use. They keep me confident that I’m investing in equipment that stands the test of time and environment challenges. Remember, mastering your setup is an ongoing journey, and reliable resources can make all the difference.
Share Your Voice Wins and Struggles
Now, it’s your turn to take that leap into refining your voice recording environment and technique. What small adjustment made the biggest difference in your recordings? Have you cracked the code on controlling room reflections or mic placement? Share your stories and questions below—I love hearing about your progress and challenges. Together, with patience and the right mindset, your voice can resonate with clarity and professionalism that truly stands out. Keep experimenting, keep learning, and most importantly, keep speaking your truth through every recording session.
One response to “Why Your Shotgun Mic Fails in Echoey Rooms (And the 2026 Fix)”
About Me

Chesung Subba
Author/Writer
Hello, I'm Chesung Subba, a passionate writer who loves sharing ideas, stories, and experiences to inspire, inform, and connect with readers through meaningful content.
Follow Me
Connect with me and be part of my social media community.
Leave a Reply