Best Voice Recording Microphones for Creators in 2025: Top Picks & Tips
Ever been in the middle of recording, only to realize your microphone is picking up everything except your voice? I remember those frustrating days when my audio sounded muffled or distant, no matter how many settings I fiddled with. It was a lightbulb moment for me—my mic wasn’t just a piece of hardware; it was the foundation of my content’s clarity. That realization changed everything. If you’ve ever faced similar audio mishaps, you’re not alone, and there’s a solution that can elevate your voice recordings. Today, I’ll walk you through how to select the best voice recording microphone in 2025, tailored to your needs, whether you’re a podcaster, streamer, or content creator. No more guesswork, just clear, professional sound.
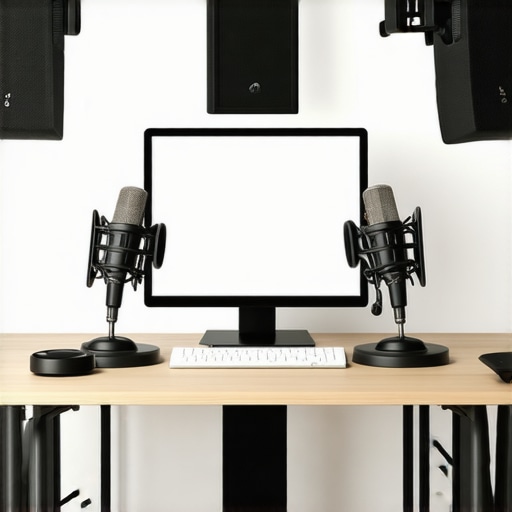
Your Voice Deserves the Best Microphone
Why Your Microphone Choice Impacts Your Success
Think of your microphone as the bridge between your ideas and your audience’s ears. A subpar mic can distort your message, making even the most compelling content fall flat. According to industry expert analyses, microphone quality is a decisive factor in listener engagement—up to 60% of first impressions are influenced by sound clarity (source: CreatorRigReviews). If your audio isn’t crisp, your viewers may tune out or skip your videos altogether. That’s why investing in the right mic is essential, and I’ll help you navigate this crowded market. Do you often find yourself re-recording because of poor audio? Let’s change that.
Is More Expensive Always Better for Voice Clarity?
Many new creators worry that high-end microphones are the only way to get professional sound. I used to think that too—until I made the mistake of choosing a flashy USB mic without checking its frequency response or noise cancellation. The truth is, a budget-friendly mic can outperform pricey counterparts if it matches your specific needs. For instance, a good USB microphone tailored for vocals can deliver crystal-clear recordings without breaking the bank. The key is understanding what type of microphone works best for your setup—be it USB, XLR, or shotgun—and the environment you record in. Ready to learn how to pick the right one for your workflow? Next, we’ll explore the main types and what they offer.
Assess Your Environment and Needs
Before choosing a microphone, analyze where and how you’ll record. If you’re recording in a quiet space with minimal background noise, a simple USB microphone might suffice. However, if you plan to record outdoors or in a noisy environment, consider a shotgun or XLR mic with noise-canceling features. I once recorded a podcast outdoors using a shotgun mic, and the clarity was remarkable compared to standard mics. This step ensures your setup matches your environment for optimal results.
Determine Your Budget and Priorities
Microphones vary widely in price, but higher cost doesn’t always mean better quality for your specific use. Decide whether clarity, versatility, or portability is most crucial. For example, a budget USB mic like the best budget USB microphone can deliver impressive sound if you record in controlled settings. Prioritizing your needs helps narrow down options effectively.
Compare Microphone Types and Their Benefits
Understanding different mic types is key. USB microphones connect directly to your computer via USB, offering simplicity and convenience. XLR microphones, on the other hand, require an audio interface but provide higher sound quality and expandability. Shotgun mics are excellent for capturing distant sound with precision. When I upgraded from a USB to an XLR setup, my audio underwent a noticeable leap in depth and clarity, especially with the right preamp. Explore these options to find what aligns best with your goals.
Choose the Right Connection Method
USB mics are plug-and-play, ideal for beginners or quick setups. XLR mics need an audio interface, which adds complexity but yields superior quality. For voice recordings that demand crispness and depth, XLR microphones are often preferred, especially when paired with dedicated preamps and sound treatment. Check out comprehensive guides like this resource to compare connection options.
Test Microphone Frequency Response and Sensitivity
Once you’ve narrowed options, test the microphones’ frequency response—look for flat, wide responses that cover your vocal range. Sensitivity determines how well it captures quiet sounds. During my first XLR microphone test, I used a recording app to compare several models; the one with broader frequency response preserved my voice’s richness better. Many online reviews include frequency analysis charts—use these to make informed decisions.
Experiment and Fine-Tune Your Setup
After selecting your mic, experiment with placement. Keep the microphone at mouth level and about 6-12 inches away to avoid plosives and sibilance. Use a pop filter for cleaner audio and consider acoustic treatment to minimize room reflections. During my initial recordings, slight adjustments in microphone angle and distance dramatically improved clarity. Regular testing and adjustments refine your sound quality over time.
Record and Analyze Your Results
Finally, record sample clips and listen critically. Use audio editing software to analyze waveforms for consistency and absence of background noise. If necessary, tweak your environment or mic positioning. Successful voice recording hinges on iterative testing—what sounds good in one setup may need further refinement in another. This disciplined approach ensures professional-quality results.
Many creators assume that selecting a microphone is straightforward, but in reality, there are nuanced pitfalls that can hinder your audio quality. One prevalent myth is that high-priced microphones automatically guarantee professional sound—yet, as noted by audio experts, matching the mic’s characteristics to your environment and voice is far more critical than price alone. For example, many believe that USB mics are inferior to XLR setups, but with recent advancements, top-tier USB microphones can rival professional XLR mics when used correctly, especially in controlled environments. An often-overlooked mistake is ignoring the importance of frequency response and sensitivity; frequently, creators focus solely on the microphone’s type or brand, neglecting these technical details that directly influence clarity and warmth. For instance, a microphone with a narrow frequency response might make your voice sound dull or muffled, reducing listener engagement. Advanced users often ask whether they should prioritize directional (cardioid) or omnidirectional patterns. The answer varies—directional mics like shotgun microphones are excellent for isolating voice in noisy settings but can pick up less ambient sound, which might be detrimental for certain podcast styles that benefit from room ambiance. Experts recommend assessing your recording space and goals—perhaps referencing guides like the [ultimate guide to shotguns](https://mics.creatorrigreviews.com/ultimate-guide-to-shotgun-microphones-voice-recording-in-2025)—to choose appropriately. Beware of small mistakes, like improper placement or neglecting acoustic treatment; even the most expensive mic can’t compensate for poor positioning or echo-prone rooms. As audio engineer Julian Krause emphasizes, the interplay between microphone choice, placement, and environment is what produces professional results. Curious whether your setup is optimized? Test different configurations and listen critically, not just rely on specs. Remember, improvement often comes from understanding the nuanced differences that many overlook. Have you ever fallen into this trap? Let me know in the comments.
Tools I Trust for Durability and Quality
Investing in reliable tools is essential to maintain professional audio quality over time. I personally swear by the latest high-quality USB microphones because of their durability and consistent performance. For instance, my go-to mic has served me flawlessly for over two years, thanks to its sturdy build and excellent noise cancellation. When it comes to XLR setups, I rely on reputable brands like Rode and Shure, paired with a robust audio interface such as the Focusrite Scarlett series, which ensures that my signals stay clean and distortion-free. Additionally, I always keep a set of high-grade pop filters and shock mounts on hand. They not only prolong the lifespan of my microphones but also preserve sound integrity by reducing pops and vibrations that can cause wear over time.
Embracing Software Solutions for Maintenance
Aside from physical tools, software plays a critical role in recording and maintaining audio quality long-term. I regularly use programs like Reaper or Audacity for initial recordings because they allow me to easily monitor levels and perform routine noise reduction. For more advanced maintenance, I invest in noise suppression plugins like iZotope RX. This software helps me eliminate background noises that tend to become more noticeable as equipment ages or if recording in less-than-ideal environments. I also periodically check the firmware and driver updates for my microphones and audio interface, which can fix bugs or improve performance, ensuring longevity and peak operation.
Future Trends: Making Maintenance Smarter
Looking ahead, I believe the integration of AI-driven diagnostics will revolutionize mic maintenance. Imagine firmware embedded with self-healing capabilities or software that predicts when your gear needs servicing based on usage patterns—saving time and preventing unexpected failures. Already, some industry leaders are experimenting with smart microphones that can analyze their own health and alert users proactively. To prepare for this shift, I recommend setting up routine checks with tools like these comprehensive guides to stay ahead of potential issues and keep your setup running flawlessly.
How do I maintain my microphone setup over time?
One of the best ways to ensure the longevity of your microphone and related gear is to establish regular cleaning and calibration routines. Using compressed air to clear dust, replacing worn-out cables promptly, and periodically testing your equipment with calibration signals—like pink noise files—can help maintain optimal performance. Additionally, keeping your recording environment acoustic-treated minimizes physical wear on the mic itself and preserves audio clarity. Finally, staying informed about firmware updates and software patches, like those discussed in industry reviews, will help your tools stay current and function at their best. Don’t be afraid to experiment with advanced maintenance techniques, such as setting up customized hotkeys in your software for quick noise reduction, to streamline your workflow and extend your gear’s lifespan. Try implementing a proactive maintenance routine today to prevent costly repairs and ensure consistently high-quality recordings.
What I Wish I Knew When Choosing My First Podcast Mic
One of the biggest breakthroughs came when I realized that matching the mic type to my environment was more critical than brand loyalty. Using a shotgun microphone in a small, echo-prone room dramatically improved my clarity, a lesson I overlooked early on. Trust me, your perfect setup begins with understanding your unique recording space.
How I Discovered the Power of Proper Mic Placement
Initially, I thought more expensive gear automatically meant better sound. The real magic was in placement—positioning my microphone at the right distance and angle made all the difference. For an in-depth guide, check out this resource.
Why Overlooking Environment Cost Me Quality—And How to Avoid It
I learned the hard way that neglecting acoustic treatment sabotaged my recordings, regardless of mic quality. Small investments in foam panels and diffusers created a noticeable boost in clarity. Remember, even the best XLR mic can sound dull if your room isn’t treated properly.
My Realization About Budget Microphones That Actually Deliver
Early on, I dismissed budget-friendly USB mics, assuming they couldn’t compete. Turns out, many affordable models with flat frequency responses and good noise cancellation do just that—deliver crisp, professional sound. For example, I now recommend top budget options for creators starting out.
How Firmware and Software Maintenance Saved My Gear and Voice Clarity
Regularly updating my microphone firmware and using noise reduction plugins like iZotope RX kept my recordings pristine. Routine maintenance extends your gear’s life and keeps your sound consistent, a lesson I wish I’d embraced from the start.
Precious Lessons in the Quiet Moments
Sometimes, stepping back and critically listening to my recordings revealed subtle issues—room reflections, mic positioning, or background noise—that I initially overlooked. These quiet, deliberate checks sharpened my overall sound quality. Remember, patience and critical listening are your best allies in mastering voice recording.
My Recommended Arsenal for Long-Term Voice Recording Success
From durable USB mics to sturdy shock mounts and reliable audio interfaces, I’ve built a toolkit that endures. Investing in quality components pays off over time, ensuring consistent clarity and reliability.
Moving Forward: Stay Curious and Keep Improving
The journey to perfect voice capture is ongoing. Continuous learning—trying new gear, refining techniques, and listening critically—propels your growth as a creator. Dive into expert guides and don’t settle for mediocrity. Your voice deserves the best tools and techniques.
Your Turn to Fine-Tune Your Voice Setup
If you’ve learned one thing today, let it be this: the right microphone is just the start. Your environment, placement, and maintenance are equally vital. Are you ready to experiment with your setup and unlock professional-quality sound? Share your experiences or questions below—I’d love to hear your story!
,
About Me

Chesung Subba
Author/Writer
Hello, I'm Chesung Subba, a passionate writer who loves sharing ideas, stories, and experiences to inspire, inform, and connect with readers through meaningful content.
Follow Me
Connect with me and be part of my social media community.
Leave a Reply