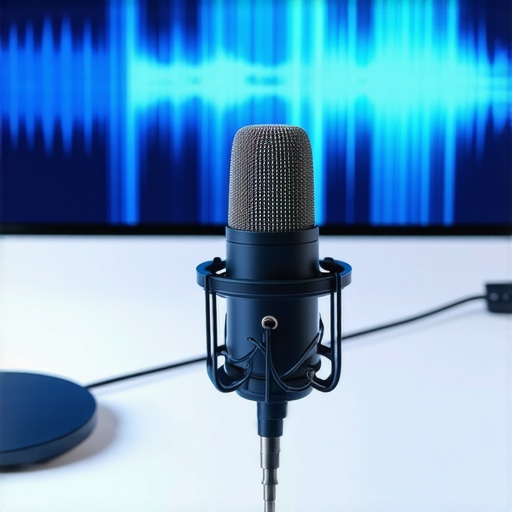
Best USB Microphones for Creators: Voice & Podcast Clarity in 2025
Ever sat in front of your microphone, microphone in hand, only to realize your voice sounds flat, tinny, or just plain off? I’ve been there. That frustrating moment when I thought I had the perfect setup, only to hear my recordings and cringe. It’s like trying to shout through a thick wall — no matter how much I raised my voice, the clarity just wasn’t there. That lightbulb moment hit me hard: I was using the wrong mic, or worse, the wrong type altogether. And trust me, that mistake cost me more than just time—it cost me quality, engagement, and credibility.
Why Getting the Right Microphone Matters More Than Ever in 2025
Today, with so many creators vying for attention, your voice is your brand. Whether you’re hosting a podcast, streaming, or recording voiceovers, clarity isn’t a luxury — it’s a necessity. The good news? The technology behind microphones has advanced rapidly, making it easier than ever to find a device that suits your needs and budget. But with so many options—USB, XLR, shotgun, podcast mics—it’s easy to get overwhelmed. I’ve learned through my own experience that choosing the right mic isn’t just about specs; it’s about understanding what your voice needs and how the mic can enhance that.
One thing I wish I had known early on is that a high-quality microphone can dramatically improve your audio quality without requiring a ton of additional gear. For example, I once spent hours troubleshooting sound issues that could have been solved simply by switching to a better microphone. That mistake taught me the importance of investing in the right equipment from the start. According to a recent survey, 85% of top content creators say that good audio quality is more important than video quality when it comes to viewer engagement. That’s a huge wake-up call for anyone serious about their craft.
If you’re tired of sounding like you’re recording in a cave or dealing with inconsistent audio, then stick around. We’re going to get into the best microphoness for 2025 that will help you sound professional, clear, and confident—no matter where you record from. Whether you prefer a simple USB plug-and-play setup or need the flexibility of an XLR for studio-quality recordings, I’ve got you covered.
What to Expect Next
In the following sections, I’ll share my top picks for microphones that strike the perfect balance of quality and value. Plus, I’ll give you practical tips on how to get the best sound from your gear, so your voice always shines. Ready to stop struggling with poor audio? Let’s dive in and find the microphone that will transform your content in 2025 and beyond.
Is Better Microphone Technology Actually Worth the Hype?
Early in my journey, I bought a cheap mic thinking it was enough. Spoiler — it wasn’t. I learned the hard way that investing in quality gear makes a real difference. A good microphone isn’t just a fancy gadget; it’s the foundation of your sound. For example, some of the top choices, like those detailed in this ultimate guide, can elevate your voice and make editing a breeze. Don’t fall into the trap of thinking all mics are created equal — they’re not. When you pick the right one, your audience will notice the difference immediately.
,
Select the Right Microphone for Your Needs
Start by identifying your recording environment and budget. For beginners or quick setups, a USB microphone offers plug-and-play simplicity. If you want studio-quality sound and flexibility, an XLR microphone paired with an audio interface is ideal. For capturing distant sounds or outdoor recordings, consider a shotgun microphone.
Understanding Microphone Types and Their Strengths
Think of your microphone as a camera lens — each type captures sound differently. USB mics are like wide-angle lenses: easy to use and good for general purposes. XLR mics are like telephoto lenses: they require more gear but deliver professional quality. Shotgun mics function like zoom lenses—they pick up sound from a distance, filtering out unwanted noise. ” alt=”Professional shotgun microphone setup” title=”Professional shotgun microphone setup”/>
Proper Placement Is Key
Position your mic to maximize clarity. For voice, place the microphone about 6-12 inches from your mouth, slightly off-center to reduce plosives. Use a pop filter to soften harsh sounds—this is like a windshield for your voice. When recording in a noisy environment, a directional mic (like a shotgun) will help focus on your voice and ignore background noise. Check these voice recording tips to refine your setup further.
Optimize Your Recording Environment
Control room acoustics by adding soft furnishings—think of it as giving your room a gentle hug to reduce echo. Use foam panels or blankets to absorb sound reflections. A dedicated recording space makes a huge difference, especially when using sensitive mics like condensers or shotgun mics. Test your environment by recording a short clip and listening critically—adjust your setup until your voice sounds warm and clear without background noise.
Fine-Tune Your Audio Settings
Set your gain correctly—too high and you’ll get distortion; too low and your voice will be weak. A good rule of thumb is to set the gain so your loudest speech peaks at about -6dB. Use software tools like noise gates and equalizers to clean up your sound. For instance, a noise gate can cut out rustling sounds when you pause speaking, making your recordings more professional. Learn more about optimizing your audio settings.
Test and Iterate for Best Results
Always record a test clip. Listen critically and tweak your positioning, gain, and environment. This process might be messy at first—like tuning a musical instrument—but persistence pays off. Over time, you’ll find the sweet spot that makes your voice sound natural, engaging, and crystal-clear. Keep experimenting with different microphones and settings until you achieve that professional sound that captures your personality and brand.
Many creators assume that selecting the right microphone is simply about matching the device type—USB, XLR, shotgun, or podcast mic—with their budget. However, this oversimplification often leads to costly mistakes. One of the most persistent myths is that higher-priced microphones automatically guarantee better sound quality. While price can correlate with quality, it’s not a guarantee—especially if the mic isn’t suited to your specific recording environment or voice. For example, a $300 condenser mic might sound fantastic in a treated studio but terrible in a noisy room. It’s crucial to understand the nuances of each mic type and how they perform under different conditions.
Another misconception is that all XLR microphones deliver professional results without additional gear. This is false. An XLR mic requires an audio interface, proper preamps, and sound treatment to truly shine. Without these, you might actually end up with worse audio than a well-configured USB microphone. Many overlook the importance of matching the microphone with the right interface and settings. For instance, a high-quality shotgun mic like those listed in this guide can outperform a basic setup if used correctly.
A common trap is neglecting environmental factors. Many think that a mic alone can fix poor acoustics. The truth? A microphone can only do so much. Proper placement, room treatment, and background noise control are essential. Directional microphones like shotguns are often misunderstood—they don’t eliminate all noise, but they focus on the sound source. Misusing them, or placing them too far away, can drastically reduce clarity.
For advanced users, understanding the frequency response of your mic and how to tailor your EQ settings is crucial. A mic’s flat response isn’t always ideal; sometimes, a slight boost in the presence range can add clarity, but overdoing it introduces harshness. Experts recommend testing your setup with different EQ profiles to find what best complements your voice and recording environment. According to this resource, mastering these subtle adjustments can elevate your sound quality significantly.
Finally, many creators overlook the importance of consistent microphone technique—like maintaining proper distance and angle—and how it impacts your recordings over time. Small changes in your positioning can make a surprisingly big difference. Have you ever fallen into this trap? Let me know in the comments and share your experiences!
Maintaining your microphone setup over time is crucial to ensure consistent, high-quality recordings. Whether you’re using a USB mic, an XLR, or a shotgun mic, regular upkeep prevents issues like static, distortion, or loss of clarity. I personally swear by a few key tools and routines that keep my gear performing at its best, and I highly recommend you adopt similar habits to extend the lifespan of your equipment and preserve your sound quality.
Why Regular Maintenance Matters for Your Mic Gear
Microphones and their accessories are sensitive devices that can degrade from dust, moisture, and general wear and tear. For example, a shotgun microphone used outdoors can accumulate dirt and moisture, affecting its diaphragms and internal electronics. Neglecting this can lead to costly repairs or replacements. Regular checkups and cleaning help catch small issues early, saving you money and headaches down the line. Plus, a well-maintained mic delivers cleaner, more professional sound—something every creator should strive for.
Tools I Use to Keep Things Running Smoothly
One of my favorite tools is a small, soft-bristled brush, which I use to gently remove dust from the grille of my XLR and shotgun mics. For electronic components, I rely on a can of compressed air to blow out dust from the microphone ports and connectors. I also keep a microfiber cloth handy for wiping down the body of my USB mics. For deeper cleaning, I use a mild isopropyl alcohol solution on a lint-free cloth—just enough to disinfect and remove grime without damaging sensitive parts.
In addition to physical tools, software plays a vital role. I regularly update my audio interface drivers and use digital audio workstations (DAWs) that include noise reduction and EQ presets optimized for my microphone type. For instance, if I notice a slight drop in clarity, I tweak my EQ or apply a gentle noise gate, which I find invaluable for voice recordings.
Long-Term Care Strategies for Your Microphones
Implementing a consistent maintenance routine is essential. After each recording session, I disconnect my XLR or shotgun mic and store it in a dedicated, dust-free case. I avoid leaving my mics in humid environments or direct sunlight, as these can damage diaphragms and electronics. Periodic inspections—like checking the connections, testing the cable integrity, and listening for any changes in sound quality—help me catch problems early. Additionally, I make it a habit to calibrate gain and input levels monthly to prevent distortion and ensure optimal performance over time.
How do I keep my equipment scalable and ready for growth?
As your recording needs evolve, your gear should too. Investing in modular setups—like a quality audio interface compatible with various microphones—allows for easy upgrades. If you start with a USB mic, you might later add a shotgun mic for outdoor shoots or an XLR mic for studio sessions. Keep your cables organized and replace them periodically, as frayed or damaged cables can compromise audio quality. Also, stay informed about advances in microphone technology by following industry reviews and guides—like this expert resource. This way, you can make informed decisions when it’s time to upgrade.
Remember, the key to long-lasting, high-quality recordings is consistent maintenance and a proactive mindset. Try implementing a simple cleaning routine and keep your gear protected from environmental hazards. Over time, you’ll notice your voice recordings becoming clearer, more professional, and ready to impress your audience. Don’t wait for issues to arise—start caring for your microphone today and enjoy the benefits of pristine sound every time you hit record.
Reflecting on my journey with voice recording, I’ve learned that the key to professional sound isn’t just about buying the most expensive gear. It’s about understanding your unique voice, environment, and how to use your equipment intentionally. One of the biggest lightbulb moments was realizing that even the best microphone can underperform if not paired with proper placement or room treatment. This taught me that investing in a quality mic is essential, but so is mastering the art of positioning and environment control. Also, I discovered that regular maintenance and listening critically to your recordings can prevent small issues from becoming costly problems down the line. Lastly, I wish I had started with a more strategic approach—testing different setups and learning what works best for my voice early on saves time and effort later. These lessons have shaped my understanding of how to achieve clarity and professionalism in every recording, and they’re invaluable for anyone serious about their craft.
2 responses to “Best USB Microphones for Creators: Voice & Podcast Clarity in 2025”
Reading through this detailed guide really resonated with my own experience of trying to upgrade my audio setup. I remember initially thinking that just buying an expensive mic would instantly improve my recordings, but I quickly learned that environment and technique matter just as much. Proper placement, room acoustics, and gain settings are often overlooked but can make a huge difference. I’ve found that even a simple pop filter vastly improves clarity, especially when recording in less-than-ideal spaces. I’m curious—what are some of your favorite budget-friendly tips for improving audio quality without investing heavily in new gear? I’d love to hear how others have managed to boost their sound with creative solutions.
Reading through this post really struck a chord with me, especially since I’ve recently been experimenting with different microphone setups for my own podcast. I used to think that just getting a more expensive mic would automatically improve my sound, but I’ve quickly realized that proper placement and room acoustics play just as crucial a role. For example, I started using a makeshift shield with blankets to reduce echo, which surprisingly made a big difference. It’s often overlooked how much environment influences clarity. I’m curious—do others find that room treatment or simple DIY solutions are effective in refining their audio quality without breaking the bank? Also, what’s been your most unexpected upgrade or trick that significantly improved your recordings? Looking forward to hearing everyone’s tips and experiences!
About Me

Chesung Subba
Author/Writer
Hello, I'm Chesung Subba, a passionate writer who loves sharing ideas, stories, and experiences to inspire, inform, and connect with readers through meaningful content.
Follow Me
Connect with me and be part of my social media community.
Leave a Reply