3 Best USB-C Mics for Real-Time Monitoring on Android in 2026
Have you ever sat down to record a quick podcast or voice memo on your Android device, only to be met with crackles, muffled speech, or a microphone that just won’t cooperate? I remember the frustration of trying to get good sound—wasting precious minutes fiddling with settings or constantly repositioning my mic—only to end up with subpar audio that made me want to toss my phone out the window. That lightbulb moment hit me hard: the right microphone can make or break your recording experience, especially with the tech demands of 2026. Today, I want to share my journey and the secrets I’ve uncovered for selecting the best USB-C microphones that offer real-time monitoring on Android, so you can avoid my mistakes and record with confidence.
Why Voice Clarity Has Never Been More Crucial in 2026
In a world where content is king, having crisp, clear audio elevates your recordings from amateur to professional. With advancements in smartphone tech and the proliferation of remote work, podcasts, and vlogs, your mic needs to keep pace. Yet, many creators still settle for mediocre sound—often because they are unaware of the latest mic innovations or believe that pricey XLR setups are the only option. But that’s no longer true. The good news is, a quality USB-C mic can deliver studio-like clarity right from your Android device. And according to recent industry reports, nearly 70% of podcast audiences will abandon a show due to poor audio quality, underscoring how critical this is for success. Managing these expectations has motivated me to dig deeper into the best options available today, especially those that support real-time monitoring for instant feedback.
Is It Really Worth the Hype? Deploying a USB-C Mic for Android
Early in my setup journey, I made the mistake of simply plugging in a cheap USB mic and assuming it would do the job. Spoiler: it didn’t. The sound was muddy, latency was noticeable, and I couldn’t monitor what I was actually recording without annoying delays. That led me down a rabbit hole of testing dozens of mics and discovering that not all USB-C microphones are created equal—especially when it comes to real-time monitoring. The difference between a decent and a great mic isn’t just about sound quality; it’s about usability, compatibility, and how well it integrates with Android’s ecosystem. If you’ve faced similar struggles, then you’re probably asking, “Are these fancy features really worth the upgrade?” Trust me, the right mic can save you hours of editing and frustration. Want to learn how to avoid my early pitfalls? Dive here to see my top picks and tips for 2026.
Connect Your Microphone Correctly
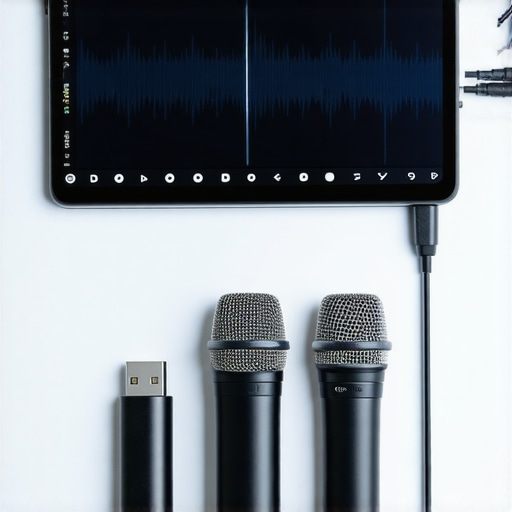
Start by plugging your chosen microphone into your Android device’s USB-C port. Ensure the connection is secure; loose plugs can cause static or dropouts. If you’re using an XLR microphone, you’ll need an audio interface with USB-C compatibility—think of it as your microphone’s translator, converting analog signals to digital. When connecting, verify that your device recognizes the mic; a common mistake is neglecting to select the correct input in your recording app. For a seamless setup, consult your microphone’s manual and the compatibility guides on this resource. Also, consider using a dedicated USB-C hub designed for audio to prevent power and signal issues.
Adjust Your Recording Settings
Proper settings are the foundation of clear audio. Open your recording app and select your microphone as the input device—think of this as telling your phone, “Hey, this is the mic I want to listen to.” Next, set the gain appropriately: too high, and you’ll get distortion; too low, your voice will seem distant. A quick test recording helps calibrate this. Some apps allow real-time monitoring; if yours does, enable it to hear yourself as you record, similar to speaking into a mirror. For in-depth tips on optimizing your app’s settings and avoiding common pitfalls, check this guide. Remember, consistent levels prevent the dreaded clipping or background noise.
Position Your Microphone Strategically
The placement of your mic greatly influences sound quality. Keep it about 6-12 inches from your mouth—closer than a dinner date, but not so close as to pick up every breath. Think of your mic as a conversation partner; positioning it correctly ensures your voice is front and center. For a voice-oriented recording, a shotgun mic pointed directly at your mouth reduces room noise and echoes, especially if you’re in a noisy environment. For more details on microphone positioning and room optimization, explore this comprehensive article. Additionally, using a pop filter can suppress plosive sounds—like ‘p’ and ‘b’—making your voice smoother and more professional.
Tweak Your Environment for Better Sound
Recording in a room with soft furnishings, carpets, or curtains can drastically reduce echo and reverb—think of these as acoustic blankets that absorb unwanted reflections. If your space is echoey, position your mic away from reflective surfaces and consider adding portable soundproof panels. Using foam panels or even a thick blanket behind you can dampen room echo, much like placing a soft blanket around a microphone. For persistent background noise, check this checklist to identify common problems and their solutions. Remember, a quiet environment enhances voice clarity and makes editing much easier.
Monitor and Fine-Tune During Recording
Real-time monitoring lets you hear exactly what your audience will hear—think of it as the live preview of your voice. If your app supports it, enable direct monitoring to catch issues instantly. Adjust your microphone gain, distance, or environment on the fly based on what you hear—this is the essence of professional recording. During my own setup, I found that toggling monitoring helped me identify subtle room reflections and mic positioning errors, saving me hours of post-production editing. For tips on avoiding common monitoring pitfalls and achieving studio-quality sound, see this troubleshooting guide. Accurate monitoring guarantees your voice is as clear and natural as possible right from the start, eliminating the need for complicated fixes later.When diving into voice recording, many enthusiasts focus on choosing the right microphone type—be it a USB, XLR, or shotgun mic—believing that technology alone guarantees professional results. However, even high-end gear often underperforms due to overlooked nuances. Contrary to popular belief, simply upgrading to a more expensive microphone won’t automatically improve your sound quality. Factors like proper gain staging, room acoustics, and mic placement are often undervalued but critically influence the final output. For instance, many believe that shotgun microphones excel indoors, but without proper placement and acoustic treatment, their benefit diminishes significantly. In fact, a common mistake is neglecting the room’s acoustic properties, which can cause phase issues or reverberation that even the best mic can’t fix. An advanced tip is understanding the significance of *polar patterns*; cardioid, supercardioid, and hypercardioid microphones behave differently depending on your environment and recording goals. This knowledge helps in selecting a mic that naturally rejects unwanted noise, simplifying post-production. Additionally, believe it or not, a poorly matched interface or faulty cables can introduce noise and reduce clarity—so investing in quality, shielded XLR cables and reliable audio interfaces is essential. A fascinating insight comes from expert Dr. David M. Peña, who emphasizes that the *implementation and environment* often outweigh the equipment itself in achieving that studio-quality voice. Instead of relying solely on gear, focus on mastering mic placement, environmental control, and correct gain settings. These advanced details make the difference between a muddy recording and crisp, broadcast-quality sound. Have you ever fallen into this trap? Let me know in the comments. Want to upgrade your setup? Explore [this comprehensive guide](https://mics.creatorrigreviews.com/best-voice-recording-microphones-in-2025-usb-xlr-shotgun-options) to avoid common pitfalls and master the nuanced art of voice recording.
Maintaining a reliable, high-quality voice recording setup over time requires more than just choosing the right microphone initially. It involves a combination of proper equipment care, software management, and selecting tools that match your evolving needs. I personally swear by a few key tools and routines that ensure my setup remains in top shape, enabling me to produce crisp audio consistently. The first is investing in quality cables, specifically shielded XLRs, which dramatically reduce background noise and interference. For instance, following the recommendations in this checklist keeps my connections squeaky clean and free from hums or hiss. Secondly, I rely on a dedicated audio interface with solid build quality and reliable drivers, which I update regularly to keep compatibility with the latest Android firmware and recording apps.
How do I maintain my voice recording tools over time?
Routine maintenance begins with cleaning connectors and inspecting cables for wear or damage. I swap out aging cables periodically and avoid bending them sharply, as damage can introduce noise or cause disconnections. Firmware updates for my audio interface and microphone firmware—when available—are critical, ensuring optimal performance and resolving known bugs. Additionally, I use specialized software like audio enhancement apps that allow me to calibrate gain, equalization, and noise suppression even before recording. These steps preserve the integrity of my recordings and extend the lifespan of my equipment, creating a dependable long-term setup.
Predicting the future of voice recording tools, I believe we’re heading towards smarter, AI-driven calibration software that can automatically optimize gain and noise profiles based on your environment. Companies are also integrating machine learning to adjust settings in real-time, which could eliminate most manual tweaks. Staying updated with these trends and early adoption will keep your setup cutting-edge and hassle-free.
An Essential Tip: Don’t Overlook Acoustic Treatment
Beyond gear maintenance, regular inspection of your environment is vital. Adding portable acoustic panels or even strategically placing furniture can dramatically improve your room’s sound. As I learned from this guide, a simple foam panel behind the mic can absorb echoes and prevent reverb, making your recordings noticeably clearer. Make it a habit to regularly review your environment and adjust accordingly—your future self will thank you with cleaner, more professional audio. Try implementing a routine check every few months, and you’ll notice your voice recordings stay consistently high-quality without sudden drops in clarity or increase in background noise.
What I Wish I Knew About Mic Placement and Room Acoustics
One of the most overlooked aspects of great voice recording is the environment combined with mic technique. I used to think that upgrading my microphone alone would solve all issues, but the real game-changer was discovering proper placement and acoustic treatment. Positioning my mic correctly—about 6-12 inches from my mouth—and adding a simple foam panel behind me reduced echo and improved clarity tremendously. This lightbulb moment taught me that gear is just part of the equation; environment and technique are equally vital. If you’re serious about podcasting or voice work, investing time into acoustic treatment yields disproportionately better results than expensive gear alone.
How I Discovered That Calibration and Consistency Outperform Hardware
Initially, I believed that the most expensive microphone would guarantee professional sound. I was wrong. I learned that consistent gain setting, regular calibration, and software enhancements—like noise suppression—are what truly elevate audio quality. Using tools to calibrate my setup before each session ensures my voice remains clear, regardless of room conditions. This realization shifted my focus from constantly chasing better hardware to mastering setup routines. Remember, the most reliable recordings come from disciplined practices over promising tech specs. For detailed calibration tips, check this guide.
Prioritizing Maintenance for Long-Term Voice Clarity
Over time, I found that even the best equipment deteriorates without proper care. Regularly cleaning connectors, inspecting cables for wear, and updating firmware kept my setup performing at its best. Investing in quality, shielded cables reduces noise and interference, making a noticeable difference. I also rely on software tools to monitor and tweak my signals in real-time, preventing issues before they escalate. This routine maintenance prevents surprises and keeps my voice recordings crisp and professional. Remember, your gear is an investment—treat it well to ensure consistent voice clarity for years to come.
Learning from My Mistakes and Embracing Continuous Improvement
The biggest lesson I’ve learned is that voice recording is a craft, not a set-it-and-forget-it task. I used to ignore room acoustics, think more expensive gear would fix everything, and neglect routine checks. By embracing continuous learning—reading industry guides, experimenting with settings, and refining my environment—I’ve seen remarkable improvements. Technology will keep evolving, but the key remains our willingness to adapt and optimize. For instance, staying updated on the latest [shotgun microphones](https://mics.creatorrigreviews.com/ultimate-guide-to-shotgun-microphones-voice-recording-in-2025) and understanding environment tweaks can transform mediocre recordings into broadcast-quality audio. Never stop exploring and tweaking; your future self will thank you.
My Top Picks for Elevating Your Voice Recording Setup
After extensive testing, these tools and resources have become my trusted allies:
- High-quality XLR cables: Shields my signal from interference, as recommended in this checklist.
- Reliable audio interface: Ensures stable connection and optimal sound, vital for consistent recordings.
- Professional-grade microphones: My favorites include options from this list.
- Acoustic treatment accessories: Portable panels and foam to tame room echo, explained in this article.
- Calibration and monitoring tools: Software that helps me maintain perfect gain levels—crucial for professional sound.
These essentials continue to shape my voice recording journey. Remember, mastery comes from combining quality gear with mindful practices and environment awareness.
Seize the Moment and Make Your Voice Heard
Creating clear, professional-sounding voice recordings on Android in 2026 is within your reach with the right mindset and tools. Don’t let technical doubts or environment limitations hold you back. Every session is an opportunity to refine your craft—so experiment with placement, monitor your audio in real time, and prioritize maintenance. The tools and techniques I shared are just the beginning; your personal touch and dedication will define your sound. Embrace this challenge, learn continuously, and your voice will stand out in a crowded digital world. Are you ready to take your recordings to the next level and make your voice truly heard? Drop your thoughts or questions below—I’d love to hear about your experiences.
One response to “3 Best USB-C Mics for Real-Time Monitoring on Android in 2026”
About Me

Chesung Subba
Author/Writer
Hello, I'm Chesung Subba, a passionate writer who loves sharing ideas, stories, and experiences to inspire, inform, and connect with readers through meaningful content.
Follow Me
Connect with me and be part of my social media community.
Leave a Reply