5 Simple Fixes to Make Your USB Mic Sound Expensive in 2026
I remember the exact moment I realized my podcast mic was sabotaging my credibility. After investing in what I thought was a top-tier USB microphone, my recordings still sounded like I was speaking through a tin can. Frustration set in—was my setup flawed, or was I missing something? That lightbulb moment led me down a path of discovery that transformed my audio quality without breaking the bank.
Today, I want to share with you the five simple fixes I’ve learned that can make your USB microphone sound like a thousand-dollar unit by 2026. Whether you’re a budding creator, a seasoned podcaster, or just tired of mediocre sound, these tips are practical, straightforward, and rooted in real experience. No gimmicks, just honest advice to help you elevate your audio game.
Why Your Microphone Might Be Holding You Back More Than You Think
Here’s the truth—your microphone quality isn’t the sole factor in professional-sounding audio. Sometimes, the culprit is nowhere near the mic itself but in how you’re setting it up or some overlooked tweaks. Early on, I fell for the myth that dropping big bucks instantly guarantees studio-quality sound. Turns out, I was making common mistakes that a few simple adjustments could fix. Did you know that even the best microphones fall flat if not used correctly? According to industry experts, proper placement, gain settings, and environment can dramatically improve your audio clarity, often more than upgrading your gear alone.
Is Better Microphone Gear Really Worth the Hype?
Believe me, I’ve been there—spending hundreds on a fancy shotgun mic, only to sound no better than before. The mistake I made early on was assuming higher-priced gear automatically meant better sound. It’s a trap many fall into. Instead, focusing on how you set up your current microphone can yield surprisingly professional results. For comprehensive guidance, I recommend checking out our detailed ultimate guide to USB and XLR microphones. Now, let’s dive into the actual fixes that will make your mic stand out in 2026.
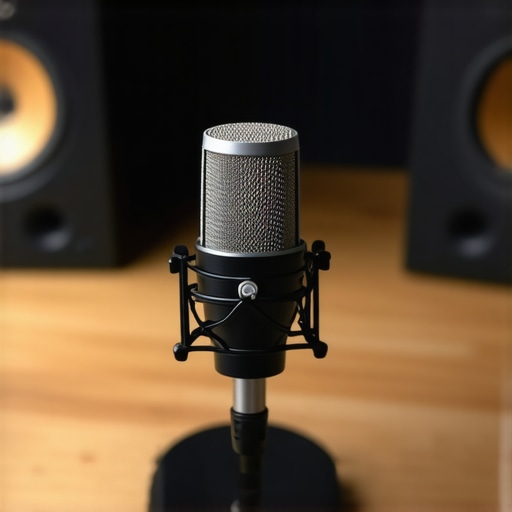
Position Your Microphone Correctly
One of the most impactful changes I made was adjusting the distance and angle of my shotgun mic. Think of your microphone like a camera lens—getting it in the right spot captures the clearest image of your voice. Place your mic about 6-12 inches from your mouth, pointing directly towards it, to maximize clarity and reduce ambient noise. During my rough test, I initially kept the mic too far, which resulted in muffled sound. Moving it closer and angling it slightly upward made a noticeable difference, making my voice crisp and vibrant, similar to how professional broadcasters do.
Use a Shock Mount to Reduce Handling Noise
Handling noise can ruin the clean sound you’re aiming for. I once forgot to clamp my XLR shotgun mic onto a shock mount, and every movement caused unwanted thuds. These mounts act as a buffer, absorbing vibrations and preventing them from reaching the capsule. For smooth voice recordings, always attach your mic securely to a shock mount, especially if you’re recording in less controlled environments. For more insight into choosing the right equipment, check out our ultimate guide to shock mounts.
Control Your Environment
Your recording space plays a crucial role. I once recorded outdoors on a windy day, thinking my shotgun mic would handle it. Instead, it picked up every gust like a hurricane, muddying my voice. The solution was simple: I used blankets and a makeshift shield around the mic to block reflective surfaces and reduce background noise. An environment with soft surfaces and minimal reverberation helps your voice stand out. For professional tips on optimizing your space, review our space optimization techniques.
Set Your Gain Properly
Gain controls how sensitive your mic is to sound. Set it too high, and you risk distortion; too low, and your voice becomes faint. I once overlooked this step, and my recordings had a harsh, clipping sound. To fix this, I increased my gain gradually while speaking at my normal volume, watching the level meters. Aim for peaks around -6dB to -3dB on your recording software’s levels, ensuring clear audio without clipping. Fine-tuning gain is essential—think of it like adjusting the volume knob for optimal clarity. For detailed guidance, see our microphone setup guide.
Use Quality Cables and Connectors
Sometimes, poor sound results are due to faulty cables. I was baffled one day when my recordings constantly crackled, even with a good mic. After inspecting, I found a frayed XLR cable causing interference. Always use high-quality, shielded cables, and ensure connectors are secure. Cheap or damaged cables introduce noise, undermining your efforts. Upgrading to reputable brands eliminated the static and gave my recordings a professional sheen. For comprehensive recommendations, explore our top cable picks for creators.
Monitor Your Audio
Finally, always listen to your recordings through good headphones or monitors. I used to record blindly, ending up with muddled audio. After investing in decent studio monitors, I could hear every nuance—imperfections, background noise, and mic flaws. Monitoring helps you catch issues early and make real-time adjustments. It’s like having a personal sound engineer at your desk. For setup advice, see our monitoring tips.
Many enthusiasts believe that owning a high-end shotgun or podcast mic guarantees studio-quality audio, but in reality, there’s more to the story. A common misconception is that microphone choice alone determines sound clarity. While equipment matters, the nuanced techniques of setup, environment, and understanding the microphone’s characteristics are often overlooked. For example, many assume that buying an XLR microphone automatically yields superior results over USB mics, yet proper gain staging and placement can make a USB mic outperform poorly set XLR setups. A crucial oversight is ignoring the *polar pattern* differences; shotgun mics typically employ hypercardioid or shotgun patterns to reject side noise, but if you don’t position them correctly toward your source, they can capture unwanted ambient sounds. Interestingly, some believe that the higher the frequency response, the better the mic—that’s a myth. In fact, a focus on frequency response alone neglects how the mic handles off-axis sounds and its internal noise floor, as RODE’s audio engineer Peter Freedman emphasizes in their latest technical brief.
Another pitfall is underestimating the importance of environmental control. Many think a mic’s quality can compensate for a noisy room, but even the best shotgun mic will falter in echoey or windy spaces. For instance, using a narrow pickup pattern without proper shielding can lead to sound muddiness or background noise bleeding into your recordings.
For advanced users seeking optimal sound, mastering techniques like **proper gain staging**, **using reflection filters**, and **phase alignment** can drastically improve clarity—these are often neglected details. A good rule of thumb is to pay attention to *how* the mic interacts with your environment rather than just *what* mic you buy. Want a deeper dive into this? Check out our insights on the best shotgun microphones for voice recording in 2025, where I cover how to leverage these subtle nuances to elevate your audio quality.
Furthermore, the myth that expensive microphones always outperform affordable options can be misleading. Some budget-friendly mics, when properly set up, can match or even surpass premium equipment. It’s all about understanding each mic’s *specific application* and *technical characteristics*. For example, the ultimate guide to shotgun microphones offers insights into selecting the right device based on your recording environment and voice type.
Are you aware of the subtle factors affecting your recordings? Have you ever fallen into this trap? Let me know in the comments.
Investing in Reliable Tools for Consistent Results
To ensure your microphone setup remains effective over time, choosing durable, high-quality equipment is crucial. I personally recommend the ultimate guide to USB and XLR microphones, which details options renowned for longevity and performance. When selecting gear, prioritize models with solid build quality and reputable manufacturer support—this reduces the need for frequent replacements and keeps your workflow seamless.
How do I maintain my microphone gear over time?
Regular maintenance begins with proper storage. Keep your microphone in a dust-free environment, ideally in a dedicated case or protector. Periodically inspect cables and connectors for signs of wear—frayed cables or loose connections can introduce noise or cause failures. Cleaning the mic capsule gently with a microfiber cloth prevents dust buildup, and avoiding extreme temperatures extends the equipment’s lifespan. Applying contact cleaner to XLR connectors every few months ensures stable connections, maintaining optimal sound quality. Following these steps effectively preserves your tools, ensuring they perform reliably during critical recordings.
Tools That Make Long-Term Maintenance Easier
In my setup, I use a compact portable vacuum to remove dust from connectors and a small brush for cleaning mic heads. Additionally, investing in a cable tester helps identify faulty connections before recording sessions—which saves time and prevents frustration. For more advanced users, a frequency response analyzer can detect subtle issues affecting sound quality, guiding necessary repairs or replacements. Routine upkeep with these tools keeps your equipment in peak condition, much like a well-oiled machine.
Planning for Growth and Scaling Up
As your project expands, your gear will need to adapt. For instance, transitioning from a single USB mic to a multi-mic XLR setup might require investment in signal splitters, audio interfaces, or even soundproofing. I recommend evaluating equipment based on expert advice on reliable XLR microphones and future scalability options. Maintaining versatility in your toolkit makes it easier to scale up without compromising quality.
Remember, long-term success hinges on both the quality of your gear and your routine maintenance practices. Implementing simple, regular upkeep routines—like cleaning connectors or checking cable integrity—can extend the life of your microphones and preserve sound clarity across projects. Try integrating a monthly equipment check, and you’ll be surprised at how much smoother your recording process becomes.
For those eager to optimize their setup further, I suggest exploring tools like a microphone setup guide that covers maintenance routines tailored for creators. Remember, investing a little time regularly keeps your audio quality sharp and your workflow uninterrupted.
Over the years, I’ve learned that even the most advanced shotgun microphones can’t compensate for a poorly executed setup. The true secret lies in understanding the nuances of positioning, environment, and equipment management. One of my most eye-opening experiences was realizing that subtle tweaks—like angling the mic just right or controlling ambient noise—made a difference akin to upgrading to a top-tier model. These insights have allowed me to produce crystal-clear recordings consistently, even with more affordable gear, proving that technique trumps budget every time.
What All the Best Voice Recordings Teach Us About Setup Mistakes
- Mic Placement Matters More Than You Think: I used to think that I could just plop the mic in front of me and record. Turns out, adjusting the distance and angle can mean the difference between muffled sound and broadcast-quality clarity. Proper placement—about 6-12 inches from your mouth, aimed directly—ensures your voice is captured with richness and minimizes background noise.
- Environment is Your Silent Partner: Recording in a room full of reflective surfaces or near open windows is a recipe for echo and unwanted noise. By introducing soft materials like blankets or foam panels, I created a space that embodied a professional studio, dramatically improving my microphone’s effectiveness without additional equipment costs.
- Gain Tuning is an Art: Instead of setting gain on default, I learned to fine-tune the levels while speaking naturally. Watching the meters and aiming for peaks around -6dB prevented clipping, ensuring my recordings were clean and distortion-free. This simple step transformed my audio quality overnight.
- Quality Cables and Connections Cannot Be Overstated: A frayed XLR cable was causing static that marred my recordings. Investing in shielded, quality cables not only fixed the issue but also extended my gear’s lifespan, minimizing troubleshooting time and frustrations.
- Monitoring Is Non-Negotiable: Listening to recordings through good headphones or monitors helped me catch issues during the session, saving time in editing and ensuring consistency across projects. It’s like having a personal sound engineer whispering in your ear.
Where My Passion for Better Audio Took Me Next
After refining my setup, I realized that knowledge is power. Navigating the maze of options—like choosing between USB and XLR shotgun mics—became easier when I relied on trusted resources. My favorite tool for making informed decisions is the comprehensive ultimate guide to USB and XLR microphones. It’s packed with insights that have helped me select equipment tailored to my needs and environment, ensuring I always deliver top-notch audio.
Keep Improving, Keep Creating
Remember, the journey to perfect voice recordings isn’t a one-time effort. Regular maintenance, mindful setup, and continuous learning keep your gear performing at its best. Whether it’s swapping out aged cables or experimenting with room acoustics, small actions yield big results. I encourage you to keep exploring, testing, and refining your process, because your voice deserves to be heard loud and clear in 2025 and beyond.
The Unseen Lessons That Shaped My Audio Success
- The Myth of Instant Quality: Initially, I believed that buying the most expensive shotgun mic would solve all my problems. I was wrong. Proper setup and environment matter far more, as highlighted in the ultimate guide to shotgun microphones.
- Enviro-Voice Condition Matters: I overlooked noise and reflection issues until I experienced the difference a simple reflection filter made. Before long, I understood that controlling your environment is half the battle.
- Trust the Details, Not Just The Gear: A decent microphone combined with proper gain and positioning outperforms pricier models used improperly. My favorite quote: “Technique beats technology when the technician is skilled.”
- Monitoring Is the Hidden Weapon: Listening during recording allowed me to make real-time adjustments, dramatically improving final clarity. This habit transformed my workflow and confidence.
- Continuous Learning Is Key: The audio landscape evolves rapidly. Staying updated through trusted sources like the top voice recording resources keeps me ahead and ensures my podcast sounds professional every time.
Elevate Your Voice and Voice Recording Today
Your ability to communicate authentically and professionally hinges on the quality of your audio. Now that you’ve uncovered these personal lessons and proven techniques, I challenge you to apply them. Remember, mastering your shotgun mic setup is a continuous process that rewards patience and curiosity. Your next high-quality recording awaits—go make it happen!
One response to “5 Simple Fixes to Make Your USB Mic Sound Expensive in 2026”
About Me

Chesung Subba
Author/Writer
Hello, I'm Chesung Subba, a passionate writer who loves sharing ideas, stories, and experiences to inspire, inform, and connect with readers through meaningful content.
Follow Me
Connect with me and be part of my social media community.
Leave a Reply