Top Shotgun Microphones & Voice Recording Tips for Creators 2025
I remember the exact moment I hit record for the first time on my podcast—my voice crackled, my background noise overwhelmed my microphone, and I felt a wave of frustration wash over me. It was painfully clear that no matter how much I tried, my setup just wasn’t capturing the crisp, clear audio I envisioned. That lightbulb moment pushed me into a deep dive into the world of Top Shotgun Microphones & Voice Recording Tips for Creators 2025, and I realized I wasn’t alone in this struggle.
If you’ve ever felt your voice gets lost in the noise or your recordings sound flat and muddy, you’re not alone. Many creators face the challenge of capturing studio-quality sound without breaking the bank or hauling around cumbersome equipment. The good news? With the right microphone and some expert tips, transforming your audio quality is entirely possible—and more straightforward than you might think.
Why Voice Clarity Matters More Than Ever for Creators
In 2025, voice quality can make or break your content’s success. Audiences crave authentic, engaging audio—be it for podcasts, YouTube videos, or live streams. According to a report by the Audio Engineering Society, listeners are 70% more likely to stay engaged with content that features clear, professional-sounding audio. That’s a staggering statistic emphasizing why investing in good voice recording gear isn’t just luxury—it’s a necessity.
But here’s where many go wrong. I used to believe that simply owning a decent microphone was enough. I thought positioning was trivial—until I realized I was often talking directly at my laptop’s built-in mic or using a cheap USB mic that picked up every background noise. Early on, I made the mistake of ignoring the importance of microphone directionality and environment, which significantly impacted my sound quality.
If you’ve faced similar hurdles, don’t worry. The path to clearer recordings is paved with the right choices in equipment and technique. For a detailed comparison of the top options, check out the comprehensive guide on the best shotgun microphones for creators in 2025, which can help you find the perfect match for your recording style. Plus, mastering some simple recording tips can drastically enhance your voice clarity and overall audio production.
Ready to transform your voice recordings? Let’s dive into the practical steps that can help you achieve professional-quality sound, starting with understanding your microphone options and how to optimize their use.
Choose the Correct Microphone Type for Your Needs
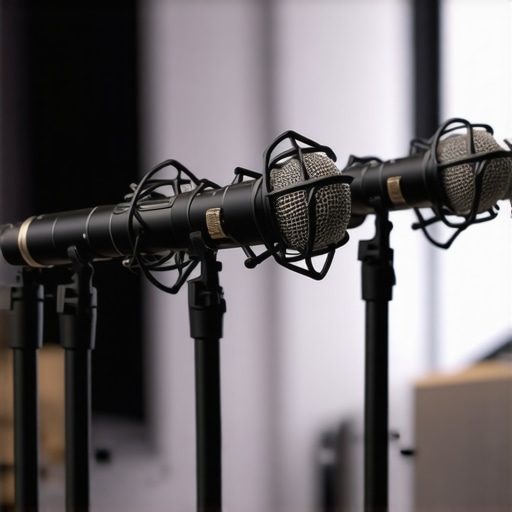
Start by deciding between a USB microphone, an XLR microphone, or a shotgun mic. USB mics are plug-and-play and ideal for beginners—like my first podcast, where I plugged in a simple USB mic and immediately noticed improvements. XLR microphones, however, require an audio interface but offer higher quality and flexibility for advanced setups. Shotgun microphones excel in capturing voice from a distance, making them perfect for recording in noisy environments or for dynamic content creation. To find options suited for your setup, check out the detailed comparisons on best USB, shotgun, and XLR mics.
Optimize Microphone Placement and Setup
Position your microphone close to your mouth, ideally within six inches, to maximize clarity and reduce background noise. Use a boom arm or desk stand to keep the mic steady and at the correct height. If you’re using a shotgun mic, angle it toward your mouth, ensuring that the mic’s off-axis rejection is harnessed effectively—this is like pointing a flashlight directly at your face in a dark room. During my own recordings, I used a boom arm to precisely position my shotgun mic, which minimized ambient sounds and boosted vocal focus. Remember, the right placement can make a noticeable difference—experiment to find what works best. For detailed guidance, explore shotgun mic placement tips.
Control Your Recording Environment
Nothing beats a quiet, acoustically-treated room. Use soft furnishings, rugs, or foam panels to dampen echo and reverberation, much like wrapping your space in a cozy blanket of sound absorption. I once recorded in a room with bare walls, which caused my voice to echo, muddying my audio. After adding even a few foam panels, my voice immediately sounded warmer and more professional. Incorporate a pop filter or foam windscreen—think of it as a shield for your mic—especially if recording with a USB or XLR mic directly in front of your mouth. These simple techniques drastically reduce plosive sounds and breath noise, boosting overall clarity. For additional setup tips, see voice recording environment tips.
Adjust Gain Settings for Clarity
Set your microphone gain properly to prevent distortion and background noise. Too high a gain, and your voice may clip or sound harsh; too low, and your voice will be faint. Think of gain like the volume of a camera’s microphone—finding the sweet spot is key to capturing clear sound. During my first attempts, I left the gain cranked, which resulted in distorted audio. After testing with a digital audio recorder, I lowered the gain until my voice sounded full but clean. If using an audio interface, adjust the gain knob while speaking into the mic, and monitor levels on your recording software. For tech-savvy creators, this article sheds light on fine-tuning gain settings for top clarity.
Leverage Voice Processing Tools
Once you have your raw recordings, use digital tools like noise reduction, EQ, and compression to enhance clarity further. Think of these as editing your raw footage into a polished piece, much like applying filters to a photo. Programs such as Audacity or Adobe Audition provide powerful yet user-friendly features. For example, a gentle high-pass filter can remove low-end rumble, and compression can smooth out volume inconsistencies, ensuring your voice remains clear across your content. I used a simple noise reduction plugin after recording in my noisy office, which made a remarkable difference in the final sound. For recommended settings and advanced techniques, visit professional voice processing tips.
Many creators assume that choosing the right microphone automatically guarantees professional sound, but there are nuanced pitfalls that often go unnoticed. One common myth is that all USB microphones are created equal—that a simple plug-and-play device will deliver studio-quality audio. In reality, not all USB mics are designed for high-fidelity voice recording, as some prioritize portability or cost over sound quality. For instance, many novice users overlook that certain budget USB microphones lack the necessary internal components to handle nuanced voice dynamics, leading to a thin or dull sound. To avoid this trap, it’s crucial to research microphones with reputable audio specs, like those highlighted in the top picks for 2025, and understand their intended use cases.
Another widespread misconception revolves around XLR microphones. Many believe they inherently produce better sound than USB options, but the truth is, XLR mics require proper interface setups, gain staging, and acoustic treatment to realize their potential. Without correct gain calibration, even a high-end XLR mic can sound distorted or muffled. A common mistake is setting the gain too high, which introduces background noise and clipping. Advanced creators should consider integrating real-time metering and calibration techniques, such as monitoring levels in DAWs, to prevent such issues. As noted in expert guides, mastering gain management elevates voice clarity significantly.
When it comes to shotgun microphones, a typical misconception is that they can be used effectively from a distance in any environment. However, shotgun mics are highly directional, and their performance heavily depends on positioning and environment acoustics. Misplacing the mic or recording in untreated spaces often results in capturing unwanted reverberations or ambient noise. The key is proper placement—aimed precisely at the speaker’s mouth—and employing acoustic treatments like foam panels, which are sometimes underestimated by creators eager to record spontaneously. Check out the detailed placement strategies in the best shotgun mic guides for 2025.
Profoundly, creators might overlook the importance of understanding signal chain nuances. A common error is neglecting the impact of cables, connectors, and interfaces that introduce noise or degrade audio quality. High-quality microphones paired with subpar cables or low-grade interfaces can negate the benefits of premium gear. Experts emphasize that investing in quality cables and ensuring proper cable management can noticeably improve voice recording clarity.
Furthermore, advanced users often underestimate the value of digital post-processing. Relying solely on raw recordings without applying noise reduction, equalization, and compression can leave your audio sounding flat or cluttered. While it’s tempting to seek a “set and forget” approach, mastering subtle editing techniques—like applying gentle high-pass filters and spectral noise reduction—can make your voice recordings sound polished and professional. The most effective creators view post-processing as an integral part of their production pipeline, not an afterthought.
Have you ever fallen into this trap? Let me know in the comments. Remember, understanding these nuanced aspects not only elevates your audio quality but also sets you apart as a creator who truly masters the craft.Maintaining your microphone setup and software environment is crucial for sustaining high-quality voice recordings over time. Personally, I rely on a combination of physical tools and digital practices to ensure my gear remains in peak condition. Regularly inspecting connectors, cleaning microphones with soft brushes, and updating firmware or drivers prevent hardware degradation. For example, I use compressed air to remove dust from XLR ports and replace foam windscreens periodically to keep noise levels minimal.
On the software side, I utilize noise reduction plugins like iZotope RX and monitor gain levels meticulously during each session. Version control for recording templates and consistent checks of your DAW settings can save a lot of troubleshooting down the line. I’ve found that scheduling monthly maintenance routines—like testing all your microphones with a test recording—helps catch issues early before they affect crucial recordings.
Looking ahead, I predict that in 2025, smart maintenance tools integrated with AI will assist creators in diagnosing hardware issues remotely, reducing downtime and prolonging gear lifespan. Embracing these innovations can be a game-changer for serious content creators.
How do I keep my voice recording tools in top shape over the long haul?
Many creators neglect regular maintenance, risking sound quality and gear longevity. Techniques such as cleaning connectors with contact cleaner, checking cabling for wear, and calibrating gain settings after major adjustments are essential. For instance, calibrating your microphone’s gain ensures consistent clarity, especially if you frequently move between environments. Incorporating routine software updates and backups of your recording presets also safeguards against data loss and keeps your system running smoothly.
To streamline this process, consider investing in a dedicated microphone maintenance kit—containing contact cleaner, microfiber cloths, and replacement windscreens—to keep your gear free from dust and moisture. Establishing a habit of monthly checks can prevent major issues, much like routine car maintenance prevents breakdowns.
For advanced tips on maintaining your recording setup, I recommend exploring expert guides like those found on this resource which delve deep into equipment care and optimization.
If you haven’t already, try implementing a weekly environment check—inspect cables, clean mics, and review your software versions. This small step can extend your gear’s lifespan and ensure your voice recordings remain crisp and professional over the years.In my journey to perfect audio quality, I uncovered that the real magic lies in embracing the nuances rather than relying solely on expensive gear. One late night, after countless tweaks and recordings, I realized that understanding microphone placement and environment interaction is often overlooked but crucial. This insight transformed my approach and you can benefit from it too. Switching focus from just buying top-tier microphones to mastering their use and environment awareness has been a game-changer. Remember, even the best microphone won’t shine in a poorly treated space. Investing time in setting up your environment—like adding soft furnishings or acoustic panels—can elevate your voice clarity dramatically. Don’t underestimate the power of positioning; angling your shotgun mic correctly or keeping your USB mic within the optimal distance ensures your voice remains front and center. Mastering gain settings and post-processing techniques also play vital roles—think of them as the finishing touches that make your recordings pop. To explore comprehensive setups and advanced tips, check out the detailed guides linked throughout this article and start creating audio that truly resonates. Now, imagine your next recording with pristine clarity—it’s within your grasp, and the difference it makes is undeniable.
About Me

Chesung Subba
Author/Writer
Hello, I'm Chesung Subba, a passionate writer who loves sharing ideas, stories, and experiences to inspire, inform, and connect with readers through meaningful content.
Follow Me
Connect with me and be part of my social media community.
Leave a Reply