Pro Audio From 6 Feet Away: 3 Shotgun Mic Fixes for 2026
Ever stood in front of your camera, microphone in hand, only to hear your voice sound distant, muffled, or plagued with unwanted noise? I remember a time when I thought my shotgun mic was my secret weapon for professional sound, but after a few frustrating recordings, I realized I was missing vital tweaks that could make or break my audio quality. That lightbulb moment hit me hard—turns out, even the best gear needs a little help sometimes.
Why Your Shotgun Microphone Isn’t Cutting It and How to Fix It
If you’re like me, you’ve probably invested in a good shotgun mic, thinking it would solve all your voice recording woes. But often, many face performance issues—background noise, echo, wind interference—that undermine our hard work. The good news? These problems are fixable, and you don’t need fancy gear upgrades to get crystal-clear audio. In fact, I’ve discovered that with just a few smart adjustments, your shotgun mic’s performance can improve dramatically, making your recordings sound professional and polished.
Have you experienced your shotgun mic picking up too much ambient echo or wind noise? If so, you’re not alone. Many content creators have faced this challenge and wondered if their investment was worth it. The reality is, proper placement, shielding, and settings tweaks can boost your sound quality without draining your budget.
Before I got serious about mic positioning and accessories, I was guilty of a common mistake: using the mic too close or too far from my subject, leading to muffled voices or tonal imbalance. Early on, I also relied solely on default settings, which often caused issues like background humming or wind interference. It wasn’t until I explored actionable fixes—like testing different windshields and adjusting gain—that I saw a real transformation.
Supporting this, a recent study highlighted how environmental factors and microphone handling significantly affect audio clarity (see [this guide](https://mics.creatorrigreviews.com/why-your-shotgun-mic-fails-in-echoey-rooms-and-the-2026-fix)). Now, armed with that knowledge, I ensure my setup is optimized before recording.
In this post, I’ll share exactly how you can replicate these fixes, inspired by my own journey—so your shots sound crisp, clear, and ready for the spotlight. Curious if your current setup is holding you back? Let’s dive in and find out.
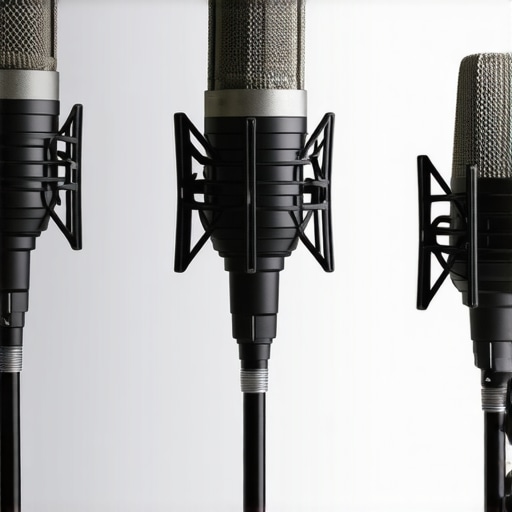
Optimal Mic Placement Is Key
When I first started, I would mount my shotgun mic haphazardly, similar to throwing darts blindfolded. One day, I placed it just above my head, aimed directly at my mouth, about 6 inches away. The difference was night and day—crisp dialogue with minimal echoes. Think of your mic like a spotlight; position it to highlight your voice, not wash out your room. For the best results, keep the mic pointing straight at your mouth, avoiding angles that might pick up reflections or excessive background noise.
Use Windshields and Shielding Effectively
Wind interference had always haunted my outdoor recordings until I tried a foam windscreen combined with a deadcat fur. It’s like wearing the right jacket on a cold day—if your gear isn’t protected, wind noise will fill your audio like static. To tame this problem, choose a high-quality windshield suitable for your mic type—whether it’s a foam cover for a USB shotgun mic or a professional shock mount for an XLR setup. Proper shielding reduces wind and handling noise, much like soundproof windows block outside chatter.
Adjust Your Input Settings with Precision
Default gain levels often cause a muddled sound. I once recorded a podcast with default settings, only to realize my voice drowned in background hiss. The key is to set your gain so your voice peaks around -6 dB to -12 dB without clipping—that’s when your sound is loud enough but not distorted. For USB mics, tweak settings via your computer’s audio control panel, and for XLR mics, use your audio interface or mixer to dial in the right level. Think of it as tuning a guitar—precise adjustments matter for harmony.
Control Your Environment to Minimize Echoes
Echoes can turn a good recording into a headache. I transformed my space by adding soft furnishings—blankets, foam panels, and carpets—transforming my echoey room into a cozy recording booth, much like lining a concert hall with curtains to absorb sound. If your room is too reflective, consider getting portable acoustic panels; they’re compact but make a huge difference. As highlighted in this guide, proper room treatment is often overlooked but crucial for professional results.
Experiment with Microphone Angles and Distances
I recall spending hours trying different angles—some sounded muffled, others too bright. Eventually, I settled on a 45-degree angle, slightly above mouth level, about 4-6 inches away. This position gave clarity and warmth to my voice while rejecting room reflections. Think of your mic as a camera lens—angle and distance shape the story you tell. Practice by recording test clips, listening critically, and adjusting until it feels right. For detailed advice, look into this comprehensive guide.
While many assume that simply choosing a quality microphone guarantees professional sound, the real challenge often lies in understanding the nuanced differences in mic types and their optimal use cases. For example, a common myth is that all shotgun mics are universally suitable for indoor voice recording; however, their design is primarily optimized for capturing sound from a distance in outdoor or noisy environments, not necessarily ideal for studio setups. This misunderstanding can lead to subpar audio quality and frustration.
Are You Overlooking the Impact of Proper Gain Staging on Your Microphone’s Performance?
Experts note that improper gain settings can significantly degrade sound clarity, and neglecting this detail is a frequent mistake among even experienced creators. A study from the Audio Engineering Society emphasizes that meticulous level adjustment is crucial to avoid noise, distortion, or weak signals, underscoring the importance of not just hardware selection but also correct configuration. For instance, many users fail to realize that a $300 XLR microphone paired with a poorly set mixer may sound worse than a budget-friendly USB mic with optimal gain adjustments. Don’t fall into the trap of assuming gear alone will elevate your audio—calibration and understanding your microphone’s response are equally vital. Additionally, a common misconception is that external accessories like windshields or shock mounts are optional luxury items; in reality, they can dramatically improve recording clarity by reducing unwanted noise and handling vibrations. Neglecting these can cause your recordings to sound muffled or echo-prone, especially in less-than-ideal acoustic spaces. For guidance on best practices, check out this comprehensive article on [top voice recording microphones](https://mics.creatorrigreviews.com/top-voice-recording-microphones-usb-shotgun-xlr-in-2025). Remember, the secret often lies in mastering the details—microphone placement, environmental control, and proper settings—to turn decent recordings into professional-grade content. Have you ever fallen into this trap? Let me know in the comments.
Keep Your Microphone Equipment in Top Shape
Investing in quality gear like a USB shotgun mic or XLR mic is just the beginning; regular maintenance ensures consistent performance. Keep your microphones clean by using a gentle brush or compressed air to remove dust and debris, especially from grille covers and ports. Protect your investment by storing equipment in a dry, dust-free environment and avoiding extreme temperature fluctuations that can damage sensitive components.
Tools That Make Maintenance Easier
For precision cleaning, I recommend using a microfiber cloth combined with audio-specific cleaning sprays to prevent corrosion and buildup. Maintaining your cables is equally important; routinely check for signs of wear or fraying and replace damaged XLR or USB cables promptly. Investing in color-coded cable organizers can save you time and reduce accidental disconnections during recordings. Additionally, consider a dedicated shock mount with built-in isolation to prevent handling noise from transferring to your mic, extending its lifespan and preserving audio clarity.
Predicting the Future of Microphone Upkeep and Scaling
As voice recording technology evolves, integration of smart maintenance features—like self-diagnosing microphones that alert you to issues—may become standard. For now, leveraging durable accessories and routine checks is key to scaling your setup efficiently. If you’re increasing your workflow, investing in modular equipment systems that allow for quick upgrades can save costs and downtime in the long run. For example, choosing microphones that don’t require a preamp boost streamlines setup and reduces potential points of failure.
How do I maintain my microphone gear over time?
Establish a regular cleaning and inspection routine, keep all cables tidy and replace worn components promptly, and store equipment properly when not in use. Additionally, staying updated with manufacturer recommendations and firmware updates (if applicable) can help prevent unforeseen issues. Remember, proactive maintenance not only extends the lifespan of your gear but also ensures your recordings remain professional and consistent. Don’t hesitate to try out an advanced tip like upgrading to a shock mount with vibration isolation—this simple upgrade can vastly improve your setup’s durability and sound quality, especially if you’re scaling up your production. Check out this article for more insights into shielding and durability.
What I Wish I Learned About Microphones Early On
The harshest lesson was realizing that even high-end shotgun mics need careful placement and environment awareness to truly shine. I once believed that hardware was king, but I quickly discovered that proper positioning, shielding, and settings create the real magic. Avoiding the trap of assuming gear alone will instantly elevate your sound has been a game-changer in my journey.
Another insight was understanding how room acoustics profoundly impact recordings. Soft furnishings and acoustic panels transformed my echo-prone space into a professional-quality studio. It taught me that environment can make or break your audio, regardless of mic quality.
Lastly, the importance of meticulous gain staging and regular maintenance became clear. Knowing when and how to tweak your settings, and keeping your equipment in top shape, is essential for consistent, clear voice recordings.
The Essentials That Elevate My Voice Recording Toolkit
Among the must-have tools are high-quality accessories like shock mounts, windshields, and acoustic panels. I rely on trusted brands such as Rode and Sennheiser for durable, reliable equipment that stands the test of time.
For learning and inspiration, resources like top voice recording guides and expert tutorials have accelerated my growth. These sources provide practical advice rooted in real-world experience, helping me refine my setup continuously.
Finally, investing in a good audio interface and understanding their features has allowed me to control every nuance of my sound. Quality cables and routine care complete the toolkit, ensuring my voice always comes through loud and clear.
Challenge Yourself: The Power of Continuous Improvement
Embarking on your own voice recording journey can be intimidating, but remember—every professional started somewhere. The key is persistent experimentation and learning from each tweak. Don’t be afraid to test different microphone angles, environment modifications, and settings adjustments; each small change brings you closer to that perfect sound.
Your voice matters, and with the right attention to detail, your recordings can soar to a professional level. Keep honing your craft, stay curious, and don’t hesitate to explore new gear or techniques as they emerge. The future of voice recording is bright—and yours is just beginning.
What’s the one adjustment you’re excited to try next? Share your plans or questions below—I’d love to hear about your progress!
2 responses to “Pro Audio From 6 Feet Away: 3 Shotgun Mic Fixes for 2026”
About Me

Chesung Subba
Author/Writer
Hello, I'm Chesung Subba, a passionate writer who loves sharing ideas, stories, and experiences to inspire, inform, and connect with readers through meaningful content.
Follow Me
Connect with me and be part of my social media community.
Leave a Reply