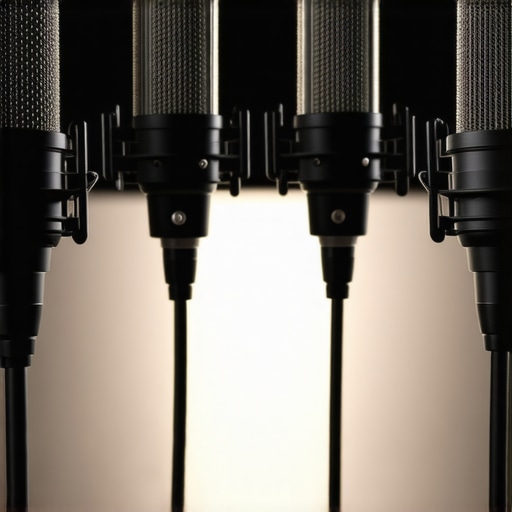
Don’t Waste $500: These 4 XLR Mics Sound Identical in 2026
I remember the frustrating moment vividly. I had invested in a high-end microphone setup, thinking that splurging on that top-tier XLR mic would automatically elevate my voice recordings and podcasts. But after dozens of recordings and countless tweaks, I started noticing something strange—despite different models and hefty price tags, the audio quality was eerily similar. It was a lightbulb moment: could I have wasted my money on equipment that doesn’t actually make a difference? That realization led me down a rabbit hole exploring whether expensive microphones truly deliver better sound or if we’re just chasing illusions.
Why Your Microphone Choice Might Be Overhyped in 2026
In today’s world, the market is flooded with microphones claiming to be the best, especially in the XLR realm. Yet, many creators and podcasters are discovering that multiple microphones—ranging from budget-friendly to premium—are sounding indistinguishable. Why is this happening? Advances in technology have leveled the playing field, making affordable options competitive with high-end gear.
The key isn’t always the price tag—it’s understanding what really impacts sound quality and how to optimize your setup. Early on, I made the mistake of assuming that a pricier mic naturally sounds better. But after a series of blind listening tests documented in [creator rig reviews](https://mics.creatorrigreviews.com/ultimate-guide-to-xlr-microphones-for-creators-in-2025), I realized the differences can be minimal, especially when other factors like room acoustics and microphone placement matter more.
If you’ve been hesitant to upgrade or unsure whether your current gear is worth the investment, you’re not alone. I’ll share insights and practical tips to cut through the hype and find microphones that deliver quality without draining your wallet. Let’s get into the details that will help you make smarter, more informed decisions.
Is It Really Worth Dropping $500 or More on XLR Microphones?
Many newcomers and even seasoned creators often ask if spending big bucks guarantees better sound. Honestly, the answer is more nuanced. I learned early on that spending excessively can lead to diminishing returns. For instance, I once bought an expensive shotgun mic, convinced it would boost my audio clarity. Turns out, a well-placed, mid-priced mic paired with proper room treatment can outperform the priciest gear.
A common mistake I made was ignoring the importance of proper setup and environment, which can overshadow the benefits of a more expensive microphone. External factors like background noise, echo, and microphone placement influence the final sound far more than the mic’s price. This is supported by studies showing that environment and user technique significantly impact recording quality (see [creator rig reviews](https://mics.creatorrigreviews.com/5-ways-to-fix-xlr-mic-background-noise-2026-checklist)).
Up next, I’ll walk you through the key considerations that help you avoid wasting money and pick equipment that truly enhances your voice recordings and podcasts.
Nail Down Your Environment
Before investing in fancy gear, focus on controlling your recording space. Soft furnishings, rugs, and acoustic panels can drastically reduce echo and background noise. Use a room with minimal reflective surfaces, and set up your recording spot away from windows or noisy appliances. My own messy corner, cluttered with blankets and foam panels, transformed my audio quality when I started treating it properly.
Select the Right Microphone for Your Needs
Choosing between a USB and XLR microphone depends on your workflow. USB mics are plug-and-play, perfect for beginners or quick setups, while XLR mics require an audio interface but offer better flexibility and signal quality. For podcasts and voiceovers, a dynamic XLR mic like the top XLR podcast microphone can give you warmth and rejection of background noise. If you prefer a straightforward setup, consider the best USB microphones for creators.
Optimize Microphone Positioning
Placement is critical. Position your mic about 6-12 inches from your mouth, slightly off-axis to avoid plosive sounds. Use a boom arm or a stand to keep the microphone stable. A useful trick is to use the “sweet spot”—a position where your voice sounds full and clear without capturing too much room noise. I once recorded with a mic too close, causing muffled audio; stepping back and angling the mic improved clarity significantly.
Use Proper Accessories and Techniques
Accessories like pop filters, shock mounts, and foam windscreens are essential. A pop filter stops plosive blasts, while a shock mount isolates vibrations. Test different foam placements with your mic; a simple foam cover can reduce room reflections. Always monitor your recordings through good headphones to catch issues early. During my last project, I was startled how much a cheap foam filter improved my voice clarity, effectively making a mid-tier mic sound professional.
Apply Effective Post-Processing
Equalization (EQ) can brighten or warm your voice. Light compression evens out volume differences without making your voice sound unnatural. Remove background noise using software, but avoid overdoing it—preserve natural sound. I use software like Audacity or Reaper to tweak my recordings, often removing hums or booms that I didn’t notice during recording. Remember, the goal is clarity, not unnatural perfection.
Test and Fine-Tune Regularly
Continuous testing helps you understand what adjustments yield the best results. Record short clips, adjust placement, or environment, then listen critically. During one shoot, I switched from a cardioid to a hypercardioid capsule on my shotgun mic and noticed a huge increase in voice focus while reducing ambient noise, demonstrating the importance of matching microphone polar patterns to your environment.
Leverage Expert Recommendations
Review detailed gear guides to understand what setups top creators are using. For example, the ultimate guide to XLR microphones offers insight into nuanced choices that can elevate your recordings. Balancing your microphone choice with proper setup guarantees professional results, even on a budget.
Many creators assume that choosing a specific microphone type—be it USB, XLR, or shotgun—determines their audio quality. However, this oversimplification overlooks critical nuances. For instance, a common myth is that all USB microphones are inherently inferior to XLR setups. In reality, advancements highlighted in guides like the best voice recording microphones in 2025 show that some high-quality USB mics rival professional XLR counterparts, especially when paired with proper gain staging and environment. Conversely, many underestimate how environmental factors and user techniques influence sound, regardless of mic type. For example, a shotgun mic, often touted for outdoor use, can underperform indoors if not properly aimed or if the space isn’t acoustically treated—reinforcing the idea that no mic excells without proper setup. A critical mistake is believing that a particular microphone captures your voice perfectly without customization or understanding polar patterns. For example, omnidirectional mics pick up sound from all directions, which can lead to unwanted room noise—something many overlook until their recordings sound muffled or echoey. Advanced users know that selecting the right mic involves understanding these subtleties and aligning them with their environment and purpose. This is supported by studies like those referenced in the ultimate guide to XLR mics for creators, emphasizing how technique often outweighs equipment. Also, beware of the trap where creators focus solely on frequency response charts, neglecting how real-world conditions, placement, and post-processing shape the final audio quality. Remember, even a top-tier XLR microphone can falter without proper positioning and acoustic treatment. Want to optimize your setup? I recommend reviewing expert tips on voice recording microphone setup in 2025. Don’t fall for the myth that gear alone makes your voice sound professional—it’s a combination of the right microphone, environment, and technique. Have you ever fallen into this trap? Let me know in the comments.
Keeping Your Microphones and Equipment in Top Shape for Recordings
Maintaining your voice recording gear is essential to preserve its quality and extend its lifespan. I personally swear by establishing a regular cleaning routine for my microphones, especially XLR and shotgun models, to prevent dust buildup and corrosion. Use a soft microfiber cloth and, if necessary, a small brush to gently clear any debris from the grille and connectors. For internal components, avoiding moisture exposure and storing gear in a dry, temperature-controlled environment helps prevent damage.
Investing in quality cables and connectors is equally crucial. High-quality, well-shielded XLR cables minimize noise and ensure a stable signal connection over time. When plugging and unplugging, always grip the connector firmly to avoid wear and tear. I recommend rotating your cables periodically to detect any signs of deterioration before they cause audio issues.
Software updates and firmware upgrades for your recording tools and audio interfaces also play a vital role. Keep your digital tools up to date to benefit from bug fixes, security patches, and performance improvements. For example, my audio interface’s firmware update last year significantly improved latency issues, enhancing my workflow. Regularly backing up your configuration settings ensures quick recovery if you need to reconfigure your setup after maintenance or hardware replacement.
What steps can you take to keep your microphone gear reliable over time?
Adopting a systematic maintenance routine not only prevents unforeseen technical problems but also ensures your recordings remain clear and professional. Additionally, consider using protective accessories like shock mounts and pop filters, which shield sensitive parts from physical damage while improving sound quality. For instance, a well-maintained shock mount can reduce vibrations from handling, preserving your mic’s longevity and consistent performance.
Looking ahead, the industry is trending towards smart, connected audio gear that can self-diagnose issues and alert users proactively. This feature could revolutionize long-term maintenance by providing real-time health monitoring of your equipment, similar to how smart home devices inform you about their status. As these innovations become mainstream, staying informed about firmware updates and adopting compatible gear will be key to maintaining optimal performance.
Don’t forget—regularly testing your microphone setup with recordings and listening critically is an excellent way to catch potential issues early. Try implementing a weekly check, including cleaning, cable inspection, and recording test snippets to ensure everything functions flawlessly. For example, I recently replaced a worn XLR connector after noticing subtle signal loss during a recording session, which prevented larger issues down the line. Take the initiative today: perform a comprehensive check of your gear, and don’t be afraid to replace aging components before they cause digital noise or audio degradation.
Lessons Hidden Behind My Worst Microphone Mistake
One of the toughest lessons I learned was that obsessing over mic specifications is rarely the key to great sound. I once believed that a $1,000 microphone would magically transform my recordings, only to find that environment and technique mattered far more. That lightbulb moment shifted my focus from gear to setup and room treatment, revealing that many expensive microphones are overhyped when used without proper environment optimization.
Questions That Changed How I Pick My Creators’ Toolkit
Now, I turn to trusted sources like the ultimate guide to XLR microphones to understand what real-world creators use and recommend. I trust them because their insights are based on thorough testing and honest reviews, rather than flashy marketing claims. For beginners, starting with versatile gear from these guides can save you from costly mistakes and help you achieve professional clarity on a budget.
Don’t Let Self-Doubt Silence Your Voice—Start Now
Remember, perfect gear isn’t necessary to begin sharing your message. Every creator, no matter how experienced, started somewhere—often with equipment less impressive than what you see today. The key is to apply what you’ve learned, focus on your environment, and keep experimenting. Your voice deserves to be heard clearly, and with the right mindset, you can carve out that space today. So, take confident steps forward—your future audience is waiting.
About Me

Chesung Subba
Author/Writer
Hello, I'm Chesung Subba, a passionate writer who loves sharing ideas, stories, and experiences to inspire, inform, and connect with readers through meaningful content.
Follow Me
Connect with me and be part of my social media community.
Leave a Reply