Top Shotgun Microphones & Voice Recording Gear for Creators in 2025
I remember spending hours trying to record a simple voiceover, only to be met with muffled sound or distracting background noise. Frustration mounted as I fiddled with cheap mics and complicated setups, wondering if I was missing something essential. That moment was my lightbulb—realizing that investing in the right microphone could transform my content, making it sound professional without a studio full of gear.
Why Your Voice Deserves Better Than Basic Microphones
In 2025, the difference between amateur and professional content boils down to one thing: sound quality. Viewers and listeners are more discerning than ever. They notice when your audio is crisp, clear, and free of background noise. But here’s the catch: choosing the right gear isn’t as simple as grabbing the most popular mic. It’s about understanding what works best for your environment, your voice, and your budget.
From USB mics perfect for quick setups to XLR shotgun microphones that capture studio-quality sound, the options are vast. And the technology keeps evolving—by 2025, many creators are switching to hybrid solutions that combine the best of both worlds. In this post, I’ll guide you through selecting the gear that suits your needs, so you don’t waste time and money on gear that underdelivers.
Is the Hype Around Shotgun Microphones Justified?
Early in my journey, I bought a popular shotgun mic based on reviews alone. Turns out, I overlooked the importance of proper positioning and environment. My recordings sounded great in theory but terrible in practice—echoes, off-axis noise, and inconsistent sound levels. That mistake taught me a vital lesson: knowing what to buy is just the start. Proper setup and understanding your environment matter more than the gear itself. If you’ve faced similar frustrations, you’re not alone. Fortunately, with the right knowledge, you can avoid these pitfalls and elevate your voice recordings.
To learn more about the latest gear and how to set it up for top-tier quality, check out this comprehensive guide. It’s packed with insights on choosing the best shotgun microphones and voice recording tools for creators in 2025. Ready to ditch the guesswork? Let’s dive into how you can make your voice heard loud and clear in the crowded digital space.
Select Your Microphone Type
Start by choosing between USB and XLR microphones based on your setup and needs. USB mics are plug-and-play, ideal for quick setups and beginners. XLR mics, on the other hand, require an audio interface but offer superior sound quality and flexibility for future upgrades.
For example, I once switched from a USB to an XLR setup for my podcast. Initially, I struggled with cables and settings, but the richer sound made the effort worthwhile. To find the best options, check out this guide.
Matching Microphones to Your Environment
Environment plays a crucial role. A shotgun microphone is excellent for noisy settings because it focuses on sound directly in front of it, reducing background noise. I used one during a noisy outdoor shoot, and the clarity amazed me. Proper positioning is key—mount the mic at mouth level, about 6-12 inches away, and aim it directly at your mouth.
For indoor recordings, a cardioid or hypercardioid condenser mic can capture your voice clearly while minimizing room echo. For instance, I recorded my voice in a small room with soft furnishings, and the sound was crisp without echo. For insights on gear, see this resource.
Proper Setup Is Everything
Even the best mic won’t sound good if not set up correctly. Use a boom arm or stand to keep the mic steady. Experiment with placement—too close causes popping, too far reduces clarity. Use a pop filter to minimize plosive sounds, and set levels so your voice peaks around -6dB to -3dB, avoiding distortion.
When I first tried my shotgun mic, I placed it too close, causing unnatural sounds. After repositioning it about 8 inches from my mouth and adding a pop filter, my recordings instantly sounded more professional. Check out this guide for detailed setup tips.
Test and Adjust Before Recording
Always do a quick test recording. Speak naturally and listen carefully for background noise, mic proximity, and levels. Adjust your mic angle or distance as needed. I once spent 30 minutes tweaking my setup until I got a clean, balanced sound that required no post-editing.
Use headphones to monitor your audio in real-time. This helps catch issues immediately rather than discovering them after editing. Remember, consistent testing saves time and ensures high-quality output.
Many creators assume that picking the right microphone is just about hardware specs or following popular trends. But in my experience, there are nuanced pitfalls that can sabotage your audio quality even with the best gear. Let’s dig deeper into what most people get wrong about USB microphones, XLR mics, shotgun mics, podcast microphones, and voice recording setups—and how to avoid these costly mistakes.
Why Thinking More Gear Means Better Sound Is a Trap
The biggest myth I often encounter is that simply buying the most expensive or latest microphone guarantees professional results. In reality, your environment, mic placement, and setup matter far more than the gear itself. For instance, I once upgraded to a high-end shotgun mic, expecting a dramatic boost in clarity. But I overlooked room acoustics and positioning, which resulted in echoes and inconsistent sound. The lesson? Focus on mastering setup techniques before investing in premium gear. Check out this guide for detailed setup tips.
Beware of the Environmental Trap
Many creators underestimate how much their environment influences mic performance. A common mistake is using a shotgun mic outdoors without considering wind noise or proper shielding. Conversely, indoor recordings often suffer from room echo, which can be mitigated with simple acoustic treatments like soft furnishings or portable shields. Ignoring environment can lead to recordings that sound professional in a controlled lab but terrible in real-world scenarios. For advanced advice on matching gear to your space, explore this resource.
Mastering the Setup Is Where Many Fumble
Even a top-tier microphone will fall flat if not set up properly. I’ve seen creators plug in a mic and start recording without adjusting gain levels, resulting in clipping or inaudible speech. The mistake? Not testing and calibrating your setup beforehand. Use headphones for real-time monitoring, and always do a quick test recording to catch issues like popping sounds or background noise. Proper placement—about 6-12 inches from your mouth—combined with a pop filter can make a world of difference. Detailed setup strategies can be found here.
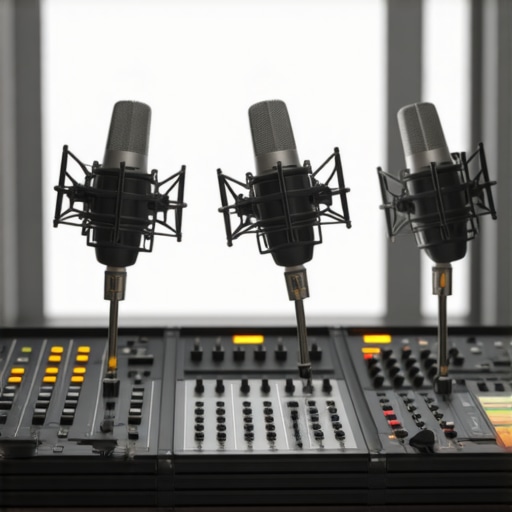
Advanced Question—How Do You Balance Multiple Microphones for Multi-Source Recordings?
For those venturing into complex setups with multiple mics—say, for a podcast with guests or a multi-camera voice-over project—balancing and phase alignment become critical. A common mistake is neglecting phase issues, which can cause sound cancellation. Use a phase meter or listen in mono to identify and correct phase problems. Also, ensure consistent placement and gain levels for each mic to avoid one source overpowering others. This nuanced approach requires a keen ear and proper tools. For expert insights, review this comprehensive guide.
In essence, mastering voice recording in 2025 isn’t just about gear. It’s about understanding the environment, setup, and nuanced technical details that turn mediocre recordings into professional-sounding content. Have you ever fallen into this trap? Let me know in the comments.
Maintaining your microphone setup over time is crucial for consistently high-quality recordings. Even the most advanced voice recording gear requires regular care and tuning to ensure it performs at its best. From cleaning connectors to software updates, small but deliberate actions can extend the lifespan of your equipment and keep your sound crisp and clear.
How do I keep my microphone setup working flawlessly for years?
First, prioritize regular cleaning of your microphones and accessories. Use a soft, lint-free cloth to wipe down the body and grille, and gently clean the connectors with a dry brush or compressed air. Dust and grime can cause connection issues, especially with XLR cables or shotgun mic mounts. For example, I routinely clean my XLR connectors with contact cleaner to prevent static or signal loss, which can subtly degrade audio quality over time.
Next, keep your firmware and software up to date. Many high-end microphones and interfaces now include firmware that enhances compatibility and performance. Regular updates fix bugs, improve noise handling, and sometimes unlock new features. I make it a habit to check the manufacturer’s website quarterly for updates—this simple step prevents many issues before they start.
Furthermore, monitor the physical condition of your cables and mounts. Replace worn or frayed cables immediately to avoid unexpected failures. Invest in sturdy cable management solutions to prevent accidental pulls or damage. For instance, I always route my XLR cables through cable ties and avoid tight bends, which could cause internal conductor breaks over time.
What about software and settings for long-term reliability?
Use reliable digital audio workstations (DAWs) like DAW software that supports your hardware and allows for precise gain adjustments and noise reduction. Save your preferred settings profiles and document calibration routines. This way, if you switch setups or troubleshoot, you can quickly restore optimal configurations.
In the future, expect AI-driven diagnostics to become standard in voice recording gear. These tools will automatically detect issues like misaligned phase, excessive background noise, or cable faults, prompting you with corrective actions. Staying ahead with these innovations will make maintaining your setup more effortless and effective.
Don’t forget to periodically check environment conditions—humidity, temperature, and dust levels—to prevent damage or performance degradation. Using a dehumidifier or keeping your gear in a climate-controlled space can prevent corrosion and component failure.
Make it a habit to perform routine checkups—say, every three to six months—and you’ll find your voice recordings stay crisp and professional for years to come. Start by implementing a simple cleaning routine today, and notice how your gear responds with consistently better sound quality.
Try setting a calendar reminder to review your equipment, update firmware, and clean connectors regularly. This small effort will pay off in the long run, keeping your microphone in peak condition and your recordings sounding their absolute best.
The Hardest Lesson I Learned About usb mic,xlr mic,shotgun mic,podcast mic,voice recording
One of my biggest realizations was that gear alone doesn’t guarantee quality. I once bought a top-tier shotgun mic expecting instant improvement, only to struggle with placement and environment issues that ruined my recordings. It taught me that mastering setup techniques and understanding your environment are more crucial than the gear itself.
3 Myths About usb mic,xlr mic,shotgun mic,podcast mic,voice recording That Held Me Back
I used to believe that expensive microphones automatically meant professional results. Turns out, environment and setup matter far more. Also, I thought all shotgun mics work outdoors, but wind noise and proper shielding are essential. Finally, I underestimated the importance of regular maintenance and calibration, which are key to long-term quality.
What Experts Won’t Tell You About usb mic,xlr mic,shotgun mic,podcast mic,voice recording
Many professionals focus on gear specs but overlook the importance of environment matching and detailed setup. Proper mic placement, acoustic treatment, and regular equipment care can drastically elevate your sound without needing the latest hardware. The real secret is in mastering these techniques, which most beginners ignore.
My Essential Toolkit for voice recording
I trust the ultimate guide on choosing the right microphone because it offers comprehensive insights into gear selection, setup, and environment matching. For software, I recommend reliable DAWs that support calibration and noise reduction, crucial for maintaining consistent quality over time. Lastly, I keep a set of acoustic treatment tools and cleaning supplies from trusted brands to ensure my gear stays pristine and performs at its best.
Don’t Be Afraid to Start
Your voice deserves to be heard clearly and professionally. With the right knowledge and attention to detail, you can elevate your recordings in 2025 and beyond. Remember, mastering your setup and environment is more impactful than chasing expensive gear. Take action today—experiment, learn, and improve your voice recordings every step of the way. Are you ready to transform your sound and make your voice stand out? Share your journey below and let’s grow together!
3 responses to “Top Shotgun Microphones & Voice Recording Gear for Creators in 2025”
Reading this post really hit home for me, especially the part about environment affecting microphone performance. I’ve learned that no matter how fancy your gear is, improper placement or bad acoustics can sabotage your sound quality. I remember trying to record in my small, untreated room and ending up with echoes that I couldn’t fix with just a better mic. Since then, I’ve invested in some acoustic panels and experimented with mic positioning, which made a huge difference. One thing I found helpful is always doing a quick test before final recording—listening with headphones in real-time to catch any issues like background noise or popping sounds.
What strategies have others found effective for managing ambient noise and room acoustics without breaking the bank? Do portable sound shields or specific types of acoustic treatment work best for small home studios? Would love to hear more tips from fellow creators about optimizing environment and setup.
This post really resonated with me, especially the emphasis on proper mic placement and environment optimization. I’ve learned through trial and error that even with high-quality gear, ignoring acoustics can seriously undermine your recordings. I started using portable acoustic panels and found that organizing my space with soft furnishings made quite a difference, especially in my small home studio. The key is to create a balanced environment that minimizes reflections but doesn’t sound overly muffled. I also do quick test recordings with headphones before each session, which helps me catch issues like background noise or unintentional pops, ensuring the final output is clear.
Regarding budget-friendly acoustic treatments, do you think that DIY solutions, like heavy curtains or foam tiles, can be just as effective as professional panels? I’d love to hear how other creators manage to strike that balance between affordability and sound quality in their setups.
About Me

Chesung Subba
Author/Writer
Hello, I'm Chesung Subba, a passionate writer who loves sharing ideas, stories, and experiences to inspire, inform, and connect with readers through meaningful content.
Follow Me
Connect with me and be part of my social media community.
Leave a Reply