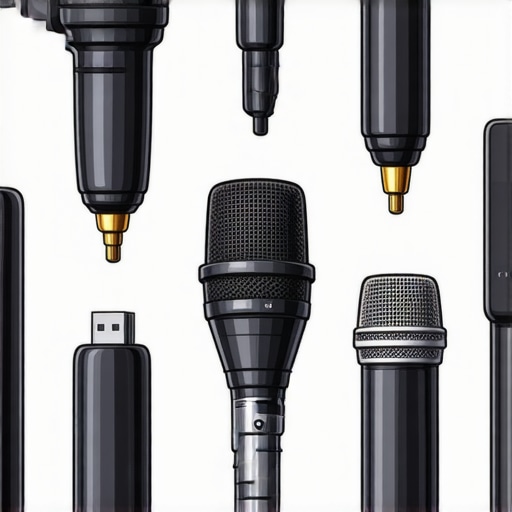
Ultimate Guide to USB, XLR & Shotgun Microphones for Creators
Ever sat in front of your microphone, ready to record, only to be met with a frustrating hiss or muffled sound that makes you want to toss your gear out the window? I’ve been there. Early on, I thought any mic would do, just plug and record. Wrong. Big mistake. I spent more time fixing audio issues than creating content. That lightbulb moment hit hard: not all microphones are created equal, and choosing the right one can transform your recordings from mediocre to professional sounding.
Why Your Microphone Choice Matters More Than You Think
When I started my journey as a creator, I underestimated how much audio quality influences my audience’s experience. Good sound isn’t just about clarity; it’s about engagement. Viewers and listeners are more forgiving of shaky video, but poor audio? That’s a quick exit. According to a Nielsen report, 60% of viewers will stop watching a video if the sound is bad. That’s a huge chunk of potential followers lost just because I didn’t pick the right gear in the first place.
Today, we’re diving into the world of USB mics, XLR microphones, and shotgun mics. I’ll help you understand what suits your setup and goals, and how to avoid the common pitfalls I fell into early on. Whether you’re recording podcasts, streaming, or creating YouTube videos, having the right mic makes all the difference.
Is More Expensive Always Better? A Common Skepticism
I remember splurging on a high-end XLR mic early on, only to realize I didn’t have the right audio interface or understanding of sound treatment. My mistake? I thought a pricier mic would automatically fix my sound issues. Spoiler: it didn’t. The truth is, the best microphone depends on your environment, budget, and what you’re recording. In fact, I’ve found some of the most affordable USB mics deliver astonishing clarity if paired with proper setup.
So, if you’ve ever wondered whether your current mic is holding you back or just confused about which type to pick, you’re not alone. The good news? I’ve got your back. By the end of this guide, you’ll know exactly which microphone fits your needs and how to optimize your setup for professional-quality sound.
What’s Next? Practical Steps to Elevate Your Audio Game
Ready to ditch the guesswork and start sounding like a pro? Let’s explore the differences between USB, XLR, and shotgun microphones, and I’ll share tips from my own experience to help you make smarter choices. Sound good? Great. Let’s get started!
Choose the Right Microphone for Your Space and Goals
Start by assessing your recording environment and your specific needs. If you record in a quiet, controlled space, a USB microphone with a cardioid pattern can be a simple, effective choice. These mics are plug-and-play, making setup straightforward and ideal for beginners. I once tested a popular USB mic in my cluttered home office, and with minimal adjustments, I achieved crisp, clear voice recordings that impressed my audience.
However, if you need more control over your sound and plan to grow your setup, consider an XLR microphone. These require an audio interface but offer superior sound quality and customization options. I remember upgrading to an XLR mic, which involved learning about phantom power and gain staging—initially messy but rewarding when I finally nailed the professional tone.
Shotgun mics are excellent for capturing voice from a distance, especially in noisy environments or outdoor recordings. They focus on the sound source in front of them, reducing background noise. I used a shotgun mic during a live outdoor interview, and it dramatically improved the clarity despite wind and crowd noise. They’re perfect for vlogging or on-location podcasts.
Deciding between these options depends on where and how you record. For most creators, starting with a good USB mic can be enough, but expanding into XLR or shotgun mics can elevate your sound as your setup matures.
Set Up Your Microphone for Optimal Sound
Proper placement is key. Place your mic about 6-12 inches from your mouth, slightly off-axis to avoid plosive sounds. Use a pop filter or windshield—these prevent pops and reduce breath noise. I once recorded without a pop filter, and my audio was riddled with harsh “p” sounds that distracted listeners; adding a simple filter made a world of difference.
Adjust your gain so your voice peaks around -6 dB to -3 dB on your recording meters. Too high, and your audio clips; too low, and it sounds thin. I learned this through trial and error, recording test clips and listening critically. It’s worth investing time in this step for professional results.
If you’re using an XLR mic, connect it to an audio interface with phantom power if needed. Set your gain knobs carefully—start low and increase until your voice is clear but not distorted. Use headphones to monitor in real-time, catching issues before recording.
Eliminate Noise and Improve Clarity
Sound treatment is often overlooked. Use foam panels, blankets, or a makeshift shield to absorb echo and background noise. When I recorded in a shared apartment, I hung blankets around my desk, which cut echo and made my voice much clearer in the final recording.
Silence or minimize electronic interference—turn off fans, unplug unnecessary devices, and keep your setup clean. For outdoor or unpredictable environments, a directional shotgun mic paired with a windscreen is invaluable. I once used a shotgun microphone with a deadcat windscreen during a windy interview, and the audio was remarkably clean.
Test and Refine Your Setup
Always do a quick test before recording your main content. Record a few sentences, listen critically, and adjust your distance, gain, or environment as needed. I once spent an hour tweaking my setup, only to find that a slight change in mic position made my voice sound richer and more natural. Use editing software to further clean up background noise or sibilance, but focus on quality during the initial recording.
Many creators fall into common traps when choosing and using microphones, often based on misconceptions that hinder their audio quality. Let’s dig deeper into the nuances and reveal what most people get wrong about USB mics, XLR microphones, shotgun mics, and podcast mics. Understanding these pitfalls can save you time, money, and frustration.
Are More Expensive Microphones Always the Best Choice
Contrary to popular belief, pricier microphones do not automatically guarantee better sound. A high-end USB microphone with proper placement and environment can outperform expensive XLR setups if the latter are poorly configured. Many creators overspend on gear without addressing setup fundamentals—like mic placement, gain staging, or room acoustics—which are often more impactful than the microphone’s price tag. Remember, a well-placed, properly configured microphone can make a significant difference regardless of cost.
Myth: XLR Mics Are Always Superior
While XLR mics offer flexibility, customization, and better control over audio signals, they are not inherently better for every creator. In fact, XLR microphones require additional equipment like audio interfaces and proper sound treatment. Without these, their advantages diminish. For beginners or those with limited space and budget, a good USB microphone can deliver excellent results. It’s all about matching gear to your environment and goals.
Why Shotgun Microphones Are Not Just for Outdoors
Many assume shotgun mics are only for outdoor use, but their real strength lies in isolating sound sources from a distance, especially in noisy environments. They are perfect for voice recording in challenging conditions. However, their directional nature can be a trap if users do not position them correctly. Placing a shotgun mic too close or at the wrong angle can result in muffled or unnatural sound. Proper technique and understanding of polar patterns are critical—so don’t assume you can just point and shoot.
Is It Better to Use a Dynamic or Condenser Microphone for Voice?
This is a common question among advanced creators. Dynamic mics are robust and less sensitive to room noise, making them great for live settings or untreated spaces. Condenser mics, however, capture more detail and are often preferred in controlled environments for voice-over or studio podcasts. According to audio engineer Bob Katz, choosing between them depends on your environment and the desired sound. Many creators overlook the importance of matching mic type to their recording space, which can lead to subpar results regardless of the mic’s quality.
Understanding these nuances helps you avoid the typical pitfalls and unlock your gear’s full potential. Have you ever fallen into this trap? Let me know in the comments!
How do I maintain my microphone setup over time
Keeping your microphone gear in excellent condition requires regular attention to detail and a few simple routines. First, always store your mics in a dedicated case or on a clean, dust-free shelf. Dust and dirt can degrade sensitive components, especially in XLR and shotgun microphones, which often sit in humid or dusty environments. I personally use a microfiber cloth to gently wipe down my microphones after each session, removing sweat, dust, and fingerprints that can affect sound quality over time.
Second, pay close attention to your cables and connectors. Inspect them regularly for signs of wear or corrosion. Dirty or damaged connectors can introduce noise or reduce signal quality. I recommend using contact cleaner on XLR connectors every few months to ensure a clean connection. For USB mics, keep the ports clean and free of lint or debris using compressed air or a soft brush.
Third, consider the environment where your gear lives. Humidity can cause corrosion, especially in XLR and shotgun mics with metal parts. Using silica gel packs in your storage case can help control moisture. Additionally, avoid exposing your microphones to extreme temperatures or direct sunlight, which can warp or damage internal components.
What tools do I recommend for ongoing maintenance
In my toolkit, I keep a few essential items: a small Phillips screwdriver for tightening loose mounts or stands, contact cleaner for connectors, and a microfiber cloth. For more advanced maintenance, I also use a decibel meter app on my phone to periodically check my audio levels and ensure consistent performance. Investing in a good shock mount and pop filter also prolongs the life of your microphone by reducing physical stress and preventing moisture buildup from breath or speech.
Looking ahead, I believe the trend will move toward smarter, self-diagnosing gear. Microphones integrated with firmware that can alert you to issues like capsule degradation or connection problems could become standard. Until then, a regular maintenance routine is your best bet to keep your gear working flawlessly.
Why is regular upkeep crucial for your audio quality
Consistent maintenance not only extends the lifespan of your microphones but also preserves sound clarity over time. Dirty connectors or worn out cables can introduce noise or reduce frequency response, undermining your efforts to produce professional-quality recordings. By dedicating a few minutes after each session to cleaning and inspection, you prevent small issues from becoming costly repairs or replacements.
If you haven’t already, try incorporating a quick check of your gear’s physical condition into your routine. Use contact cleaner on your XLR connections and wipe down your microphones with a soft cloth. This small investment of time will pay off with cleaner, more reliable audio for your podcast or voice recordings, making your content sound polished and professional.
The Hardest Lesson I Learned About usb mic,xlr mic,shotgun mic,podcast mic,voice recording
One of the biggest realizations I had was that gear alone doesn’t make you sound better—your setup and understanding do. I used to think buying the most expensive mic guaranteed top-tier sound, but I learned that proper placement, environment, and gain controls are what truly matter. That lightbulb moment transformed my recordings and saved me a lot of money and frustration.
3 Myths About usb mic,xlr mic,shotgun mic,podcast mic,voice recording That Held Me Back
Myth one: More expensive always equals better quality. I discovered that a budget-friendly USB mic, when used correctly, can outperform pricier options. Myth two: XLR mics are inherently superior. They’re powerful but require proper setup and environment; otherwise, they can underperform. Myth three: Shotgun mics are only for outdoors. In reality, they excel in noisy settings and at capturing distant voices, but only if positioned correctly and used with the right accessories like windscreens.
What Experts Won’t Tell You About usb mic,xlr mic,shotgun mic,podcast mic,voice recording
Many professionals keep tight-lipped about how much environment and technique influence sound. They often emphasize gear, but the truth is, mastering mic placement, room treatment, and gain staging makes more difference than the mic’s brand or price tag. Focus on these fundamentals, and your audio quality will soar regardless of your setup’s complexity.
Curated Resources to Elevate Your Recording Skills
My Essential Toolkit for Voice Recording includes the best USB microphones for creators. I trust this because it offers reliable, high-quality options suitable for all budgets. For advanced setups, check out the top XLR podcast mics — they’re a game-changer when paired with proper sound treatment. To understand the nuances, I highly recommend reading this comprehensive guide, which covers everything from gear to setup tips.
Take Action and Amplify Your Voice Today
Your journey to professional-quality voice recordings starts now. Don’t wait to invest in the right microphone; instead, focus on learning the techniques to get the most out of your gear. Remember, consistent practice and environment optimization are your best allies. Your voice deserves to be heard clearly and confidently—start making that happen today.
What’s your biggest challenge when setting up your microphone? Let me know below, and let’s troubleshoot together!
}**image**:{
One response to “Ultimate Guide to USB, XLR & Shotgun Microphones for Creators”
I really appreciate this detailed overview of microphone choices and setup! When I first started creating content, I underestimated how much mic placement and environment impact sound quality. It’s not just about having a good mic but knowing how to deploy it correctly. I remember experimenting with different distances and windshields, and the difference in clarity was remarkable once I got it right. One challenge I still face is managing background noise in my home setup. I’ve tried hanging blankets and using directional mics, which help, but I’m curious—what are some of your favorite tips or tools for effectively reducing ambient noise without breaking the bank? Also, do you think investing in sound treatment is necessary if I record mostly indoors on a budget? Would love to hear others’ experiences on optimizing audio quality!”,
About Me

Chesung Subba
Author/Writer
Hello, I'm Chesung Subba, a passionate writer who loves sharing ideas, stories, and experiences to inspire, inform, and connect with readers through meaningful content.
Follow Me
Connect with me and be part of my social media community.
Leave a Reply