Ultimate Guide to Podcast & Streaming Microphones: XLR, USB & Shotgun 2025
Ever been mid-recording, only to hear your voice crack or echo because of a cheap or mismatched microphone? I remember my first attempt at podcasting—my setup was a chaotic mess of mismatched gear, and it sounded terrible. It was frustrating, embarrassing, and made me question if I was cut out for audio content creation. That lightbulb moment hit me hard: the right microphone makes all the difference between a professional-sounding show and one that’s just noise.
Why Your Microphone Choice Matters More Than Ever in 2025
In 2025, the demand for high-quality audio content is at an all-time high. With platforms like Spotify, Apple Podcasts, and YouTube pushing creators to produce studio-quality sound, simply using a built-in laptop mic or a cheap headset won’t cut it anymore. According to a 2024 report by Statista, over 80% of successful content creators attribute their growth to investing in proper audio equipment. It’s clear: investing in the right microphone is no longer optional—it’s essential.
But here’s the tricky part. With so many options—XLR, USB, shotgun, and more—it’s easy to get overwhelmed. I’ve been there. I’ve wasted money on mics that promised studio quality but delivered nothing but static. That early mistake taught me a valuable lesson: understanding the differences between these microphone types is the first step toward transforming your sound. Whether you’re a budding podcaster, a streamer, or a voice-over artist, choosing the right microphone can elevate your content and boost your confidence behind the mic.
Are Microphone Choices Really That Important?
Absolutely. Think about it: your voice is your brand. A poor-quality mic can turn listeners away, no matter how great your content is. I learned this the hard way when I initially relied on a cheap USB mic. The clarity was lacking, and background noise was everywhere. It wasn’t until I upgraded to a dedicated XLR setup that my voice finally sounded professional. Mistakes like neglecting proper microphone placement or choosing the wrong type can sabotage your efforts from the start. Want to avoid my pitfalls? I’ll walk you through the essentials to pick the perfect mic for your needs, with tips and reviews that will save you time and money.
If you’re wondering whether investing in the right microphone is worth it, I get it. It’s a significant step, and not everyone knows where to begin. That’s why I’ve compiled this comprehensive guide—covering everything from XLR to USB and shotgun microphones—to help you make an informed decision. Ready to upgrade your audio game? Let’s dive into the details and find the perfect mic setup for you.
Determine Your Primary Recording Environment
Before choosing a microphone, assess where you’ll be recording most often. Is it a quiet home studio, a noisy outdoor location, or a professional studio? For home setups with minimal background noise, a USB mic like the top USB shotgun mics can be perfect. If you need flexibility and professional sound, consider an XLR setup, but make sure your environment supports soundproofing or acoustic treatment.
Select the Microphone Type Based on Your Needs
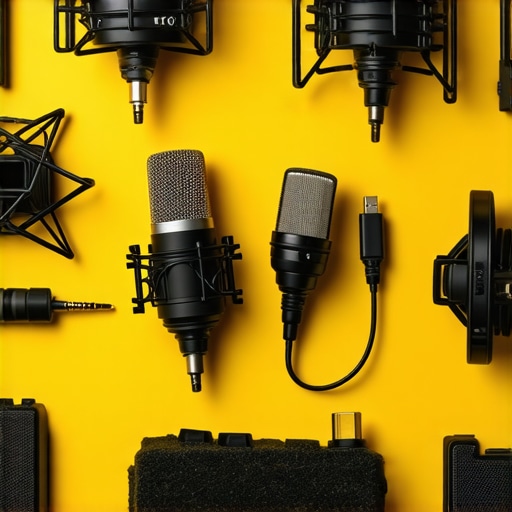
XLR Microphones
XLR mics are like the high-performance sports cars of audio gear. They require an audio interface or mixer but offer superior sound quality and expandability. I once upgraded to an XLR microphone setup for my podcast, and the clarity difference was night and day. The key is to choose a reputable model, such as the Shure SM7B or Rode Procaster, and pair it with a quality audio interface. Proper placement—aiming the mic towards your mouth at about 6 inches—maximizes clarity and minimizes background noise.
USB Microphones
USB mics are like the automatic transmission cars—easy to use and quick to set up. They connect directly to your computer, making them ideal for beginners or quick setups. For instance, I used a top USB shotgun mic for a quick recording session, and it sounded surprisingly professional with minimal fuss. Position the mic close to your mouth, and use a pop filter to reduce plosives. This setup is perfect for streamers who want quality without the hassle.
Shotgun Microphones
Shotgun mics are directional, capturing sound from a specific area while rejecting background noise—think of them as the sniper rifles of mics. They’re excellent for outdoor recording or situations with lots of ambient sound. I tested a top shotgun mic during a live outdoor podcast, and the clear voice focus made a huge difference. Mount them on a boom arm or camera rig, and aim directly at the speaker’s mouth for best results.
Understand Connectivity and Compatibility
Match your microphone with your recording device. USB mics are plug-and-play, compatible with most computers. XLR mics require an audio interface, which acts as a bridge to your computer. Ensure your interface has the right inputs and outputs; for example, if you choose an XLR mic, review options like the best XLR interfaces for 2025.
Test and Fine-Tune Your Setup
Once you’ve selected the right microphone, test your setup. Record yourself speaking at different distances and angles to find the sweet spot. Use a sound editing tool to analyze your recordings, and make adjustments to mic placement or gain levels. Remember, even the best mic can sound terrible if placed improperly, so experiment with positioning until your voice sounds natural and clear.
In my own experience, I once spent hours fine-tuning my XLR setup, swapping out cables and repositioning the mic until I achieved a warm, professional tone. It paid off—listeners noticed the difference, and my confidence skyrocketed. To ensure you get the most out of your gear, check out detailed reviews and setup tips at this resource.

Many content creators assume that simply spending more on a microphone guarantees professional quality. However, this is a common misconception. In my experience, the real challenge lies in understanding the nuances of microphone technology and how they align with your specific recording environment and needs. For instance, a high-end XLR microphone like the Shure SM7B can deliver superb sound, but only if paired with a quality audio interface and proper placement. Without these, even the most expensive mic can sound subpar. One of the most overlooked aspects is the importance of acoustic treatment and microphone placement, which can make or break your audio quality—regardless of the mic’s price tag. According to audio engineer Dave Rat, “Proper placement and room acoustics are often more critical than the choice of microphone itself.”
Are You Falling for the ‘More Expensive Means Better’ Myth?
It’s tempting to believe that a pricier microphone will automatically improve your sound, but this isn’t always true. For example, some budget-friendly USB mics like the top USB shotgun mics can outperform expensive models in certain environments due to their directional capabilities and ease of use. The key is matching the microphone to your environment and workflow, not just the price. Also, many creators overlook the importance of proper gain staging and editing, which can significantly elevate even modest setups. Studies show that post-production and editing often have a greater impact on final sound quality than the mic itself. So, investing in skills and knowledge is just as vital as choosing the right gear. Don’t fall into the trap of thinking that gear alone will make your audio perfect. It’s a combination of the right microphone, environment, placement, and post-processing that truly creates professional results. To deepen your understanding, check out my detailed guide on XLR setup tips and avoid costly mistakes. Have you ever fallen into this trap? Let me know in the comments.
Maintaining your microphone setup over time is crucial to ensure consistently high-quality audio production. Regular upkeep prevents unexpected failures and extends the lifespan of your equipment. One of my go-to tools for routine maintenance is a high-quality cleaning kit, which includes compressed air, microfiber cloths, and gentle electronics cleaning solutions. I use these to carefully remove dust and debris from the microphone grille and connectors, preventing buildup that can degrade sound quality. A quick weekly wipe-down of your gear keeps everything functioning smoothly and avoids the accumulation of dirt that could cause static or dropout issues.
Another essential aspect is checking your cabling and connections regularly. Over time, cables can wear out or develop microfractures, leading to intermittent audio or complete failure. I personally replace XLR cables every 12-18 months, even if they seem fine, because hidden internal damage can silently impair your sound. When replacing, I opt for well-reviewed brands like Mogami or Canare, which offer durability and consistent signal transfer. For USB microphones, ensure the ports and cables are free of dust and secure, reducing the risk of disconnections during recordings.
Software maintenance is equally important. I recommend using a dedicated audio interface driver updater—like the ones provided by manufacturers such as Focusrite or PreSonus—to ensure compatibility with the latest operating system updates. Outdated drivers can cause latency issues or crashes, which ruin your recording session. Additionally, regular calibration of your microphone gain settings prevents clipping and distortion. I set a baseline gain level and avoid adjusting it unless necessary, using my digital audio workstation’s meters to monitor input levels continuously.
Long-term results depend on consistent upkeep and being proactive about replacing worn parts. Invest in quality cables, keep your microphone and accessories clean, and stay updated with the latest firmware and driver updates. A proactive approach minimizes downtime and ensures your recordings always sound professional. Looking ahead, I predict that AI-driven diagnostic tools will become more integrated into audio gear, offering real-time health checks and maintenance suggestions—making upkeep even easier.
How do I maintain my microphone and setup over time?
To keep your microphone working flawlessly, schedule regular inspections—monthly if you’re a heavy user, quarterly for occasional recording. Use specialized cleaning tools, replace cables proactively, and keep your software drivers up to date. Also, consider environmental factors; keeping your recording space at a stable temperature and humidity level can prevent corrosion and damage. For instance, I keep my gear in a climate-controlled cabinet, which has extended the life of my microphones and accessories significantly. Additionally, I recommend creating a maintenance checklist that includes cleaning, connection checks, and software updates—sticking to this routine helps catch issues early and keeps your setup performing at its best.
For more detailed maintenance routines tailored to different microphone types, check out my guide on XLR microphone maintenance. Implementing these practices today will save you time and money down the line, ensuring your voice remains clear and professional no matter how long you’ve been creating content.

The Hardest Lesson I Learned About Microphone Choices
One of the toughest realizations I encountered was realizing that investing in an expensive microphone isn’t a magic fix. The real magic happens when you understand how to optimize placement, acoustic treatment, and post-processing. I used to chase the latest gear, thinking that price equated to quality, but I was wrong. It’s the nuanced understanding of your environment and proper setup that truly elevates your sound.
3 Myths About Microphones That Held Me Back
Firstly, the myth that only high-end gear can produce professional sound. Many budget-friendly options, like certain USB shotgun mics, outperform expensive models when used correctly. Secondly, the idea that a better microphone can fix poor acoustics—without room treatment, even the best mic will struggle. Thirdly, the misconception that once you buy a mic, your work is done. Regular maintenance, placement adjustments, and learning editing techniques are essential for sustained quality.
What Experts Won’t Tell You About Maintaining Your Microphone in 2025
Most creators overlook that regular cleaning and connection checks extend their gear’s lifespan and preserve sound quality. Simple routines like replacing cables proactively and updating drivers can prevent costly failures. I found that keeping my environment climate-controlled helps avoid corrosion and static issues, which can silently degrade performance over time. These small, often overlooked steps can make a huge difference in your long-term success.
My Essential Toolkit for Voice Recording and Content Creation
For my setup, I trust the XLR microphone and interface combo because it offers unmatched clarity and expandability. The best USB shotgun mics provide quick, high-quality results for on-the-go recordings. I also rely on top podcast microphones for their ease of use and consistent performance. These tools have transformed my workflow and output.
Your Turn to Try: Elevate Your Microphone Game in 2025
Remember, mastering your microphone setup isn’t just about gear—it’s about understanding your environment, regular maintenance, and continuous learning. Don’t be afraid to experiment with placement, try new tools, or refine your environment. Your voice has the power to connect, inform, and inspire—equip it with the best possible sound. Are you ready to take your audio quality to the next level? Share your experiences or questions below and let’s grow together!
One response to “Ultimate Guide to Podcast & Streaming Microphones: XLR, USB & Shotgun 2025”
This post really hit home for me because I’ve definitely fallen into the trap of thinking that buying the most expensive mic would automatically solve all my audio issues. Like many creators, I often overlook the importance of proper mic placement and room acoustics, which can be just as critical. I upgraded to a decent XLR microphone a few months ago, and the difference was night and day after I took the time to learn about optimal positioning and acoustic treatment. It’s fascinating how much of an impact small adjustments can have on sound quality. I’m curious—what are some of the most common mistakes people make with microphone placement, and how can beginners avoid them without a lot of trial and error? Would love to hear more practical tips from others who’ve refined their setup!
About Me

Chesung Subba
Author/Writer
Hello, I'm Chesung Subba, a passionate writer who loves sharing ideas, stories, and experiences to inspire, inform, and connect with readers through meaningful content.
Follow Me
Connect with me and be part of my social media community.
Leave a Reply