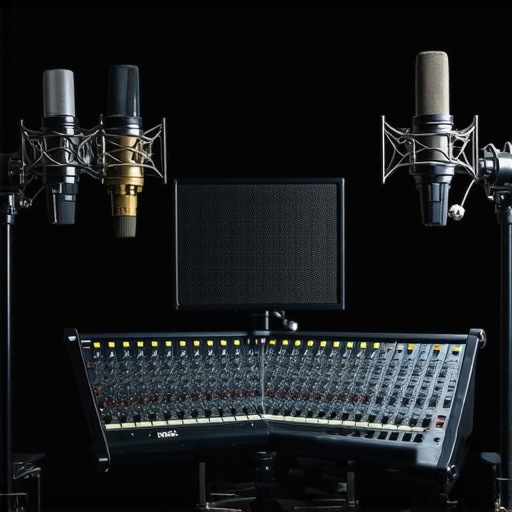
Top Shotgun Microphones & Voice Recording Gear for Creators in 2025
Ever had that sinking feeling when you hit record, only to realize your voice sounds muffled, distant, or just plain bad? I remember the first time I tried recording a podcast episode with a cheap USB mic. The sound was so poor that I almost gave up on the idea altogether. It was a frustrating experience that taught me a vital lesson: your equipment can make or break your content, especially in 2025, where audience expectations for crystal-clear audio are higher than ever.
Why Voice Clarity Can Make or Break Your Content
In today’s crowded creator landscape, standing out isn’t just about the content itself but how it sounds. Viewers and listeners crave immersive, professional-quality audio. According to a recent report by Creator Rig Reviews, creators who invest in quality voice recording gear see a significant boost in engagement and growth. That lightbulb moment hit me hard—if I wanted my audience to keep coming back, I needed to upgrade my gear.
But with the flood of options—USB mics, XLR setups, shotgun microphones—how do you choose? And more importantly, how do you avoid the common pitfalls that can sabotage your sound quality? That’s what I’ll help you figure out today. We’ll explore the best equipment for 2025, plus tips to get your voice sounding professional without breaking the bank.
Is All the Hype About Microphones Just Noise?
I’ll admit, I fell for the hype early on. I bought a fancy shotgun mic that looked great but turned out to pick up a ton of background noise—wasted money. The mistake? I didn’t consider my recording environment or the specific mic’s pattern and clarity. Trust me, not all mics are created equal, and what works for one creator might not suit another. For a deeper dive into gear that actually improves voice clarity, check out this guide on shotgun microphones.
If you’ve faced similar frustrations or are just starting out and feeling overwhelmed, don’t worry. The good news is, with the right knowledge, you can avoid costly mistakes and get your voice sounding amazing. Let’s get into the practical steps you need to take to elevate your audio game for 2025 and beyond.
Choose the Right Microphone for Your Setup
Start by selecting a microphone that matches your recording environment and budget. For beginners or those working in noisy spaces, a USB microphone with a cardioid pattern, like the best USB mics for creators, can be a game-changer. These mics are plug-and-play, easy to set up, and deliver decent quality without fuss. If you want more control and professional sound, consider an XLR microphone, which requires an audio interface but offers superior clarity. To find the perfect fit, check out the top microphone tips for creators.
Understand Microphone Patterns and Their Roles
Microphone pattern determines how much sound it captures and from where. Cardioid mics pick up sound primarily from the front, minimizing background noise—ideal for voice recording. Shotgun microphones, with their highly directional pattern, excel at isolating your voice even in noisy environments, making them perfect for on-the-go recording or outdoor podcasts. XLR mics often come with switchable patterns, giving you versatility. When choosing, consider your environment and goals. For detailed comparisons, review the best shotgun and XLR mics.
Optimize Your Recording Environment
Even the best microphone can’t save a bad environment. Use soft materials like foam panels, carpets, and curtains to dampen echo and reduce background noise. Position yourself at least 6-12 inches away from the mic to avoid plosives and sibilance—use a pop filter for added protection. During my first attempt, I neglected environment and ended up with muffled sound due to echo. After setting up a simple DIY sound booth, my voice became clearer and more professional. For more tips, explore the ultimate guide to voice recording.
Set Up Your Microphone Correctly
Proper positioning is crucial. Keep the mic at mouth level, about 2-6 inches away, and slightly off-axis to minimize sibilance. Use a boom arm or stand to keep the mic steady and consistent. Adjust gain so your voice peaks around -6dB to -3dB without clipping. In my early days, I recorded too close and caused popping sounds; after moving the mic back and adding a pop filter, my recordings improved significantly. For detailed setup instructions, visit the voice microphone setup guide.
Leverage Post-Processing to Enhance Clarity
Even with optimal setup, some noise or uneven frequency response may remain. Use editing software to equalize your voice, reduce background noise, and add gentle compression. These steps ensure your voice sounds consistent and professional. I once recorded in a rush and had uneven volume levels; post-processing cleaned it up and made it sound polished. For recommended tools and techniques, see the ultimate voice recording tips.
Test and Iterate for Best Results
Always record test clips, listen critically, and adjust your setup accordingly. Small tweaks—like moving the mic slightly closer or changing the environment—can make a big difference. I learned this the hard way when I thought my setup was perfect, only to realize subtle changes improved clarity. Regular testing keeps your sound sharp and your audience engaged.
Many creators believe that simply choosing the most expensive microphone guarantees professional sound quality. However, this is a misconception that can lead you astray. In reality, most people overlook the importance of environment, placement, and post-processing, which are equally critical. For example, an XLR mic like the top shotgun microphone can sound terrible if not properly set up or if recorded in a noisy room. The myth that expensive gear alone solves all issues is widespread but false. Focus on your setup, environment, and technique to truly elevate your voice recording quality.
Another common trap is relying solely on the microphone pattern without considering your environment. Many creators think that a cardioid mic will automatically block out all background noise. In practice, if you’re in a cluttered or echo-prone space, even the best cardioid mic won’t deliver clear results. Proper acoustic treatment and positioning are essential. For instance, using soft materials like foam panels or a makeshift sound booth can dramatically improve clarity. The real secret is in combining good gear with a well-managed space, not just the gear itself.
Now, let’s tackle a question more advanced than beginners usually consider:
Why does mic placement matter even with high-quality equipment?
In my experience, mic placement can make or break your recording, regardless of the mic’s quality. Slight differences in distance or angle can cause significant changes in sound, including unwanted plosives or sibilance. This nuance is often overlooked but is crucial for achieving a broadcast-quality voice. According to audio experts, optimizing placement can reduce post-processing time and enhance clarity, making your recordings more professional. Take time to experiment with different positions—sometimes, moving your mic a few inches can create a noticeable difference. For detailed tips on setup, explore the ultimate setup guide.
Finally, many creators underestimate the importance of consistent gain and proper post-processing. Overloading your mic with gain or neglecting noise reduction can introduce artifacts that diminish quality. The subtle art of balancing input levels and applying gentle EQ and compression is what transforms a decent recording into a polished broadcast. According to industry experts, mastering these techniques is often more impactful than upgrading to a more expensive mic. Remember, even the best gear needs proper handling and editing—don’t fall into the trap of thinking equipment alone will do the job. Have you ever fallen into this trap? Let me know in the comments.
Maintaining your microphone setup over time is crucial to ensure consistent, professional-quality recordings. As technology advances, so do the tools and methods for keeping your gear performing at its best. Regular upkeep not only prolongs the lifespan of your equipment but also helps you avoid unexpected issues that can derail your recording sessions.
How do I maintain my microphone and tools over time?
First, always keep your microphones clean. Dust, dirt, and moisture can affect sound quality and damage sensitive components. Use a soft, lint-free cloth to wipe the mic’s grille and body after each session. For XLR and shotgun mics, check the connectors and cables periodically for wear and tear, replacing any frayed or damaged parts to prevent signal loss or noise issues. I personally prefer using a contact cleaner like DeoxIT for connectors—it’s a game-changer for maintaining clean, reliable connections. This guide on microphone tips offers detailed advice on keeping your gear in prime condition.
Next, inspect your accessories. Pop filters, foam windshields, and shock mounts are often overlooked but play a vital role in your sound quality. Regularly clean or replace these components to prevent buildup of dirt and ensure they function properly. This simple step can significantly improve your recordings, especially if you’re using a shotgun mic outdoors or in uncontrolled environments.
Software updates are another critical aspect of maintenance. Keep your recording and editing software current to benefit from bug fixes, new features, and improved compatibility with your hardware. Staying up-to-date ensures you leverage the latest tools for noise reduction, equalization, and compression, which are essential for maintaining high clarity over time.
Additionally, calibrate your setup periodically. This involves testing your microphone’s frequency response and adjusting your environment or settings accordingly. For example, if you notice your voice sounds dull or overly bright, tweak your EQ settings or reposition your mic. Regular calibration helps you catch issues early before they become ingrained habits or permanent problems.
Finally, consider investing in a dedicated audio interface or preamp that includes built-in protections and quality components. These devices not only improve sound but also shield your gear from power surges and electrical noise, ensuring longevity. As the trend in 2025 points toward more integrated, intelligent audio solutions, choosing reliable, future-proof tools now will pay dividends later.
Remember, consistent, small maintenance routines are more effective than sporadic deep cleans. Make it a habit to review your gear after each recording session, and you’ll keep your voice sounding clear and professional for the long haul. Don’t forget to explore this resource for more expert advice on maintaining your voice recording tools. Try implementing a routine check every few weeks, and you’ll notice your recordings stay consistently crisp and clear—setting you apart in 2025 and beyond.
Reflecting on my journey, the most unexpected lesson was realizing that even with the latest gear, poor mic placement or environment can sabotage your voice quality. I once upgraded to a top-tier shotgun mic, only to find my recordings still lacked clarity until I adjusted the position and treated my space. It taught me that gear alone isn’t enough—technique and environment matter just as much, if not more. Another insight was discovering how critical regular maintenance is; neglecting simple steps like cleaning connectors or updating software can lead to subtle but damaging issues over time. Lastly, I learned that post-processing, while powerful, can’t fix everything—getting it right during recording saves time and preserves natural warmth and clarity. These lessons emphasized that mastering voice clarity is a continuous balance between choosing the right tools, setting them up properly, and maintaining them diligently.
2 responses to “Top Shotgun Microphones & Voice Recording Gear for Creators in 2025”
This article really hit home for me, especially the part about environment affecting sound quality. I recently upgraded to a high-quality shotgun mic but found that my recordings still sounded muffled and distant. After some trial and error, I realized my room was causing a lot of echo, which the mic couldn’t completely block out. Adding foam panels and positioning my mic closer made a huge difference. It’s a reminder that even pinpointing the best equipment isn’t enough—you need to consider acoustics and placement carefully. I’m curious, what are some affordable DIY solutions others have used to treat their recording spaces effectively? It seems like proper environment setup is just as crucial as choosing the right mic, especially for creators working from small or shared spaces.
This post really sheds light on the importance of environment and mic placement, which I think often gets overlooked in favor of just upgrading gear. I’ve learned from my own experience that even a high-end microphone can fall flat if it’s not positioned correctly or if the room isn’t treated acoustically. I started using DIY solutions like hanging blankets and creating a makeshift vocal booth with cardboard and foam to dampen echoes; surprisingly, these affordable fixes made a huge difference in my recordings. On top of that, experimenting with mic angles and distances helped me find that sweet spot for clarity. It’s interesting to see how much subtle adjustments can elevate audio quality without breaking the bank. For those working in shared spaces or small rooms, what creative DIY techniques have you found effective for acoustic treatment? I’m curious if others have found clever ways to optimize their environment on a budget.
About Me

Chesung Subba
Author/Writer
Hello, I'm Chesung Subba, a passionate writer who loves sharing ideas, stories, and experiences to inspire, inform, and connect with readers through meaningful content.
Follow Me
Connect with me and be part of my social media community.
Leave a Reply