Top Microphone Tips for Creators: Best USB, Shotgun & XLR Microphones 2025
Ever spent hours recording your latest podcast or YouTube video, only to be disappointed by the muffled sound or background noise that sneaks in? I’ve been there. One moment, I thought my setup was fine, and the next, I realized my voice sounded distant and unprofessional. That lightbulb moment hit hard—better gear isn’t enough if you don’t know how to use it properly. And let’s be honest, with the flood of options out there—USB, shotgun, XLR—it’s easy to get overwhelmed and buy the wrong mic, or worse, skip the crucial setup tips that make all the difference.
Why Picking the Right Microphone Matters More Than Ever in 2025
In 2025, the quality of your voice recording can make or break your content’s success. Whether you’re streaming, podcasting, or creating videos, your audience expects crystal-clear sound that pulls them in. It’s no longer enough to just have a decent microphone; you need the right one for your environment and the right tips to maximize its potential. According to a recent study, poor audio quality can cause viewers to click away in seconds—over 70% of viewers say they’re more likely to watch content with clear sound, even if the video isn’t perfect. That’s a game-changer.
My early mistake was thinking that just plugging in a mic would improve my audio. Turns out, I overlooked simple things like positioning, room acoustics, and gain settings. I ended up with muffled recordings and excessive background noise, which honestly hurt my credibility. That’s when I started digging into the best practices—learning everything from proper mic placement to choosing the right type for my needs. And trust me, the difference is night and day.
In this post, I’ll guide you through the top microphone tips for 2025, so you can avoid my rookie mistakes and get professional-quality sound. We’ll explore the best USB mics for ease and affordability, shotgun mics for outdoor or studio use, and XLR mics for ultimate control. Ready to upgrade your voice game? Let’s dive in and make your content sound as good as it looks.
Is High-End Equipment Really Worth the Investment?
Honestly, I was skeptical about spending big on microphones early on. I wondered if a mid-range model could do the job just as well. Turns out, the real secret isn’t just the gear but how you use it. I learned this the hard way—assuming that fancy equipment alone would fix poor technique. A mistake I made was neglecting proper mic placement, which even the most expensive mic can’t fix. For a detailed review of the best options for your setup, check out this guide to the best USB microphones for creators in 2025.
Now, I focus on pairing the right mic with good habits. Whether you’re considering a versatile shotgun microphone for outdoor shoots or a simple USB mic for beginner streamers, knowing what to look for and how to set it up will make all the difference.
Ready to stop guessing and start sounding professional? In the next sections, I’ll share proven tips and tricks that have transformed my recordings—and can do the same for you. Whether you’re a newbie or a seasoned creator, these insights will help you get the best voice quality possible in 2025.
Position Your Microphone for Clarity
Start by placing your microphone at mouth level, about 6 to 12 inches away. Use a comfortable distance to avoid plosive sounds or muffling your voice. I once recorded a podcast with the mic too close, causing harsh pops; moving it back a few inches improved clarity instantly. Think of it like tuning a guitar string—small adjustments make a big difference.
Optimize Room Acoustics and Reduce Noise
Sound quality heavily depends on your environment. Use soft materials like foam panels, blankets, or even pillows to minimize echo and background noise. I once set up in a cluttered room, and my recordings sounded hollow. After adding some DIY acoustic treatment, my voice became much warmer and professional. Place your mic away from noisy appliances or open windows for cleaner sound.
Use Proper Gain Settings and Levels
Adjust your microphone gain so your voice peaks around -6 dB to -3 dB on your recording software. Too high, and you risk distortion; too low, and your voice gets lost in the mix. I learned this by monitoring my levels during a live session, noticing distortion when gain was set too high. Always test with your typical speaking volume before recording fully.
Leverage the Right Microphone Type for Your Needs
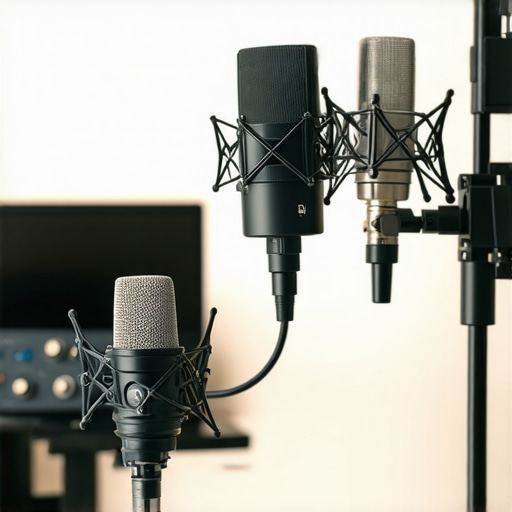
Choosing between USB, shotgun, and XLR microphones depends on your setup and environment. For simple home studios, a solid USB mic offers plug-and-play convenience. Outdoors or in noisy environments, shotgun mics focus on your voice and reject ambient sounds. For maximum control and quality, XLR mics paired with an audio interface are ideal.
Experiment and Fine-Tune Your Setup
Don’t settle for initial placement. Use headphones to monitor your recordings in real-time, adjusting position and settings until you get the desired sound. I once spent an hour experimenting with mic angle and found that tilting the mic slightly upward reduced plosives without sacrificing warmth. Think of it as a musical instrument—small tweaks create the perfect tone.
Keep Your Equipment Clean and Well-Maintained
Dust and moisture can degrade mic quality over time. Regularly clean your mic grille with a soft cloth and store it in a dry place. I learned this the hard way when my old condenser mic started picking up static noise, which was resolved after a thorough cleaning. Proper maintenance ensures your gear performs at its best for years.
By applying these concrete steps—positioning correctly, optimizing your environment, adjusting levels, selecting the right mic, fine-tuning through testing, and maintaining your equipment—you’ll unlock the full potential of your microphone. This approach transforms good recordings into professional-quality content that stands out in 2025’s crowded creator landscape.
Many content creators believe that investing in the most expensive microphone guarantees professional sound quality. While high-end gear can be beneficial, this is a dangerous misconception. In my experience, most people overlook the crucial nuances that truly impact audio clarity. For example, the common myth that simply buying a fancy microphone will solve all sound issues ignores the importance of proper setup, environment, and technique. This misconception often leads creators to spend thousands on equipment that doesn’t deliver the expected results, especially if they neglect foundational practices like mic placement and room acoustics.
One of the biggest traps to avoid is the idea that more expensive always means better. The reality is, a budget-friendly microphone paired with proper positioning, gain control, and acoustic treatment can outperform a costly mic used poorly. For instance, I once upgraded to a premium XLR microphone, but my recordings still sounded muffled until I adjusted my mic angle and reduced background noise. It’s about knowing how to optimize your gear rather than just owning the best equipment. For detailed recommendations tailored to your setup, check out this guide on the best USB microphones for creators in 2025.
Is There a Hidden Advantage of Using Higher-End Microphones?
Absolutely. Higher-end microphones often have better components and more refined capsules, which can capture subtle vocal nuances and reduce noise floor. However, the real advantage lies in your technique. A common mistake is assuming that an expensive mic will fix poor technique. Instead, focus on proper placement—about 6 to 12 inches from your mouth—and avoid plosive sounds by using a pop filter. Even the best microphone won’t compensate for bad habits. According to audio expert Bob Katz, mastering mic technique is more impactful than the gear itself, especially in professional settings.
Another nuance often missed is the importance of monitoring your audio in real-time. Using headphones and adjusting gain levels during recording can prevent distortion and ensure clarity. This advanced approach is sometimes overlooked by beginners but is vital for achieving that polished sound. For insights into optimal setup practices, visit top voice recording mic tips for creators.
Finally, don’t forget environmental factors. The myth that your room doesn’t matter is false. Even the best microphone will struggle in a noisy or echo-filled space. Investing in acoustic treatment or even simple DIY solutions like blankets and foam panels can dramatically improve your sound quality. Remember, sound quality is a combination of gear, technique, and environment. If you want to delve deeper into choosing the right microphone for your needs, explore this comprehensive guide on XLR mics.
So, next time you’re tempted to chase the latest gear, focus on refining your setup and technique first. Have you ever fallen into this trap? Let me know in the comments!
Once you’ve invested in quality equipment, the next step is ensuring it remains reliable and continues to deliver stellar audio. Regular maintenance, smart tool choices, and strategic upgrades will keep your microphone setup performing at its peak for years to come. In this section, I’ll share exactly how I keep my gear working flawlessly and recommend the tools I rely on to streamline this process.
How do I maintain my microphone gear over time?
Consistency is key. I start by cleaning my microphones regularly—gently wiping the grille with a soft, lint-free cloth to remove dust and moisture that can cause static or corrosion. For condenser mics, I use a small brush to clear any debris from the capsule. I also store my equipment in a climate-controlled environment, avoiding excessive humidity or temperature fluctuations that can damage sensitive components.
In terms of tools, I swear by a few essentials. First, a high-quality pop filter is indispensable—not only for reducing plosive sounds but also for protecting the mic capsule from saliva and dust. I prefer magnetic pop filters because they’re easy to attach and remove, keeping my workflow smooth. Second, an inexpensive but effective microfiber cloth helps me wipe down my gear quickly between sessions, preventing buildup that can affect sound quality.
For ongoing calibration, I use software like Reaper or Adobe Audition to monitor levels and noise floor regularly. These programs allow me to spot issues early—whether it’s a gain spike, background hum, or distortion—and address them before recording. Additionally, I run routine tests with reference audio samples to ensure my setup is consistent over time.
What are the best tools for keeping your microphone in check?
When it comes to tools, I highly recommend a dedicated USB audio interface or XLR preamp with a built-in level meter. These allow precise gain control and real-time monitoring—crucial for catching issues during recording. For physical maintenance, an ultrasonic cleaner can give your mic capsules a deep clean when needed, especially if you notice static or muffled sound after long-term use.
In the future, I see the trend moving toward smart microphones with integrated diagnostics and maintenance alerts, reducing manual upkeep and ensuring optimal performance at all times. For now, sticking with proven tools and routine checks keeps my setup reliable and my recordings crisp.
One advanced tip I encourage you to try today is implementing routine calibration checks using reference sound files. This simple step can reveal hidden problems early, saving you time and ensuring your audio remains professional. Don’t wait for issues to appear—be proactive about your gear’s health!
Maintaining your microphone setup isn’t glamorous, but it’s essential for long-term success. Regular cleaning, monitoring software, and quality tools form the backbone of a reliable recording environment. Invest a little time now, and your future self will thank you with consistently excellent sound quality.
Throughout my journey as a content creator, I’ve learned that even the most advanced microphone can’t save you from poor technique or setup. The real secret to professional-quality sound lies in the details—placement, environment, and consistent maintenance. These lessons aren’t just theory; they’re hard-earned insights that transformed my recordings from muffled and noisy to crisp and engaging. If you’re serious about elevating your voice in 2025, these insider tips will make all the difference.
The Hardest Lesson I Learned About Microphone Setup
I once believed that buying the best microphone was enough. It wasn’t until I experienced muffled recordings and background noise that I realized I’d overlooked the importance of proper positioning and room acoustics. The lightbulb moment? Small adjustments—like moving my mic a few inches or adding DIY acoustic panels—had a dramatic impact on clarity. This taught me that gear is only part of the equation; technique and environment are equally vital.
3 Myths About Microphones That Held Me Back
One common misconception I encountered was that expensive microphones automatically guarantee great sound. The truth? Even budget-friendly mics outperform expensive gear when used correctly. Another myth was that USB mics are inferior to XLR setups; in reality, a good USB mic paired with proper technique can rival professional studio gear. Lastly, I used to think that once set up, my mic didn’t need adjustments. Regular testing and fine-tuning are essential to maintain top quality.
What Experts Won’t Tell You About Maintaining Your Microphone
Maintaining your microphone isn’t glamorous, but it’s crucial. I learned the hard way that dust, moisture, and mishandling degrade mic quality over time. Simple habits like cleaning the grille regularly, storing gear in a dry environment, and using pop filters protect your investment. Monitoring levels with software and performing routine calibration checks can prevent issues before they become costly repairs. These small but vital practices keep your sound crisp and professional for years.
My Essential Toolkit for Voice Recording in 2025
Over the years, I’ve curated a set of tools that keep my recordings sharp. A high-quality pop filter is indispensable—not just for reducing plosives but also for safeguarding the mic capsule. I rely on a dedicated audio interface with level meters to control gain precisely. For acoustic treatment, DIY solutions like foam panels and blankets make a noticeable difference. And for cleaning, an ultrasonic mic cleaner has become my secret weapon for long-term reliability. These tools form the backbone of my reliable setup.
Keep Your Voice Clear — Your Turn to Shine
Achieving professional sound quality isn’t about owning the most expensive gear; it’s about mastering the fundamentals and maintaining your equipment diligently. With the right setup, consistent practices, and a bit of patience, you can make your voice stand out in 2025’s competitive landscape. Now, it’s your turn—what’s the one microphone tip you wish you’d learned sooner? Share your thoughts below and let’s grow together!
One response to “Top Microphone Tips for Creators: Best USB, Shotgun & XLR Microphones 2025”
Reading this post really resonates with my own experience as a beginner trying to improve my sound quality. I used to think just owning a decent mic was enough, but I quickly learned that setup and environment are just as crucial. The tips on mic positioning and room acoustics, especially, made a huge difference in my recordings. I’ve also found that investing in a good pop filter and monitoring my levels in real-time dramatically improved clarity.
One challenge I still face is balancing gain levels without introducing background noise. Have others found effective ways to calibrate gain especially in a less-than-ideal space? I’d be interested to hear how different creators handle this, especially those working in shared or multi-use rooms. Thanks for such an insightful guide; it’s helped me focus on the right areas to upgrade my setup without breaking the bank.
About Me

Chesung Subba
Author/Writer
Hello, I'm Chesung Subba, a passionate writer who loves sharing ideas, stories, and experiences to inspire, inform, and connect with readers through meaningful content.
Follow Me
Connect with me and be part of my social media community.
Leave a Reply