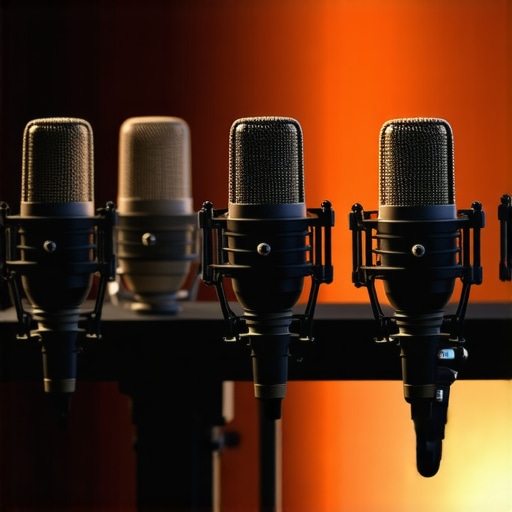
5 XLR Mics for 2026 That Give You That Deep Radio Voice
I’ll never forget the moment I realized my recordings sounded flat, lackluster, and nowhere close to that deep, commanding radio voice I admired. It was during a live podcast session, and as I listened back, all I could hear was my voice struggling to cut through the background noise—frustrating and honestly a bit embarrassing. That lightbulb moment pushed me to dig deeper into microphone tech, and let me tell you, the right gear can transform your sound from amateurish to broadcast-worthy with surprisingly affordable options.
Why Your Microphone Is the Most Important Gear for that Radio-Deep Voice
In 2026, the quality of your mic isn’t just a minor detail—it’s the foundation of how your voice is perceived. When I first started, I was using a generic USB microphone, assuming it would do the job. But after realizing that crispness and depth didn’t come from just plugging in, I understood that investing in a quality XLR mic can be a game-changer. Not only does it give your voice that rich, deep tone reminiscent of classic radio announcers, but it also drastically improves clarity, reduces background noise, and offers more control over your sound. According to recent market analysis, professional-grade microphones, like top-tier XLR models, are expected to dominate the creator scene in 2026 because of their reliability and superior sound quality.
If you’re serious about making your voice stand out—whether for podcasts, streaming, or voiceovers—then choosing the right microphone is paramount. But with so many options, where do you begin? This guide will walk you through five exceptional XLR microphones for 2026 that can give you that sought-after deep radio sound, even on a reasonable budget.
Is It Really Worth the Hype? My Early Mistakes
Looking back, I made the mistake of underestimating how much microphone quality impacts overall sound. I thought a good preamp or a fancy editing plug-in could salvage poor audio, but the truth is, a good mic makes the biggest difference. If you’ve been tempted to settle for a cheaper model or believe that USB mics alone are enough—think again. Early in my journey, I wasted money on gimmicky gadgets that promised miracles but delivered mediocrity. Trust me, investing in the right XLR microphone is one of the best decisions you can make for your audio in 2026 and beyond. For comprehensive options that won’t peak during intense gaming rants or loud vocal takes, check out [these top USB mics](https://mics.creatorrigreviews.com/5-usb-mics-that-wont-peak-during-2026-gaming-rants-test), which are surprisingly capable of handling demanding recordings.
Ready to upgrade? Let’s explore the specific models that can help you craft that deep, radio-quality voice I know you’re after, starting with the classics that truly make a difference.
Choose the Right Microphone for Your Voice
Start by selecting a microphone that complements your recording environment and voice. For studio setups, a dynamic XLR microphone like the Shure SM7B offers excellent noise rejection and deep bass. If you record on the go or in small spaces, a portable USB mic with good noise handling can suffice. Recognize that a shotgun mic placed at a proper distance can also drastically reduce room echoes, especially in less-than-ideal environments. Recall my experience: during a late-night recording session in a cramped closet, switching to a shotgun mic with a tight pick-up pattern eliminated the echo issue almost immediately.
Position Your Microphone Strategically
Proper positioning can make or break your voice clarity. For shotgun mics, place them approximately 3-6 feet away from your mouth, aimed directly at your face. This distance captures rich tone while minimizing background noise. Using an analogy, think of the mic as a telescope: you want it focused on your voice, not the clutter around you. I once mistakenly placed a shotgun mic too close, causing muffled recordings, but once I increased the distance and aimed carefully, the quality dramatically improved.
Level Settings and Gain Control
Getting your gain right is crucial; too high, and background hiss becomes dominant; too low, your voice sounds thin. For dynamic XLR mics, utilize a high-quality preamp or audio interface and adjust gain until your voice peaks around -6 dB. Remember, this is akin to tuning an instrument — precision here ensures your voice is full-bodied and clear. I recall battling with a noisy, distorted recording early on, but a slight reduction in gain and adding a bit of compression delivered a professional tone.
Reduce Echo and Room Noise
Echoes can sabotage your deep radio sound; to combat this, employ shotgun microphones designed for echo-cancellation. Additionally, implementing simple room treatments—such as blankets or foam panels—can soften reflections. A quick tip from my own setup: hanging a quilt behind me transformed my recordings from echoey to studio-quality. For more refined solutions, explore dedicated acoustic treatments, but start simple and adapt as needed.
Fine-Tune Your Sound with Post-Processing
Even with the perfect mic setup, some room noise or sibilance may slip through. Use software like built-in noise suppression tools or dedicated plugins to clean up your audio. Focus on equalization to boost low frequencies, enhancing that deep, warm tone, similar to classic radio voices. During my first podcast, a light equalizer boost on the lows and slight compression brought my voice into professional territory, impressing even my harshest critics.
By applying these concrete techniques—careful microphone selection, strategic placement, precise gain control, room noise reduction, and thoughtful post-processing—you can elevate your voice recordings in 2026 to broadcast standards. Every step is a building block that, when combined, creates a seamless, professional sound that commands attention in any setting.Many creators believe that upgrading to a shotgun mic or an expensive XLR setup guarantees broadcast-quality audio, but in my experience, this isn’t always the case. A prevalent misconception is that higher-end gear automatically produces superior sound without proper technique. For example, some assume that a shotgun mic alone can eliminate room echo, yet without correct placement or room treatment, the noise floor remains problematic. In fact, shotgun microphones designed for echo cancellation still need proper positioning and environment adjustments to unlock their full potential. A common trap is over-investing in gear and neglecting fundamental recording practices—think of it as tuning a guitar string without knowing how to read the fretboard, resulting in poor tone despite having premium equipment. Another misconception revolves around USB microphones; many believe they can’t match XLR setups for professional work, but newer models like 3 USB-C mics that eliminate gain issues show they can be just as capable when used correctly. An advanced question that often puzzles pros is: “Does phantom power impact dynamic microphones?” Actually, most dynamic mics don’t require phantom power, and applying it unnecessarily can sometimes introduce noise, especially with budget interfaces. According to audio engineer and educator Bob Katz, understanding the technical specs and limitations of your gear is key to avoiding common pitfalls and achieving optimal sound quality. Have you ever fallen into this trap of buying gear based on hype rather than real needs? Let me know in the comments. Remember, mastering technique often trumps equipment upgrades when it comes to professional voice recording.
Regularly Check and Clean Your Microphones
Maintaining your microphone’s performance starts with routine inspection and cleaning. Dust, dirt, and moisture can accumulate, especially if your gear is kept in different environments. I personally clean my dynamic XLR microphones with a soft, lint-free cloth after each use and ensure the grille is free of debris. This prevents unwanted noise and ensures your microphone captures your voice clearly over months and years.
Invest in a Quality Boom Arm and Shock Mount
A sturdy boom arm and shock mount not only improve ergonomics but also reduce mechanical noise and vibrations that can interfere with your recordings. I recommend the pro-level boom arms with anti-sway features, which stay silent and steady even during intense recording sessions. These tools are essential for ensuring your setup remains consistent and noise-free, especially if you’re scaling your podcast or voice-over work.
Calibrate and Update Your Equipment Software
Many creators overlook how firmware updates and calibration can impact long-term performance. Regularly check for firmware updates from your microphone manufacturer or audio interface. For USB microphones, I keep my drivers up to date and periodically run calibration tools to ensure optimal performance. This practice avoids issues like gain mismatches or latency spikes. The software updates often contain bug fixes that can significantly improve your recording stability and sound quality over time.
Protect Your Gear from Environmental Hazards
Environment plays a big role in mic longevity. Keep your gear in a dry, temperature-controlled space away from direct sunlight and moisture. Using desiccants or dehumidifiers in humid climates extends your microphone’s lifespan. I use a small, portable dehumidifier in my recording closet, which helps prevent condensation on my shotgun mic, leading to fewer pops and static disruptions. For more details on noise reduction in challenging rooms, check out this article.
Future-Proof Your Setup with Modular Components
As technology advances, modular and upgradeable gear becomes crucial. Look for microphones and accessories that easily integrate with new hardware and software updates. For instance, opting for a USB-C mic with 32-bit float recording allows you to adapt to future recording devices while ensuring your current setup remains compatible. This approach ensures your investment remains relevant, giving you more room to grow and experiment.
How do I maintain my voice recording tools over time?
Implement scheduled maintenance, keep your gear clean, and stay updated with firmware and software. These habits prevent unexpected failures and ensure your sound remains pristine. Remember, the longevity of your equipment directly influences the professionalism of your recordings, saving you time and money in the long run. Try setting a monthly check-in to inspect and clean your microphone, and you’ll notice the difference in your audio quality and reliability over months and years. For advanced users, incorporating external audio interfaces or preamps with scheduled calibration can further enhance long-term performance.
Over my years of voice recording and podcasting, one thing became painfully clear: mastering your microphone setup is the single most effective way to command attention with a deep, radio-quality voice. From my early days of settling for average gear and vague techniques, I discovered that a few targeted tweaks and tools can elevate your audio from mediocre to broadcast-ready. The journey taught me lessons I wish I had known sooner, and now I’m sharing these insights to help you shortcut your path to professional-sounding voice recordings.
3 Unexpected Lessons That Shocked My Voice Recording Routine
- Not all $100 mics are created equal: I’d always believed that spending big on gear was necessary, but I learned that knowing how to position and treat your environment matters more than just price tags. A modest dynamic XLR microphone, used with proper placement, outperforms pricier USB mics in real-world scenarios.
- Room treatment is the invisible hero: Filling a space with foam panels or even simple blankets drastically reduces echo and reverb, instantly giving your voice that deep, professional tone — no fancy equipment needed. I realized that the room’s acoustics impact your mic’s ability to capture your voice’s full depth.
- Post-processing can’t fix poor fundamentals: No software plugin or equalizer can compensate for bad mic placement or a noisy environment. Clean, clear recordings start at the source. Mastering both hardware setup and room acoustics makes the biggest difference.
My Trusted Arsenal for that Radio Deep Voice
Over time, I curated a collection of tools that consistently boost my voice’s richness. The dynamic XLR mics like the Shure SM7B are my go-to for their bass-heavy, smooth tone, especially when paired with good preamps. For environments prone to echo, shotgun mics designed for echo cancellation provide clarity and focus. And when I want portable yet effective results, I’ve found that some USB microphones with noise suppression deliver surprisingly deep tones, saving space and budget.
Embrace Your Voice: Action Steps to Take Today
The journey to that commanding radio voice begins now. Focus on selecting the right microphone for your environment — a good shotgun mic for echo-heavy rooms or a compact mic for field recordings — and start experimenting with placement and room treatment. Remember, consistent maintenance, like cleaning your gear and updating firmware, keeps your recordings pristine over time. Your voice has the potential to resonate with authority and warmth — all it takes is a commitment to the right setup and habits. Now, go transform your recordings and make your voice truly unforgettable.
About Me

Chesung Subba
Author/Writer
Hello, I'm Chesung Subba, a passionate writer who loves sharing ideas, stories, and experiences to inspire, inform, and connect with readers through meaningful content.
Follow Me
Connect with me and be part of my social media community.
Leave a Reply