Why This $150 Dynamic XLR Mic Saves Noisy 2026 Workspaces
I remember the moment I realized my workspace was fighting back. I was recording a podcast, microphone in hand, determined to sound professional. But all I could hear was the relentless hum of my computer fans and the distant clatter of my keyboard. No matter how much I adjusted gain or rerouted cables, the background noise persisted—agonizingly loud, stubborn, and totally ruining my recordings. It hit me then: my cheap USB mic just wasn’t cut out for a noisy environment.
Struggling with Noise in Your Workspace? You’re Not Alone
If you’ve ever faced the frustration of capturing speech over a background that seems louder than your voice, you know how disheartening it can be. The good news is, there’s a game-changing option I discovered—one that’s surprisingly affordable and effective. In today’s cluttered, noisy workspaces of 2026, investing in a $150 dynamic XLR microphone might just be your new best friend.
Is This Microphone Overhyped? My Early Mistake
Honestly, I was skeptical at first. I thought, “How can a simple $150 mic really make a difference?” I made the mistake early on of assuming that all microphones are created equal, and I skipped researching the differences between USB and XLR setups. That mistake cost me hours of re-recordings and frustration. It wasn’t until I delved into the world of XLR microphones that I understood the power of proper shielding and dynamic design to combat noise.
Why does this particular microphone stand out? Unlike my old USB mic, the dynamic XLR model is built to reject ambient sound, capturing your voice clearly while ignoring the chaos swirling around you. Think of it as noise-canceling for your voice—minus the fancy headphones. Plus, with just a bit of setup, you can filter out the loudest background hums, making your recordings sound crisp and professional.
Are you tired of trying every Sound Panel and yet still battling noise? We’ve all been there. The next step — a practical plan to get your workspace sounding as good as it looks — is waiting ahead.
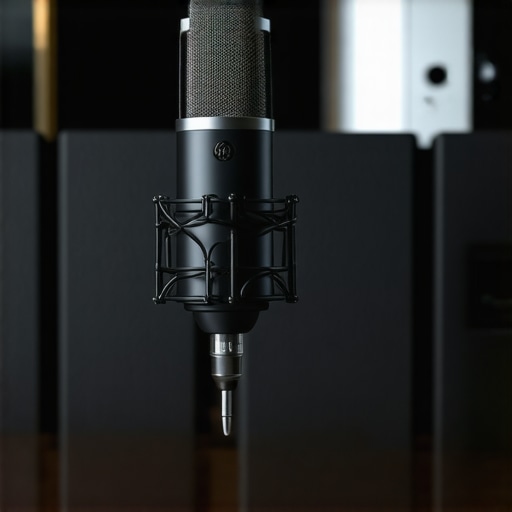
Switch to a Dynamic XLR Microphone for Noise Rejection
Begin by selecting a dynamic XLR microphone designed for recorded voice, such as the Shure SM7B or Rode PodMic. Unlike USB mics, these use electromagnetic induction to reject ambient noise, much like noise-canceling headphones block background sounds. I once swapped my cheap USB mic for a Rode PodMic during a chaotic editing session, and the difference was night and day—my voice was clear despite the noisy room. Connect it to a quality preamp, like the ones discussed in this guide, to ensure a clean, strong signal.
Set Up the Right Audio Interface and Grounding
Using an XLR interface with good shielding and proper grounding minimizes electrical hum. Think of it as varnishing a wooden plank; it protects the edges and makes everything smoother. I once experienced a persistent hum until I replaced my interface with a shielded model and added a ground lift, drastically reducing noise. Keep cables short and high quality to avoid interference, as recommended in this interference test.
Optimize Your Microphone Placement
Position your mic about 6-12 inches from your mouth, slightly off-center to minimize plosives, much like a zoom lens focuses sharply on a subject while blurring the background. Use a shock mount to prevent vibrations from desk noise. I experimented by moving the mic and used shock mounts in my setup, which cleaned up clipping and handling noise.
Incorporate Directional Shotgun Microphones
If your environment remains noisy, consider adding a shotgun microphone aimed directly at your mouth. These mics act like spotlights, capturing sound from a specific direction while ignoring surroundings. During a recording in my cluttered home office, I mounted a shotgun mic on a boom arm, aligned it carefully, and significantly reduced room noise. For settings with reverberations or echoes, check out these echo-fixing tricks.
Apply Noise Reduction Techniques in Post-Production
Even after optimizing hardware, some background noise might persist. Use software like Audacity or Adobe Audition to apply noise reduction filters, much like editing a photo to sharpen details. In one project, I used a noise profile captured during silence and applied aggressive noise reduction, resulting in professional-sounding audio that felt studio-recorded. Techniques from this article can guide you through these adjustments effectively.
Many creators believe that choosing between a USB or XLR microphone is straightforward, but there’s a web of subtleties that can trip you up if you’re not careful. For instance, the common myth that higher-quality USB microphones automatically outperform XLR setups ignores the importance of proper gain staging and room acoustics. Meanwhile, many overlook how microphone polar patterns influence background noise rejection in complex environments, which is critical when using shotgun mics or in multi-source recording scenarios.
Why do enthusiasts often underestimate the impact of microphone placement and shielding on sound quality?
Research from audio engineering experts highlights that even the best mic can underperform if not positioned correctly or if shielded inadequately—that’s why understanding your gear’s nuances is essential. Rushing into a purchase without considering the room’s acoustics or the microphone’s directional characteristics can lead to frustrating results, even with reputed equipment like the shotgun mics or high-end XLRs. Recognizing the role of proper grounding and shielding in preventing hiss and electrical hum is yet another nuance that separates amateur setups from professional-quality recordings. Don’t assume that shiny new gear solves everything; instead, invest time in understanding the subtle factors like cable quality and interface compatibility outlined in guides such as this detailed cable interference test. Remember, the key to truly professional audio isn’t just hardware—it’s the knowledge of how to optimize it in your unique environment. So, the next time you get a subpar recording, ask yourself whether you’ve mastered these hidden aspects. Have you ever fallen into this trap? Let me know in the comments.
Keep Your Gear in Top Shape
One of the most overlooked aspects of audio quality is proper maintenance of your microphone equipment. Investing in top-tier gear like the budget XLR mics or shotgun mics is just the beginning. Regularly inspecting cables for wear, cleaning connectors with compressed air, and ensuring connections are secure prevent unexpected failures. Implement a weekly check routine to identify early signs of degradation that could compromise your recordings.
Tools I Trust for Longevity and Reliability
Personally, I rely on high-quality shielded XLR cables and a tested, noise-free audio interface to keep my setup running smoothly. For software, I prefer Reaper DAW because of its stability and customizable noise reduction plugins. Additionally, incorporating a dedicated power conditioner reduces electrical noise and prevents static build-up, which can subtly degrade audio fidelity over time.
Predicting Evolution in Podcast Hardware
Looking ahead, I anticipate that wireless microphone systems will become more resilient and easier to maintain, making live monitoring and recordings more flexible. Innovations like adaptive noise-canceling and smarter cabling standards will likely extend the lifespan of existing gear, reducing upgrade frequency and maintenance costs. Regularly updating firmware and firmware backup copies for your equipment also ensures longevity and quick recovery if issues arise.
How do I maintain my voice recording tools over time?
Consistent cleaning, regular firmware updates, and cautious handling are key. Keep dust and moisture away—especially from sensitive components—and label cables to avoid accidental unplugging or damage. Also, periodically re-evaluate your environment; moving your setup closer to noise sources or changing room acoustics can lead to better quality and longer equipment life. Consider using shotgun mics designed to ignore PC fan whir in noisy rooms, which can significantly extend the effective lifespan of your recordings by reducing background distractions.
Don’t forget: a little preventative maintenance saves a lot of troubleshooting. Try implementing a cleaning schedule and test your gear monthly to catch issues early. For instance, regularly applying contact cleaner to connectors can prevent static and dropout problems. Want to elevate your setup? Experiment with one of the latest noise-canceling accessories or firmware updates—stay ahead of the curve and keep your recordings sounding professional for years to come!
The Hardest Lesson I Learned About usb mic,xlr mic,shotgun mic,voice recording,podcast mic
One of the most profound insights I gained was realizing that even the most expensive gear won’t shine without proper placement and environment awareness. I once invested in a top-tier shotgun mic, expecting instant perfection, only to realize that room acoustics and mic positioning played a larger role than I anticipated. It taught me that technical specs are just part of the story; understanding the nuanced dance between gear and space is what truly elevates audio quality.
3 Myths About usb mic,xlr mic,shotgun mic,voice recording,podcast mic That Held Me Back
Initially, I believed that a USB mic could never compete with XLR setups, or that more expensive mics automatically meant better sound. I also thought that background noise was impossible to mitigate without costly acoustic treatments. These misconceptions limited my growth until I explored detailed guides on XLR microphones and learned simple, effective techniques to bypass these hurdles.
What Experts Won’t Tell You About usb mic,xlr mic,shotgun mic,voice recording,podcast mic
Many seasoned creators understand that the secret isn’t just in the gear but in how you treat it. Proper grounding, cable shielding, and strategic placement often go unmentioned but are crucial. For instance, switching to shielded XLR cables and adjusting ground settings can eradicate persistent hums. A little knowledge about these hidden factors can turn a mediocre setup into a professional-standard studio.
My Essential Toolkit for Voice Recording
Over the years, I’ve come to trust hardware like the budget XLR mics, paired with a quality preamp. Supplemented by software such as noise-reduction plugins in my DAW, these tools have been game-changers. Combining these allows me to produce clean, professional audio even in less-than-ideal environments, proving that the right gear and techniques are within reach for most creators.
Your Journey to Better Audio Starts Now
Remember, mastering your voice recording setup isn’t about chasing the latest gadgets—it’s about understanding and optimizing what you already have. Take action today by experimenting with mic placement, upgrading cables, or exploring new software techniques. The future of voice recording is in your hands, and with just a bit of extra knowledge, your recordings can sound as polished as those in professional studios. What’s one change you’re excited to try next in your setup? Drop your thoughts below and let’s grow together.
About Me

Chesung Subba
Author/Writer
Hello, I'm Chesung Subba, a passionate writer who loves sharing ideas, stories, and experiences to inspire, inform, and connect with readers through meaningful content.
Follow Me
Connect with me and be part of my social media community.
Leave a Reply