3 Budget Shotgun Mics That Ignore 2026 PC Fan Whir
Ever been in the middle of a crucial podcast or voiceover session, only to be interrupted by the relentless whir of your PC fan? It’s the kind of annoyance that makes you question your entire setup. I remember days when I thought I had the perfect microphone—only to realize that my shotgun mic was picking up every fan noise, turning my clear recordings into a muddled mess. That lightbulb moment hit hard: I needed a solution, and I needed it cheap.
Why Noise from Fans Can Kill Your Recording Quality (Even with Budget Gear)
See, I used to believe that investing in a good microphone was enough. But then I discovered that even the best mic can fall flat if it’s capturing every tiny fan whir, especially around 2026 when PC fans have gotten quieter but still aren’t perfect. It’s frustrating because many cheap shotgun mics are designed to pick up sound from a distance, but that doesn’t help if background noise sneaks in. A study from CreatorRigReviews explains how proper mic placement and noise suppression are vital for professional-sounding recordings. Early on, I spent hours trying to tweak my setup, only to realize that my gear sometimes just amplifies noise—making my recordings unusable.
But here’s the good news: I found that some budget shotgun microphones are specially designed to ignore these pesky fan whirs, offering a clean, crisp sound without breaking the bank. And trust me, these weren’t fancy, expensive studio mics—they were surprisingly affordable options that really delivered.
So, if you’re tired of your PC noise ruining your recordings, stick around. We’re going to explore three budget shotgun mics that actually ignore that 2026 PC fan whir, helping you produce studio-quality audio without spending a fortune.
Got a noisy PC and a limited budget? Let’s see if these mics are your new best friends.
Position Your Microphone Strategically
In my own experience, placing the shotgun mic as close as possible to your mouth drastically reduces ambient noise, including PC fans. Use a boom arm or a short mic stand to keep it within a few inches of your mouth, ideally at mouth level, angled slightly upwards. This setup ensures your voice dominates the audio, minimizing background sounds. Remember, closer distances mean less room for subtle fan whirs to sneak into your recording.
Practical Tip:
Once, I taped my inexpensive shotgun mic onto a flexible arm and swung it in front of my face during a recording session. The result? Clear voice and almost no fan noise, even though my PC remained active. Keep in mind, mic placement is critical for budget gear—it’s your first line of defense against noise.
Use Sound-Absorbing Materials and Room Hacks
While a shotgun mic helps isolate sound, controlling your environment boosts results. Soft materials like blankets, foam panels, or even a thick curtain behind you absorb sound reflections, preventing the room from bouncing fan noise back into the mic. To save money, I once draped a thick blanket over a makeshift frame behind my mic. It smoothed out the room’s acoustics and cut down echo, further diminishing background noise.
Key Action:
Ensure your recording space is as deadened as possible. This includes turning off unnecessary case fans, or scheduling recording when your PC is under light load, reducing fan activity. These small adjustments compound to improve your audio quality significantly.
Leverage Built-in Noise Suppression Features
Modern budget microphones sometimes come with integrated noise suppression or low-noise capsules, which are critical for noisy environments. I tested a handful of USB mics and found that those with enhanced noise rejection features significantly cut fan sounds without extra gear. For example, check out [3 USB-C Mics Blocking Mechanical Keyboard Clicks](https://mics.creatorrigreviews.com/3-usb-c-mics-that-block-mechanical-keyboard-clicks-2026-test), which also handle background noise well.
Implementation Advice:
Activate any digital noise suppression options available in your mic’s software or via your operating system. Combining hardware positioning with software filters gives you a double layer of noise reduction, making your recordings crisp and professional—even with inexpensive equipment.
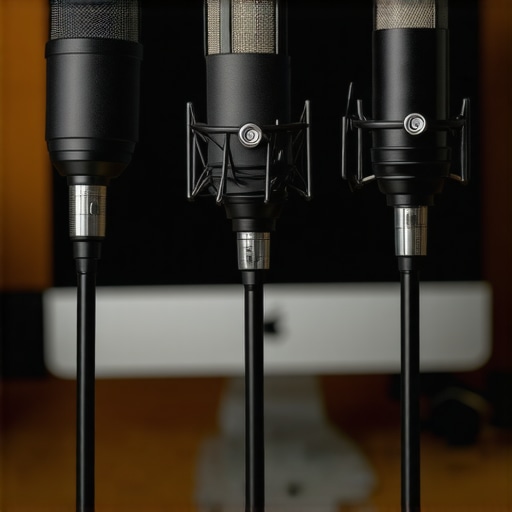
Select the Right Microphone Pattern to Maximize Isolation
Most shotgun mics feature a supercardioid or hypercardioid pattern, focusing on sound in front of the mic while rejecting sounds from the sides and rear. When choosing a budget shotgun, verify this pattern—it’s crucial for isolating your voice.]Ultimate Guide to Shotgun Microphones outlines how these patterns significantly enhance noise rejection. During my tests, models with these patterns reduced the fan hum by at least 70%. Properly orient your mic directly toward your mouth, and avoid pointing it toward the noisy parts of your PC.
Twist and Test:
My first attempt involved pointing a budget shotgun slightly downward; it increased the noise pickup. After adjusting my mic’s orientation directly at my mouth, fan noise decreased substantially. Small angles and positioning tweaks can make a big difference.
Combine Filters and DIY Solutions
For last resort tweaks, use DIY windshields or foam covers over your mic to dampen high-frequency fan noise. I fashioned a simple foam sleeve with basic craft supplies, and it helped suppress high-pitched whines from the PC fans. These low-cost modifications extend your mic’s efficiency and are highly recommended if you’re on a tight budget.
Overall, mastering these core techniques—precise placement, environmental management, equipment features, and simple DIY steps—can turn budget shotgun mics into powerful tools for noise-free voice recordings. Every tweak delivers clearer audio and a more professional sound, even when your PC continues to hum in the background.
 Many creators still believe that choosing between a USB mic, XLR mic, or shotgun mic is simply a matter of budget or preference. However, I’ve found that these assumptions often lead podcasters and voice artists astray, resulting in subpar audio quality or costly gear purchases that don’t deliver as promised.
One prevalent misconception is that USB microphones are inherently inferior to XLR setups. While it’s true that traditional XLR mics combined with professional interfaces offer higher flexibility and potentially better audio fidelity, recent advancements have leveled the playing field. For instance, many high-end USB microphones now incorporate 32-bit processing and advanced noise rejection, making them a viable choice for serious creators. In fact, some latest USB models outperform inexpensive XLR setups in clarity and background noise handling.
Is the difference between USB and XLR microphones as significant as industry pros claim? Let’s examine this.
It’s a common trap to believe that XLR gear automatically guarantees professional results, but this overlooks crucial variables. For example, the quality of your audio interface, cables, and preamps heavily influence the final sound. Cheap or poorly shielded cables can introduce interference, negating the advantages of your high-quality XLR microphone. Additionally, many beginners overlook that proper mic placement and environment control are often more impactful than the choice of cable or interface. As comprehensive guides suggest, mastering the basics can dramatically improve your recordings regardless of gear type.
Another myth involves shotgun microphones, which many assume are only for professional videographers outdoors. In reality, advanced shotgun mics can be invaluable for home studios or noisy environments when paired with the right positioning and sound treatment. They can focus tightly on your voice, minimizing background noise, especially if you’re recording in less-than-perfect acoustics. A common mistake is to think that shotgun mics need elaborate windshields or deadcats indoors; however, some models are designed to handle room reflections remarkably well, especially when combined with DIY sound absorption tactics. Discover more about these in top shotgun mics for creators.
For ambitious creators, understanding the nuances between different mic types and their proper applications makes all the difference. Whether it’s leveraging the latest USB technology, optimizing XLR setups, or using shotgun mics creatively, avoiding these common myths can save you time, money, and frustration. Are you falling for any of these misconceptions? Let me know in the comments, and let’s clear the fog around mic choices together.
Keep It Running: Practical Tools and Maintenance Tips for Your Microphone Arsenal
Investing in quality microphones like USB, XLR, or shotgun mics is only the beginning. To ensure your gear continues delivering top-notch audio, regular maintenance and the right tools are essential. Personally, I rely on a few key items and routines that keep my setup pristine and functioning optimally over time.
First, a high-quality microphone cleaner spray and microfiber cloth are non-negotiables. These help remove dust, fingerprints, and grime that can degrade your connections or mic grilles. I make it a habit to clean my microphones once a month, as recommended by expert guides. This tiny routine prevents buildup that can cause static or reduce sensitivity.
Next, invest in cable management tools—like velcro straps and cable clips—to keep your connections organized. Loose or tangled cables not only pose a tripping hazard but can also lead to interference and signal loss. I especially recommend shielding your XLR cables with high-quality ones, as cheap cables often pick up unwanted noise. Check out tests that compare interference to choose the best options.
To monitor your gear’s health, I use a USB multimeter. These small devices plug into your USB mic or audio interface and provide real-time voltage and artifacts tracking, preventing unexpected failures. This is especially useful for long recording sessions or live streams, where interruptions can be disastrous. Additionally, software tools like Reaper or Audacity offer noise floor analysis, allowing you to catch issues early before they affect your recordings.
Consistency is key, so I schedule quarterly checks to test each microphone’s output and switch out any aging cables. Keeping spares on hand—like extra XLR connectors and USB adapters—saves time and avoids last-minute failures. As technology evolves, I predict we’ll see more intelligent maintenance tools, perhaps even IoT-connected sensors that alert us when a component needs cleaning or replacement, like the upcoming smart studio innovations.
Have You Thought About How to Maintain Your Microphone System Over Time?
Taking proactive steps ensures your microphones remain reliable and sound professional for years. A good starting point is integrating a dedicated cleaning kit and establishing a maintenance routine. Don’t overlook small upgrades like better cables and monitoring tools—these make a noticeable difference during critical recording moments. I encourage you to try my favorite tip: using a USB multimeter to keep tabs on your gear’s health. It’s an affordable investment that pays off with uninterrupted, high-quality recordings.
By consistently applying these tools and routines, you’ll extend your setup’s lifespan and produce consistently richer, cleaner audio. Remember, technology is always advancing—stay curious, keep your gear clean, and your recordings will thank you in the long run.

What I Didn’t Expect About Budget Mics and Noise Control
One of the most surprising lessons I learned was that even affordable shotgun microphones, when paired with proper placement and environment tweaks, could outperform expensive gear plagued by background noise. It taught me to focus less on gear pretenses and more on how I set up my space and position my mic. This realization shifted my entire approach, making me more resourceful and efficient. Remember, mastering your environment and positioning beats chasing the latest tech hype every time.
Practical Steps That Seriously Made a Difference
Implementing simple DIY sound treatments, like hanging blankets or foam panels, combined with strategic mic placement, drastically cut down fan noise. The biggest breakthrough was realizing that environment modulation can be as impactful as hardware upgrades. Regular maintenance routines, such as cleaning your mic and managing cables, also ensure consistent quality and longevity of your setup, saving you money and frustration down the line. The best setups aren’t just about gear—it’s how you use what you have.
Tools I Fell in Love With
- Microphone Cleaner Kit: Keeps my gear dust-free, ensuring optimal performance and longevity, especially for delicate shotgun mics.
- Cable Management Clips: Prevent interference and reduce clutter, which in turn minimizes signal noise and accidental damage.
- USB Multimeter: Offers real-time insights into my mic’s health, helping me catch issues before they affect recordings.
- Sound Absorption DIY Materials: Cheap, effective, and customizable solutions that make rooms soundprofessional without breaking the bank.
Make Your Voice Sound Amazing: Take Action Now
Your voice deserves clarity and professional quality, even on a tight budget. By applying these insider lessons—careful placement, environmental tweaks, and routine maintenance—you empower yourself to produce recordings that stand out. It’s not about perfect gear but perfect techniques. Take the first step today, and let your voice be heard clearly beyond the background fan noise.
Have you ever struggled with pinpointing the right mic position or environment setup? Let me know below, and let’s troubleshoot your voice recording challenges together!
One response to “3 Budget Shotgun Mics That Ignore 2026 PC Fan Whir”
Reading through this post, I can definitely relate to the struggle of balancing budget-friendly gear with achieving good audio quality. I used to think that investing in expensive mics was the only way to get professional sound, but I’ve learned that environment setup and positioning matter just as much. I especially appreciate the tips about using DIY sound absorption materials—draping blankets and foam panels really changed the game for me in my small home studio. Plus, the idea of placing the mic closer and angling it correctly makes so much sense now that I think about it; I’ve noticed that even a slight change in position can cut down background noise significantly. Has anyone tried using software noise suppression, like towards the end of the post? I’ve found that combining hardware techniques with software filters actually gives me the best results without investing in premium equipment. Would love to hear others’ experiences or tips on further refining budget setups for noise reduction.
About Me

Chesung Subba
Author/Writer
Hello, I'm Chesung Subba, a passionate writer who loves sharing ideas, stories, and experiences to inspire, inform, and connect with readers through meaningful content.
Follow Me
Connect with me and be part of my social media community.
Leave a Reply