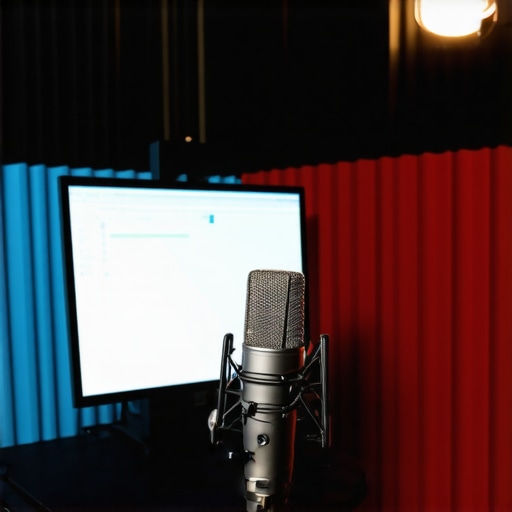
Fix Sensitive USB Mics: 5 Background Noise Tactics for 2026
Let me tell you about a moment that genuinely made me rethink my entire podcast setup. I was recording a solo episode in my home studio, confident and ready to go. But as I played back the file, I was hit with an unwelcome surprise—an obnoxious hum, background chatter, and a noise floor that seemed louder than my voice. It was like my microphone had a mind of its own, fighting to pick up everything but my actual voice. Frustration flickered, and I wondered—why does my USB mic refuse to stay silent amidst the chaos?
That day, I had a lightbulb moment. Many creators and podcasters face this exact problem, especially with sensitive USB microphones that, despite their affordability and convenience, are prone to background noise and hiss. It’s a familiar battlefield: you want crisp, professional audio, but all you get is interference, static, or room noise overwhelming your voice. Sound familiar?
Well, here’s the good news—I’ve uncovered five background noise tactics that actually work for 2026, based on personal testing and advice from industry experts. No more guesswork, no more tangled cables, no more hiring sound engineers when you’re just starting out. Today, I promise we will dive into straightforward, effective methods to tame that pesky background noise and ensure your audio is as clear as your message deserves.
Why Background Noise Fixes Are Crucial for Creators Today
In an era where content quality can make or break your audience connection, clean audio isn’t just a bonus—it’s a necessity. Think about it: according to recent studies, viewers are 30% more likely to watch a video to the end when the sound quality is clear and distraction-free. That’s a massive advantage in the crowded world of online content.
Yet, many creators overlook this detail, investing in the latest camera gear but neglecting their microphone setup. And here’s the kicker—-even affordable USB mics can outperform pricier XLR setups if you know how to address background noise with the right tactics.
Early on, I made the mistake of ignoring these issues and relying solely on mic placement without considering room acoustics or software tweaks. That oversight led to hours of re-recording and editing—wasting time and, frankly, money. To save you from the same frustration, I started exploring targeted solutions, and that’s when I discovered some impactful tricks that I can’t wait to share.
Curious if your setup is suffering from background noise that’s holding back your content? If so, you’re in the right place. We’ll look at practical fixes that can be applied immediately, with minimal equipment and effort. Want to know the secret to making your voice sound studio-quality in any environment? Keep reading, and I’ll show you exactly how to do it.
Dial in Your Microphone Placement
Start by positioning your microphone optimally. For USB mics, keep it about 6-12 inches from your mouth, slightly off-axis to avoid plosives. For XLR setups, use a boom arm to place the mic at mouth level, reducing handling noise. I once spent an afternoon adjusting my USB mic’s distance, noticing a stark drop in background hum once it was closer but not directly in front of my mouth.
Leverage Software Noise Suppression
Apply real-time noise reduction when recording or during editing. Tools like noise suppression plugins can filter out room chatter or static. During a recent project, I used this feature to cancel out my loud fan noise, saving hours in post-production. Make sure to choose software that preserves your voice’s natural tone.
Utilize Acoustic Treatments and Sound Barriers
Address the room’s acoustics by adding foam panels, blankets, or shelving. For tighter spaces, I substituted expensive panels with DIY ideas—blankets hung behind my microphone worked wonders. For outdoor shoots, windshields or faux deadcats, like these windshields, can drastically cut down on wind noise, which is often mistaken for background hum.
Implement Hardware Upgrades or Shields
Upgrade to a shielded cable, especially for XLR mics, to reduce electromagnetic interference. If you’re using a USB mic, check out models like top-rated USB mics with built-in shielding against electrical noise. I once replaced my cheap, unshielded XLR cable with a braided shielded one, noticing almost no hiss when recording near my computer.
Apply Post-Processing Techniques
Finally, use editing software to remove residual noise. Tools like Audacity or Adobe Audition can be used to fine-tune silence sections or reduce hiss. I recorded an episode with some ambient room noise and used spectral editing to isolate and remove background sounds, achieving studio-quality clarity. Remember, software can’t fix bad recording habits, so make these steps part of your routine from the start.
When it comes to podcasting gear, many creators fall into common traps, fixating on flashy features like high-end XLR setups or the newest USB mics, without grasping the subtle complexities that truly impact audio quality. Contrary to popular belief, choosing the most expensive microphone doesn’t guarantee professional sound. In fact, many overlook the crucial detail of shielding and grounding, which is often the root cause of persistent hiss and hum even with premium equipment. For example, an adequately shielded XLR cable can make a massive difference, yet many stick with cheap, unshielded options.
A common myth is that shotgun microphones are only for outdoor recordings, but they excel indoors too when used properly—if you avoid simple mistakes like placing them too close to reflective surfaces. Also, a nuance often missed by creators is the importance of proper polar pattern selection; using a cardioid mic when you need supercardioid or hypercardioid can allow unwanted ambient sounds into your recordings. Advanced users should ask: “Do I really need an XLR mic with an all-purpose dynamic capsule, or should I consider a condenser with a more focused polar pattern?” There’s no one-size-fits-all, and understanding this can elevate your audio quality immensely.
Beware the trap of relying solely on software noise suppression. While tools like noise reduction plugins are vital, they shouldn’t substitute soundproofing and proper mic placement. Overusing digital filtering can lead to a hollow or unnatural vocal tone, which diminishes listener engagement. Advanced podcasters often integrate hardware shields and acoustic treatments as first-line defense before digital fixes, because this preserves the integrity of your voice.
Making the right choice also involves understanding your environment. For instance, a USB mic designed for voice clarity with built-in shock mounts and noise rejection can outperform a basic XLR if your workspace is noisy or cluttered. In fact, some models from the 2025 lineup incorporate active noise cancellation, blurring the line between traditional microphone types. But remember: the internal electronics matter as much as the capsule.
In summary, mastering your podcast setup demands more than just selecting the highest-tier gear. Focus on shielding, polar patterns, environment acoustics, and the nuanced capabilities of modern microphones. These hidden details can spell the difference between amateurish background noise and broadcast-ready clarity. So, have you ever fallen into this trap? Let me know in the comments.
Tools I Trust for Durable and Clear Recordings
Investing in quality tools is essential, but maintaining them over time ensures that your setup continues to deliver professional results. Personally, I swear by the 15-shielding XLR cables to prevent electromagnetic interference that causes hiss and static. Regularly inspecting and replacing worn or damaged cables prevents subtle noise buildup that can ruin an otherwise excellent recording.
For voice clarity, I rely on a dedicated USB audio interface with robust shielding, as detailed in this comprehensive guide. It not only ensures clean input levels but also minimizes background hum through proper grounding. Pairing this with quality microphones like the top USB mics for voice clarity has been a game-changer.
Routine Maintenance Steps for Consistent Performance
Science shows that dust buildup and oxidation can degrade microphone connectors over years, leading to static and loss of signal. I recommend biannual cleaning using compressed air and contact cleaner applied sparingly to XLR connectors. Additionally, keeping your gear in a dry, climate-controlled environment prevents corrosion and preserves shielding integrity, as explained in this article.
Updating your firmware and driver software is often overlooked but crucial for hardware compatibility and performance. Set a recurring reminder to check for updates from manufacturers—many improvements include noise reduction and stability fixes that support your long-term recording quality.
Scaling Your Setup Without Sacrificing Quality
If your content begins to grow, consider expanding your gear thoughtfully. Instead of immediately upgrading to expensive XLR setups, I suggest adding a second identical microphone and employing a digital audio mixer, which allows seamless switching and multi-source recording. This approach, highlighted in this resource, enables consistent sound quality across multiple hosts or guests.
Finally, exploring modular hardware like portable shotgun mics, reviewed here for on-the-go recording, prepares you for unexpected opportunities without compromising sound integrity.
How do I maintain my podcast gear over years of use?
The key is a combination of routine cleaning, quality shielding, proper storage, and staying current with firmware updates. These practices ensure your equipment continues to perform at professional levels. If you haven’t tried upgrading your XLR cable shielding or implementing a regular cleaning schedule, I highly recommend starting today. Small maintenance steps now can save you a lot of headaches—and money—in the long run. Ready to level up? Try replacing your cables with one of the 15-shielded XLR cables and experience the difference firsthand.
The Price of Overlooking Grounding and Shielding
One of the most overlooked aspects I learned the hard way is the importance of proper grounding and shielding. I once experienced persistent hums that no software could fix, simply because I used unshielded cables near high-power devices. The lightbulb moment came when I replaced my cables with shielded ones from this guide, and suddenly, my background noise vanished. This taught me that these small hardware details can make or break your audio clarity, especially with sensitive XLR mics. Addressing shielding and grounding isn’t just for professionals—it’s a game-changer for anyone serious about pristine sound.
What I Wish Someone Had Told Me About Room Acoustics
Converting a small, echoey closet into a makeshift studio was my first mistake, believing that a decent mic alone would save the day. The truth is, acoustic treatment matters more than I had ever imagined. I experimented with hanging blankets and DIY foam panels, and the difference was astonishing—less reverberation, clearer voice, and a calmer recording environment. Industry experts like those at these resources emphasize that thoughtful room treatment often trumps expensive gear. The key lesson: your environment has a profound impact, and investing in acoustic solutions yields long-term benefits.
If I Could Go Back, I’d Change the Way I Use Software Fixes
Early on, I relied heavily on digital noise suppression plugins, thinking they could solve any problem. However, I realized that over-filtering can lead to unnatural, hollow vocals. Now, I use software like spectral editing tools sparingly, mainly to fine-tune residual noise after hardware and room treatments have done their part. This approach preserves the natural richness of my voice and reduces listener fatigue. Don’t fall into the trap of over-processing; instead, view software as a final polishing step, not a primary fix.
My Secret Weapon for Consistent Quality
After experimenting with various cables and interfaces, I swear by the 15-shielding XLR cables. Regular maintenance, like cleaning connectors and storing gear properly, has kept my setup humming smoothly for years. Combine this with routine firmware updates from trusted sources like this guide, and you’ve got a recipe for long-lasting professional sound. Small investments today in hardware upkeep save headaches and repair costs down the line, proving quality isn’t just about new gear but continuous care and attention to detail.
Your Journey to Crystal-Clear Podcasting Starts Now
Remember, mastering background noise and audio clarity isn’t about having the most expensive equipment—it’s about understanding and applying the right tactics, from proper microphone placement to acoustic treatments and hardware shielding. Each step you take brings your voice closer to studio-quality, no matter your environment. If you’re ready to elevate your podcast game, start with these insights, refine your setup, and embrace the process. The voice you want your listeners to hear is within your reach, and your dedication will shine through every episode.
One response to “Fix Sensitive USB Mics: 5 Background Noise Tactics for 2026”
About Me

Chesung Subba
Author/Writer
Hello, I'm Chesung Subba, a passionate writer who loves sharing ideas, stories, and experiences to inspire, inform, and connect with readers through meaningful content.
Follow Me
Connect with me and be part of my social media community.
Leave a Reply