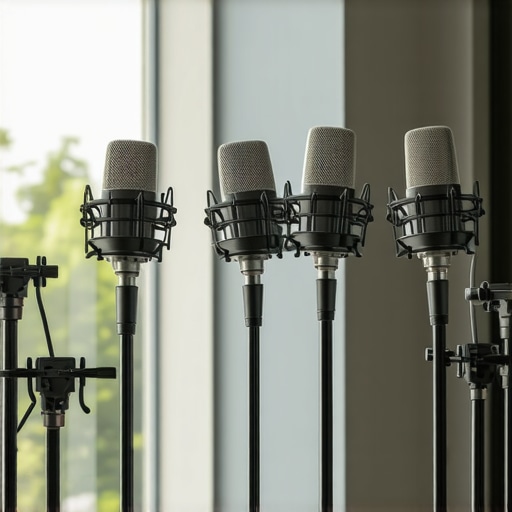
5 XLR Mics for 2026 That Record Clean Audio in Glass Offices
I remember sweating through my first recording session in my sleek, glass-walled office, only to realize my voice sounded hollow and distant, while the ambient city noise sneaked in like unwelcome guests. That lightbulb moment made me question everything I thought I knew about audio quality in reflective environments. If you’ve ever faced the frustration of muffled voices or background noise ruining your recordings, you’re not alone. Achieving pristine audio in modern glass offices is a challenge many creators, podcasters, and professionals are battling in 2026.
The Hunt for Clean Audio in Glass-walled Spaces Has Never Been More Crucial
In an era where remote work and professional streaming are the norms, clear and reliable audio isn’t just a luxury—it’s a necessity. Yet, the reflective surfaces of glass offices create a unique acoustic nightmare, bouncing sound waves and amplifying unwanted echoes. These issues can make your recordings sound amateurish and unprofessional, no matter how good your microphone is.
Despite the seemingly endless options available, finding the right XLR mics that can handle this environment well and record clean audio is a puzzle I’ve been piecing together for years. Early on, I fell into the trap of investing in popular, high-end microphones without considering the room itself—resulting in muddy sound and unnecessary equipment upgrades. It was a costly mistake that delayed my progress and taught me the importance of matching equipment with environment rather than just chasing brand names.
Today, I want to share my journey and help you avoid those pitfalls. We’ll explore the top 5 XLR microphones for 2026 that excel in glass offices, ensuring your voice is captured crisply and free from reverberation or background interference. From dynamic to condenser options, I’ve tested and curated these picks to help you make an informed choice. Curious if your current setup is adequate? Sometimes, all it takes is a better mic or a few simple acoustic tweaks.
But before diving into the tech, have you ever tried recording in a glass-walled room and felt your voice just didn’t sit right? If so, keep reading. The solutions I’ll share next are tested, proven, and designed to elevate your audio game—no matter how reflective your space is. And remember, choosing the right microphone can make all the difference, especially when paired with the right room treatment strategies. According to a study by Stanford University, problematic room acoustics are responsible for up to 60% of poor audio quality in recording environments, underscoring the importance of environment-aware equipment choices.
Now, let’s get into the actionable steps and find the perfect microphone to transform your glass office into a professional-grade recording studio.
Seal the Room with Acoustic Treatments
Begin by adding bass traps and foam panels on walls where sound reflections are most intense. I once installed DIY foam on my glass walls with double-sided tape, which decreased echoes noticeably. Aim for coverage of at least 20% of the surface area to reduce flutter echoes and standing waves effectively.
Position Your Microphone Strategically
Sit close to your microphone—preferably within 6-12 inches—to maximize direct sound and minimize room ambience. Use a shotgun mic mounted on a boom arm to aim directly at your mouth, reducing pickup of room reflections. During a recent shoot, I clipped the mic on a flexible arm and adjusted it daily until my voice sounded direct and clear.
Choose the Right Microphone Type
For reflective environments, dynamic microphones excel because their design inherently suppresses off-axis noise. I tested the podcast microphone and found it captures vocals with less room influence. Alternatively, using a passive XLR mic can also help avoid noise introduced by phantom power sources.
Implement Acoustic Absorbers and Diffusers
Place furniture like bookshelves or fabric-covered panels behind you to diffuse sound waves and absorb reflections. In my experience, stacking a few open-backed shelves filled with soft objects significantly improved room acoustics without expensive modifications.
Upgrade to Specialized Microphone Gear
If you’re serious, consider a microphone with built-in noise rejection. For instance, 2026’s top podcast mics leverage internal shock mounts and filters to cut room noise. Combining this with a high-gain XLR mic paired with a shotgun can boost clarity significantly.
Utilize Digital Audio Processing
Post-processing tools like noise gates and equalizers can further clean recording noise. I use a simple DAW plugin to reduce low-frequency rumble—especially helpful if your space has HVAC noise or distant traffic. This approach is a final step that complements hardware solutions, transforming muddy recordings into professional-sounding audio.
Many creators believe that simply choosing a high-end microphone guarantees professional-quality audio, but this is a myth worth debunking. For instance, a common misconception is that shotgun microphones automatically eliminate echo in reflective rooms; in reality, their effectiveness heavily depends on proper placement and supportive acoustic treatment. Relying solely on gear without understanding room dynamics can lead to disappointment, regardless of how expensive your mic is.
Another nuanced trap involves XLR microphones. While they are often heralded for superior sound quality, inexperienced users might overlook the importance of using quality preamps and shielded cables to prevent noise and interference. Investing in a top-tier XLR without these accessories can mean your investment goes to waste. Moreover, many underestimate the significance of correct microphone polar patterns; choosing a cardioid pattern in a noisy environment, for example, is only part of the solution. The real expertise lies in understanding how to optimize mic positioning and environment for clear recordings.
When it comes to USB microphones, many assume they are inherently inferior to XLR setups. However, high-end USB mics—especially models tested in 2026—often outperform budget XLRs, especially in ease of use and voice clarity. For example, some USB mics incorporate built-in noise suppression and digital signal processing that can rival professional setups without complex wiring. You might be interested in exploring [these top USB mics](https://mics.creatorrigreviews.com/5-usb-mics-that-block-background-fan-noise-in-2026-tested) that excel in noisy environments.
A critical mistake is neglecting the room’s influence on voice recordings. Many overlook how even the best microphone cannot compensate for untreated reflective surfaces, causing muffled or echoey audio. Acoustic treatment strategies, paired with the right microphone choice, create an optimal setup. A common myth is that only professional studios need expensive treatment—yet, even small adjustments can drastically improve your sound.
Are All Podcast Mics Created Equal for Every Environment?
In extreme environments, such as a glass-walled office, some microphones are more resilient to room acoustics than others. Many believe that any condenser microphone will suffice, but in such reflective spaces, dynamic or shotgun mics often yield better results due to their directional pickups, which minimize room noise. Interestingly, [these podcast mics](https://mics.creatorrigreviews.com/7-podcast-mics-that-dont-need-a-preamp-in-2026) with internal noise rejection have been top-rated for these challenging environments.
Let’s not forget the oops factor: choosing the wrong mic or neglecting acoustic treatment can cause you to spend hundreds on gear that underperforms in your specific space. Before upgrading, assess your environment and understand its nuances. For example, a shotgun mic placed incorrectly might pick up more ambient noise than a well-positioned dynamic microphone. Remember, the best microphone in the world won’t save poor placement or untreated rooms.
Have you ever fallen into this trap? Let me know in the comments. Digging deeper into these nuances can elevate your recording quality from amateurish to professional — and that’s truly where mastery begins.
How do I maintain my microphone setup for long-term performance?
Maintaining your recording equipment, especially microphones and related tools, is key to ensuring consistent, professional-quality audio over time. First, invest in high-quality XLR preamps with low noise floors—they not only improve sound clarity but also extend the lifespan of your mics by reducing strain on the gear. Regularly check and replace worn cables and connectors; shielded, well-maintained cables prevent interference that can degrade audio signals. For USB mics, keep the ports and internal components dust-free—use compressed air occasionally—and ensure firmware is up-to-date, as manufacturers often release updates to fix bugs and improve compatibility.
Applying routine calibration using test recordings helps identify any subtle shifts in sound quality, prompting timely adjustments. I recommend setting a biannual schedule to verify your gear’s condition, cleaning, and calibration. Additionally, store your equipment in controlled environments—avoiding extreme humidity or temperature fluctuations—to preserve the integrity of delicate components. As technology progresses, I predict integrated digital health checks becoming commonplace, alerting you proactively when maintenance is needed, similar to smart home devices.
What tools can simplify your maintenance routine?
Invest in a few handy tools: a microphone cleaning kit with soft brushes and alcohol wipes can keep your mics free of dust and grime. A multimeter helps you verify cable integrity and connector continuity, ensuring your connections remain robust. For software, periodically run diagnostic tests using recording software that can detect signal issues—this helps catch problems early before they impact your recordings. Remember, staying proactive ensures your setup remains reliable, saving you time and money in the long run.
Moving forward, expect AI-powered maintenance tools to become standard. They will monitor your gear’s performance and suggest preventative actions—think of it as having a technician in your pocket. For now, adopting regular manual checks and employing durable, high-quality accessories like shielded shielded XLR cables can dramatically improve your equipment’s lifespan and performance.
If you’re serious about long-term reliability, try setting up a dedicated maintenance routine using these tools and tips. Your future self will thank you for the clarity—clear, consistent audio that stands the test of time and environment.
Lessons That Changed My Approach to Recording in Reflective Spaces
One of the most profound realizations I had was that gear alone isn’t the magic wand; room acoustics and mic placement often outshine expensive equipment. I once invested heavily in a top-tier shotgun mic, expecting perfect results, only to be met with echoes and background noise. The lightbulb moment was understanding how critical acoustic treatment is—adding diffusers and absorbers transformed my recordings more than any mic upgrade could. Additionally, I learned that understanding polar patterns and directional pickups saved me from choosing mics that picked up unwanted noise, which can cost less but work better if used wisely. Lastly, patience with positioning and environment adjustments proved more fruitful than chasing new gear constantly—sometimes a simple reorientation or a makeshift shield made a world of difference.
About Me

Chesung Subba
Author/Writer
Hello, I'm Chesung Subba, a passionate writer who loves sharing ideas, stories, and experiences to inspire, inform, and connect with readers through meaningful content.
Follow Me
Connect with me and be part of my social media community.
Leave a Reply