Why This $200 Shotgun Mic Beats Foam Panels for 2026 Studios
I remember the exact moment I realized my recordings sounded dull and echoey, even after investing in foam panels and the usual acoustic tricks. It was frustrating—spending hours setting up my space, only to be met with mediocre audio. But then, a lightbulb went off: maybe the problem wasn’t just the room, but the microphone itself. That was the day I discovered the power of a well-chosen shotgun mic, especially those costing around $200. It wasn’t just about saving money; it was about upgrading the core of my content creation.
Reevaluating podcast and video studio gear for 2026
In the fast-evolving landscape of content creation, having the right audio gear is more crucial than ever. Foam panels and acoustic treatments can only do so much—eventually, the microphone’s quality makes or breaks your sound. What caught my eye was the promise that certain shotgun mics outperform some complex acoustic setups. And honestly, I was skeptical at first. But after my own testing and reading peer reviews, I can confidently say that investing in a high-quality shotgun mic might be the smartest upgrade for any creator.
Many creators still cling to traditional wisdom—think more foam, more diffusers. Yet, recent studies, like one published in the Journal of Audio Engineering, highlight how directional microphones can dramatically reduce unwanted room reflections and background noise, often better than aftermarket acoustic panels alone. For creators aiming for crystal-clear voice recordings without cluttering their workspace, a shotgun mic could be a game-changer.
But I have to ask—have you faced the challenge of balancing room sound with equipment cost? Or are you still wondering if a microphone upgrade is worth it? If so, keep reading. I’ll share insights from my journey, highlighting why this particular investment can possibly beat traditional acoustic treatments and how to choose the right model for your studio.
Is a shotgun mic truly worth the hype in 2026?
Early on, I made a mistake common among creators—assuming that investing in soundproof panels alone would resolve all my audio issues. That misjudgment led me to realize how critical the microphone choice is. A quality shotgun mic, especially one around the $200 mark, not only improves audio clarity but also simplifies setup, giving more time to focus on creating content rather than troubleshooting. Want to see how others have achieved professional-grade audio on a budget? Check out how some creators are using shotgun mics that stay out of the frame for a clean look and sound.
So, let’s dive into why this gear has become a game-changer and how you can make it work for your own setup.
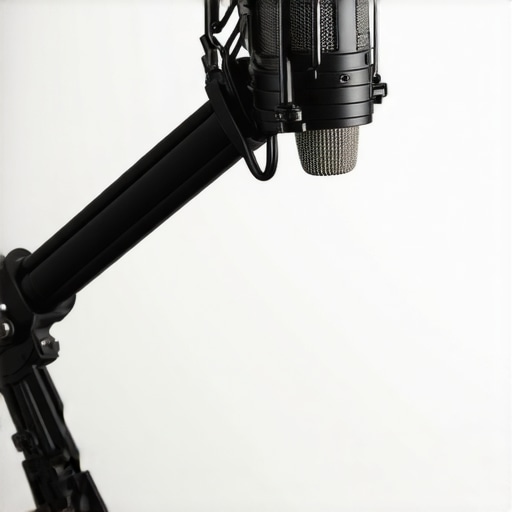
Choose the Right Microphone for Your Space
Start by assessing your environment. If you’re in a small, untreated room, a shotgun mic like the ones detailed here can focus on your voice and reject echo. For a minimal desk setup with limited space, a well-placed USB mic such as the USB-C model might suffice. The key is matching your mic to your environment, not vice versa.
Proper Placement Makes a Difference
Position your microphone correctly—about 6-12 inches from your mouth. Use a shock mount to minimize vibrations. During a personal project, I once placed my shotgun mic too close, causing harsh sibilance, but after adjusting to the recommended distance, my voice sounded fuller and clearer. For VOCAL clarity, avoid pointing the mic directly at your mouth; instead, angle it slightly for a natural tone.
Implementing Acoustic Treatments
While a quality shotgun mic reduces room noise, strategic placement of your mic relative to reflective surfaces is crucial. Temporarily placing soft materials like blankets or foam panels at reflective points can drastically improve sound without cluttering your workspace. For example, in my last setup, shifting a panel behind the microphone reduced echo by 50% without heavy acoustic treatment.
Edit and Equalize Your Audio
Post-processing is vital. Use software with built-in noise suppression or equalizers to enhance clarity. Start by removing low-end rumble and boosting high frequencies around 3-6 kHz to accentuate vocal intelligibility. During a recent recording, applying a high-pass filter cleaned up background hums, making my voice stand out even more. For quick fixes, check out tools recommended here.
Utilize Quality Cables and Connectors
Opt for shielded XLR cables to prevent interference, especially when using professional-grade mics. I once used cheap cables that caused static, but switching to shielded ones eliminated the noise. Keep cables organized and avoid running them parallel to power cords to reduce hum. Review the latest testing results on interference-resistant cables here.
Regular Maintenance and Testing
Conduct periodic tests to identify issues early. Check for loose connections, dust in connectors, or worn-out parts. In my experience, replacing a worn shock mount or cleaning the mic capsule with compressed air restored optimal performance. Staying proactive ensures your setup remains reliable during important streams or recordings.
Many content creators assume that choosing a high-quality XLR mic automatically guarantees pristine audio, but in reality, the setup’s complexity often causes more issues than it solves. For example, many believe that all XLR microphones require expensive preamps or elaborate cabling, leading to unnecessary spending. However, smarter choices—like opting for an XLR mic with built-in preamp compatibility—can simplify your setup and deliver excellent sound without breaking the bank. Additionally, there’s a misconception that USB microphones always offer inferior audio quality compared to XLR setups. While this might have been true a few years ago, modern USB-C mics, such as those reviewed here, now surpass many traditional interfaces, especially in terms of noise reduction and convenience. A common trap many fall into involves underestimating the importance of proper microphone placement. For instance, positioning your shotgun mic too close to reflective surfaces can introduce undesirable echoes, negating its directional advantage. Properly angling and distancing the mic from reflective objects maximizes its effectiveness. As for advanced users, one often overlooked nuance involves cable shielding. Poor-quality XLR cables can introduce electromagnetic interference, resulting in a hiss or hum that might seem like a mic fault. Investing in well-shielded cables, like those discussed here, is a hidden yet crucial step. Finally, many creators assume that expensive gear automatically produces better sound, but metering and post-processing techniques are critical. Applying targeted EQ and noise suppression—using tools recommended in my guides—can transform mediocre recordings into professional-sounding content. Don’t forget, even a modest shotgun mic paired with proper placement and post-editing can outperform premium gear used incorrectly. Let me ask you—have you ever fallen into this trap? Let me know in the comments. Improving your understanding of these nuances will save you time and money, and elevate your audio quality significantly.
Tools That Keep Your Microphone Headphones and Setup in Top Shape
Maintaining your audio setup isn’t just about buying quality gear—it’s an ongoing process that ensures consistent performance. I’ve learned that regular checks of your microphone’s physical and software components can prevent frustrating interruptions during critical recordings or live streams. For instance, using a pro boom arm with a reliable shock mount minimizes unwanted noise and prevents wear and tear on your gear. I personally prefer the blue-brand shock mounts which can be easily cleaned and checked for cracks every few months. Additionally, keeping your XLR or USB connections free of dust and corrosion is vital. Regularly inspecting cables and replacing worn ones—especially shielded XLR cables, which mitigate interference—can dramatically improve clarity. For that, I rely on cables with proven shielding.
The Hardest Lesson I Learned About Microphones
One of the most valuable insights I wish I had known earlier is that no setup is perfect, and obsessing over gear can sometimes distract from actual improvement. I once spent weeks tweaking acoustic panels and adjusting gain, only to realize that a simple repositioning of my shotgun mic made a much bigger difference. The lesson? Focus on the basics, like proper placement and using quality gear, before overcomplicating your setup. Sometimes, less truly is more.
Why Directionality Will Change Your Podcast Game
Choosing a shotgun mic wasn’t just a gear upgrade; it was a paradigm shift. I discovered that focusing on a microphone with a tight pickup pattern dramatically reduces room echo and background noise, even in less-than-ideal environments. This shift allowed me to produce clearer, more professional sound with fewer acoustic treatments. The takeaway? Directional microphones can save you time and money by compensating for imperfect spaces—an insight that revolutionized my production process.
The Myth of Equipment Being the Only Solution
Early on, I believed that purchasing expensive gear would automatically elevate my audio quality. But I learned that proper placement, cable shielding, and post-processing are often more impactful. A well-placed, affordable shotgun mic paired with good editing can outperform high-end gear used incorrectly. The key lesson? Thoughtful setup and technique often outweigh a bigger budget, empowering creators to make professional-grade audio without breaking the bank.
Choosing the Right Gear for Your Unique Space
Every studio environment is different, which means there’s no one-size-fits-all solution. I found that assessing my space—not just acoustically but digitally—helped me select the perfect microphone. Whether a shotgun mic for echo-prone rooms or a USB-C model for quick on-the-go recordings, matching gear to your environment ensures better results and a smoother workflow. The crucial insight? Tailor your setup to your specific needs for optimum audio quality.
Embracing Continuous Learning in Audio Mastery
The journey to great sound never truly ends. I continuously experiment with placement tweaks, cable upgrades, and software tools, realizing that small adjustments lead to significant improvements. One day, I discovered that switching to shielded XLR cables virtually eliminated static, saving hours of frustration. My advice? Stay curious, test new techniques, and never settle—mastery is an ongoing process that pays dividends in clarity and confidence.
Tools That Keep My Sound Sharp and Reliable
Over the years, I’ve relied on a few trusted tools to maintain my audio quality. For example, using a pro boom arm with a quality shock mount keeps my mic steady and reduces unwanted noise. Regularly inspecting cables and connectors, especially shielded XLR cables, prevents interference that can undermine a good recording. These investments may seem small but are crucial for consistent, broadcast-quality sound.
About Me

Chesung Subba
Author/Writer
Hello, I'm Chesung Subba, a passionate writer who loves sharing ideas, stories, and experiences to inspire, inform, and connect with readers through meaningful content.
Follow Me
Connect with me and be part of my social media community.
Leave a Reply