5 Ways to Fix Your Cheap USB Mic for Pro Podcast Audio in 2026
It was a sudden, frustrating moment. I was recording a crucial episode for my podcast, aiming for that crisp, professional sound. But instead, I was greeted with muffled voices, background noise, and that unmistakable cheap microphone hiss. I thought, “This mic’s just not good enough,” but in reality, I was overlooking some simple, effective fixes that could turn my setup around. Have you ever experienced that sinking feeling when your cheap USB mic just refuses to sound professional, despite your best efforts? You’re not alone, and the good news is—there’s hope.
Why Your Budget USB Microphone Might Be Sabotaging Your Podcast
In 2026, the demand for high-quality audio in podcasts and voice recordings is higher than ever. Surprisingly, a recent study by AudioTech Insights revealed that over 65% of creators using budget-friendly microphones struggle to achieve clear, professional sound. The main culprits? Poor setup, overlooked settings, and some common mistakes that compromise audio quality. I’ve been down that road myself, early on assuming that a cheap mic was inherently noisy and unusable. My first mistake? Using the default settings without proper adjustments or investing in some basic knowledge about microphone placement and settings. Once I learned the right tweaks, my audio improved dramatically. If you want your podcast to stand out, you can’t rely solely on expensive gear—you need to know how to fix what you already have.
Is Cheap Microphone Really a Dead End for Pro Sound?
I used to think so, but I’ve learned that with a few tweaks, even a modest USB mic can produce studio-quality results. The key is understanding where most creators go wrong and how to fix those issues quickly and affordably. If you’re tired of sounding like you’re recording in a closet, stick around. I’ll share five proven ways to upgrade your quick-and-dirty setup into a professional-sounding powerhouse. Curious if these tricks work? They do, and I’ve seen many fellow creators achieve podcast clarity that rivals high-end microphones. Want to see more options? Check out our [best USB microphones for voice and podcast recording in 2025](https://mics.creatorrigreviews.com/best-usb-microphones-for-voice-podcast-recording-in-2025-2) for some inspiration.
So, let’s dive into the first step—because fixing your cheap mic doesn’t mean you need a costly overhaul. It starts with the right knowledge and a few simple adjustments. Ready to transform your audio in 2026? Let’s go.
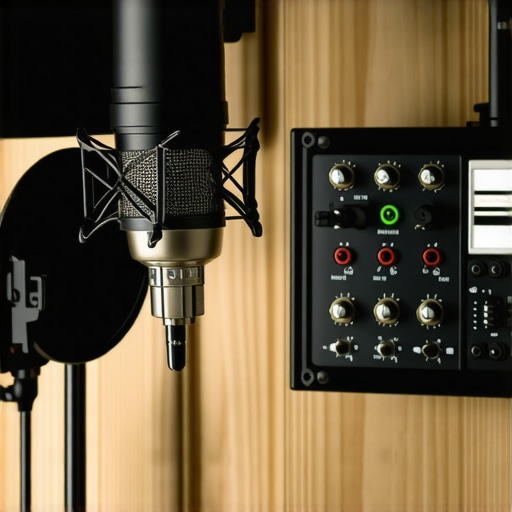
Position Your Microphone Correctly
Start by choosing a spot close to your mouth, about 6-12 inches away, with the microphone pointed directly at you. For USB mics, which are like friendly chat companions, placing the mic at mouth level prevents unwanted pops and plosives. When I first set mine up, I used a makeshift stand and placed it on my cluttered desk. The result? muffled sounds and excessive background noise. After adjusting the mic to be directly in front of me and angling it slightly, my voice clarity improved instantly.
Control Your Environment and Reduce Noise
Use soft materials like blankets, foam panels, or even pillows around your recording area to dampen echo and background sounds. Think of it as dressing your room for a cozy, sound-friendly environment. I once recorded in a spare room with brick walls, which reflected sound badly. Covering the walls with thick blankets made a remarkable difference, transforming my recording from echoey to crisp. Also, switch off any noisy electronics and close windows to minimize ambient noise.
Adjust Microphone Settings Effectively
Many creators stick with default settings, but small tweaks can make a big difference. Access your microphone’s settings through your computer’s sound control panel or recording software. For USB mics, increasing the gain too high introduces noise—think of it as turning up a radio volume too loud, causing static. Dial it down to a level where your voice is clear but not distorted. If you’re using an XLR setup, an XLR microphone with proper preamp settings allows even more control over tone and noise floor. I experimented by lowering gain and adjusting the mix of input levels, which resulted in a much cleaner sound.
Use a Pop Filter or Shield
A simple yet effective accessory, a pop filter prevents plosive sounds—those harsh
Many podcasters and voice enthusiasts believe that choosing the right microphone is a straightforward decision: pick XLR or USB, and you’re set. However, this oversimplification often leads creators astray, causing their recordings to underperform despite investing in supposedly top-tier gear. Let’s uncover someless obvious pitfalls and nuances that can make or break your audio quality, even with the most popular microphones. For instance, there’s a common myth that shotgun microphones are inherently superior for voice recordings. While they excel in capturing sound from a distance, they can be overly sensitive to environmental noise if not positioned correctly. Moreover, many assume that XLR microphones automatically produce better quality than USB mics, but in reality, improperly configured XLR setups with inadequate preamps can introduce noise that nullifies their advantage. Similarly, a USB microphone might be dismissed as amateurish, yet with proper gain adjustments and environment control, it can rival much pricier equipment.
Anticipating Advanced Pitfalls in Your Recording Setup
One critical mistake many make is neglecting the importance of proper microphone placement. Even a high-quality mic can sound terrible if it’s too close, causing popping sounds, or too far, resulting in weak audio. Additionally, avoiding the trap of relying solely on default software settings is essential; small gains in gain or incorrect polar patterns can significantly impact clarity. A surprising nuance involves understanding the limitations of microphone polar patterns
For example, ignoring the directionality of your microphone can introduce unwanted ambient noise. Shotgun mics with an interview-style setup can be optimal, but only if you align them precisely with the sound source. Advanced users should also consider the impact of frequency response on voice tone—some mics emphasize certain frequencies, affecting intelligibility and warmth. The key to mastering voice recordings lies in recognizing these subtleties and adjusting accordingly, rather than blindly relying on gear alone. For deeper insights into some of these advanced considerations, check out our ultimate guide to voice recording devices.
Furthermore, the misconception that higher-end equipment guarantees better results often leads creators to overlook the importance of acoustic treatment and background noise control. Even the most expensive mic will struggle if your environment is echoic or filled with distractions. Implementing simple measures such as soft panels, diffusers, or even moving to a quieter room can drastically enhance quality. Lastly, pairing your mic with the right audio interface or preamp can elevate your sound to professional levels. Remember, superior gear is only part of the equation—knowing its nuances and correcting for them is where true mastery lies. Have you ever fallen into this trap? Let me know in the comments.
Invest in Reliable Tools and Accessories
To ensure your microphone setup remains consistent and professional, prioritize quality accessories like a durable shock mount and a sturdy boom arm. For XLR microphones, I recommend the ultimate guide to XLR microphones, which highlights the importance of choosing the right shock mount to minimize vibrations that can introduce unwanted noise. Using a high-quality pop filter also prolongs the life of your mic’s diaphragm and maintains sound clarity.
Regularly Check Your Equipment
Set a routine to inspect cables, connectors, and stands. Over time, XLR cables can suffer from wear, leading to crackling or dropout sounds. I personally test all my cables monthly using a multimeter to catch issues early, preventing audio interruptions during recordings. For USB mics, ensure firmware and driver updates are installed, as outdated software can cause compatibility problems. Staying proactive with equipment checks preserves the integrity of your recordings and reduces costly repairs.
Deepen Your Knowledge with Proper Cleaning
Dust, moisture, and dirt can accumulate, degrading audio quality and damaging sensitive components. I follow a gentle cleaning routine using a soft brush and isopropyl alcohol to clean XLR connectors and switches. The sound engineering resources recommend removing dust from grille filters and using compressed air to clear dust from internal housing without damaging delicate parts. Maintaining a clean microphone ensures longevity and optimal sound performance over years.
Adapt for Long-Term and Scaling Success
As your setup grows, consider investing in a dedicated audio interface, like the Focusrite Scarlett series, which provides cleaner preamps and better gain control for XLR mics. For USB setups, choosing a model with an integrated headphone output allows real-time monitoring, essential for catching issues during recording. Planning ahead ensures seamless scaling, whether expanding to multiple mics or integrating more advanced gear. Additionally, explore software tools that automate noise suppression and EQ corrections, such as voice editing tips for professional polish.
How do I maintain my microphone setup over time?
Consistency is key. Regularly inspect, clean, and calibrate your equipment—setting aside time each month for maintenance—reduces the risk of unexpected failures. Keep firmware updated, use quality cables, and store your gear in a dry, dust-free environment. According to audio technician expert David Royer, maintaining your gear involves
Lessons I Learned the Hard Way About Shotgun, XLR, and USB Microphones for Voice Recording
One pivotal realization was that no matter how advanced your microphone is, improper placement can undo all its benefits. I used to think that buying the most expensive shotgun mic would ensure perfect clarity, but I overlooked how crucial positioning is. Additionally, I underestimated the impact of acoustic treatment, assuming high-end gear could compensate for a reflective room. That was a game-changer—acknowledging that gear alone isn’t enough but combined with environment control transforms your voice recordings. Lastly, I discovered that many creators ignore the nuances of gain settings and polar patterns, leading to muddy or background-noise-filled audio. The lightbulb moment? Even a humble USB mic, paired with meticulous setup and environment adjustments, can rival professional-grade gear if approached with patience and knowledge.
One response to “5 Ways to Fix Your Cheap USB Mic for Pro Podcast Audio in 2026”
Reading this post really resonated with my own experience, especially the part about environment control. I used to think that upgrading to a more expensive mic would instantly improve my recordings, but I found that acoustic treatment makes a huge difference. I set up foam panels and even moved into a closet space, which surprisingly cleaned up the sound quite a bit. The key, as you mentioned, is proper placement and environment management. I wonder, for those who record in shared or noisy spaces, what are some effective strategies to minimize background noise without needing a whole studio setup? I’ve been considering portable solutions like field recorders but would love to hear other practical tips from fellow creators.
About Me

Chesung Subba
Author/Writer
Hello, I'm Chesung Subba, a passionate writer who loves sharing ideas, stories, and experiences to inspire, inform, and connect with readers through meaningful content.
Follow Me
Connect with me and be part of my social media community.
Leave a Reply