Best Voice Recording Microphones for Creators: USB, Sh shotgun & XLR Options
Have you ever recorded a podcast or a voiceover only to realize that your voice sounds flat, distant, or just plain off? I remember those moments vividly—trying to get that crisp, clear sound, only to be frustrated by echoes, background noise, or the dreaded clipping. It’s a lightbulb moment when you realize that your choice of microphone isn’t just a piece of gear—it’s the backbone of your audio quality. Choosing the right microphone can feel overwhelming, especially with so many options like USB, shotgun, and XLR microphones flooding the market. Trust me, I’ve been there, swapping gear left and right, only to find myself stumbling over technical details or budget constraints.
Why Microphone Choice Makes or Breaks Your Voice Recordings
Here’s the truth: your microphone has a direct impact on how your audience perceives you. A good mic captures your voice accurately, reducing those distracting background noises and ensuring your words resonate clearly. But it’s not just about quality—it’s about building trust with your listeners. According to a study by IOST, audio clarity significantly influences listener engagement; poor sound quality can cause your audience to tune out faster than a bad video lag. If you’ve ever experienced the disappointment of recording hours of content only to realize it sounds like it’s coming from a tin can, you know what I mean.
But here’s where I went wrong early on: I invested in flashy, high-end microphones without understanding my specific needs. I jumped into the deep end with gear that didn’t suit my recording environment or my voice. The result? Frustration and wasted resources. That mistake taught me the importance of matching your microphone type—be it USB, shotgun, or XLR—to your environment, budget, and recording goals. Want to avoid the same pitfalls? Keep reading, and I’ll guide you through choosing the best setup for your creative journey.
Does Microphone Quality Really Make a Difference?
This is the biggest question I hear from creators just starting out. Honestly, I was skeptical at first—how much better could a microphone really be? But I learned that even small improvements in mic quality, like moving from a generic USB mic to a dedicated XLR setup, could turn your voice from amateurish to professional. If you’re still doubtful, check out this comprehensive guide on top XLR microphones in 2025. It highlights how the right gear can elevate your entire production. So, have you faced this dilemma—wondering if you should upgrade your mic now? Let’s get into the details, so you can make an informed decision that works for you.
Identify Your Recording Environment
The first step is to assess where you’ll be recording. Is it a treated studio, a noisy cafe, or your cluttered home office? This influences your microphone choice drastically. For noisy spaces, a directional microphone like a shotgun can isolate your voice from background noise effectively. In a quiet environment, a versatile USB mic might suffice. I once recorded in my echoey garage using a shotgun microphone placed on a boom stand nearby, which significantly improved clarity. This practical step ensures you pick gear suited for your space, reducing frustration and unnecessary investment.
Understand Microphone Types and Their Uses
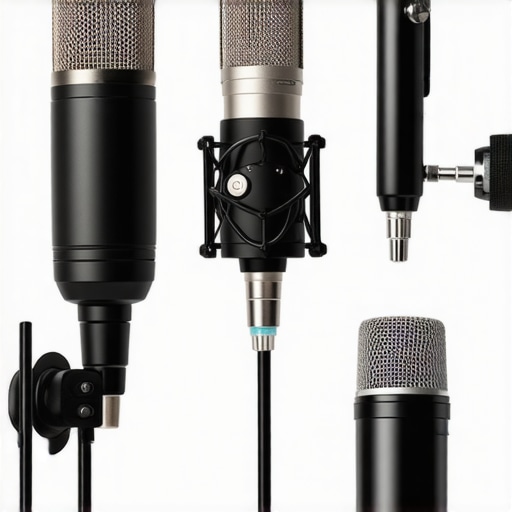
Grasp the differences between USB, shotgun, and XLR mics. Think of USB microphones as the plug-and-play option—like using a high-quality headset mic—perfect for beginners or quick setups. Shotgun microphones are like a focused spotlight, capturing audio from a distance while ignoring side noise—ideal for interviews or outdoor recordings. XLR microphones are the professional’s choice, requiring an audio interface but providing superior sound quality and durability. I recommend exploring this guide to understand which suits your needs best. Matching your environment and goals with the right mic type is the cornerstone of quality audio production.

Match Your Microphone with Your Voice
Your voice has unique characteristics that influence microphone choice. A bass-heavy voice benefits from a mic with a flat frequency response, while a bright, sibilant voice might require a mic that handles high frequencies gracefully. I had a recording session where I used a top XLR mic to capture my deep tone, resulting in recordings that sounded professional and warm. Testing different mics with your voice can be a game-changer, ensuring clarity and reducing editing time later. Scenario-specific tests resembling real recording conditions help you select the best match.
Optimize Your Microphone Placement
Positioning is vital. Place your mic about 6-12 inches from your mouth, slightly off to the side to avoid plosive sounds (those harsh “p” or “b” sounds). Use a pop filter mounted on your mic boom to soften these bursts. During my first podcast, I spent hours trying to fix plosives in post; a simple pop filter saved me countless editing hours. Remember, the goal is consistent proximity—too close causes clipping, too far results in weak audio. Experiment with angles until your voice sounds full without distortion. Proper placement turns a decent mic into a professional-grade setup.
Leverage Calibration and Testing
Once your gear is set, do test recordings. Use free software like Audacity or Adobe Audition to analyze your levels. Adjust gain so your loudest parts peak around -6dB to -3dB, avoiding clipping. I once recorded a segment and realized my levels were too high, causing distortion; lowering gain and moving the mic slightly back improved clarity. Record short snippets, listen critically, and tweak placement, gain, and environment noise filters. Consistent testing creates a reliable sound profile, reducing surprises during final recordings.
Implement Noise Reduction and Acoustic Treatments
No matter how good your microphone, background noise can spoil your audio. Use foam panels, blankets, or reflection filters to tame echoes and reverberations. During a field interview, I used a portable reflection filter to cut down ambient noise, which significantly enhanced my voice’s warmth and presence. Post-processing in software can further clean audio—equalizers to brighten or dull frequencies, compressors to even out volume levels, and noise gates to eliminate hiss. Combining proper gear with these techniques delivers that professional, polished sound your audience deserves.
Many creators jump headfirst into professional-sounding recordings, but there are crucial misconceptions that can sabotage your setup. First, a widespread myth is that upgrading to an expensive XLR microphone guarantees studio-quality audio. While high-end gear helps, many overlook the importance of proper placement, environment, and interface compatibility. A pricey mic paired with poor acoustic treatment won’t outperform a mid-tier mic used correctly. Check out this guide on XLR microphone setups for practical tips. Also, some assume that shotgun mics are only for outdoor shoots, but they excel indoors too—if you understand their nuances. The real gain comes from mastering mic positioning, calibration, and understanding your voice’s frequency response. An often-overlooked trap is neglecting the importance of audio interfaces: connecting a good mic to a low-quality or incompatible interface can introduce noise and reduce clarity. Remember, the interface’s preamps and converters are just as vital as the microphone itself. For advanced applications, consider experimenting with different polar patterns—hypercardioid vs. shotgun—to focus on your voice and reduce ambience, especially in echo-prone spaces. A review of top XLR mics highlights the importance of matching mic characteristics to your environment. Lastly, many believe that a USB mic is inherently inferior; in fact, modern USB mics can deliver comparable results with proper placement and post-processing. The misconception arises from past models that lacked quality components, but today’s tech bridges that gap. Are you falling for these myths? Let me know in the comments!
Maintaining your microphone setup over time is crucial to preserving the quality of your recordings and ensuring your investment continues to serve you well. Regular upkeep not only extends the lifespan of your gear but also preserves your professional sound. As technology advances, staying current with the latest tools and methods is equally important to stay ahead in your content creation journey.
Essential Tools for Long-Term Microphone Care
One of my go-to tools is a dedicated desk air blower. Unlike compressed air cans, a mild blower like the Giottos Rocket Blaster effectively clears dust and debris from XLR ports and delicate microphone grilles without risking moisture damage. I personally use this in my maintenance routine every six months to keep my gear dust-free and functioning optimally.
Investing in a quality pop filter cleaning toolkit has also paid dividends. Over time, pop filters accumulate saliva residue, which can weaken the material and impact sound quality. I recommend gently washing your foam filters in warm water with a mild detergent and letting them air dry. This simple step maintains their effectiveness and prolongs their lifespan.
Software plays a vital role too. For instance, I rely on auditory calibration tools like REAPER or Adobe Audition to regularly check your microphone’s frequency response. Doing this every few months helps detect subtle drifts or degradations, so you can calibrate or troubleshoot before recording sessions are impacted.
Schedule Regular Upkeep and Upgrades
Creating a maintenance schedule ensures you’re not overlooking essential upkeep. I set reminders every quarter to clean connectors, update firmware, and review settings. Technology trends suggest that emerging digital interfaces offer improved noise reduction and stability, so staying updated with the latest drivers from your audio interface manufacturer—such as Focusrite or PreSonus—is also wise. These updates can resolve bugs and introduce performance enhancements, keeping your setup at peak performance.
Looking ahead, I believe smart maintenance will incorporate IoT devices. Imagine an indicator light on your interface or mic that alerts you when dust buildup or signal drift occurs, akin to car maintenance systems. As this technology matures, integrating such tools could revolutionize longevity for creators aiming for next-level consistency.
How do I keep my microphone system reliable over time?
Develop a routine that combines physical cleaning with software calibration. A simple yet effective approach is dedicating 10 minutes once a month to inspect and clean connectors and grilles, and bi-monthly calibration checks to ensure your frequency response remains accurate. This proactive stance minimizes unexpected disruptions during critical recording sessions.
If you haven’t tried it yet, I recommend incorporating a regular calibration check using free tools like auditory calibration software. It’s a game-changer in catching subtle shifts before they affect your sound quality. Staying vigilant with your maintenance routines will ensure your gear remains reliable, giving you peace of mind and professional results every time you record. Remember, consistent effort today saves you headaches tomorrow—and keeps your voice sounding clear and confident for years to come.
How a Single Mistake Changed My Entire Approach
Early in my journey, I believed that investing in the most expensive microphone would instantly elevate my recordings. It wasn’t until I experienced poor sound quality despite high-end gear that I realized the importance of environment and technique. That lightbulb moment taught me that gear alone isn’t enough—placement, calibration, and understanding your voice are equally crucial.
Why Trusting My Ear Made All the Difference
Initially, I relied solely on specs and reviews, but I learned to listen critically during tests. Fine-tuning gain levels, experimenting with position, and analyzing frequency responses helped me develop an intuitive sense of what my recordings needed. This personal connection to my gear transformed my audio from generic to engaging and professional.
The Power of Continuous Learning and Adaptation
Recording environments change, voice tones evolve, and technology advances. Staying curious and regularly updating my knowledge helped me troubleshoot issues seamlessly and embrace new tools—like advanced calibration software—that keep my sound crisp. This mindset ensures I never settle and always seek to improve my audio quality.
My Secret Weapon for Consistency
Implementing a strict maintenance routine—cleaning connectors, calibrating regularly, and managing acoustic treatments—has kept my setup reliable. I also found that keeping detailed records of settings and environmental conditions allows me to replicate successful recordings consistently, saving time and frustration when inspiration strikes.
Curated Resources That Transformed My Voice Recordings
The first resource that reshaped my perspective was the ultimate guide to XLR microphones. It offers practical insights into matching gear with your environment and voice. I also trust the reviews on top XLR microphones for creators, which help me stay updated on the best equipment for professional results. These tools have been indispensable in my quest for high-quality sound.
Your Voice Deserves More Than Mediocrity
Deciding to refine your microphone setup is a commitment to your craft. Embrace the learning curve, experiment boldly, and prioritize consistent upkeep. With dedication, your voice will resonate with clarity and confidence—making every word count. The journey might seem daunting at first, but every small step you take now will lead to a voice that truly stands out in the crowded digital world.
What has been your biggest challenge when setting up your microphone system? Share your experiences below—I’d love to hear your story!
3 responses to “Best Voice Recording Microphones for Creators: USB, Sh shotgun & XLR Options”
This post really hits the mark on why choosing the right microphone is such a game-changer for content creators. I’ve learned the hard way that investing in a top-tier mic without proper positioning or environment really doesn’t pay off, especially with the noise and echo issues you mentioned. I started out with a basic USB mic, and while it was convenient, my recordings often sounded dull or distant. Switching to a good XLR setup, plus acoustic treatment, made a noticeable difference—my voice became richer and more professional sounding. I also agree that calibration and testing are often overlooked but crucial steps; spending time to analyze levels and frequencies can save so much editing time later. Since every voice is unique, I’m curious—has anyone here experimented with different polar patterns on their mics? I’ve heard hypercardioid can help reduce room noise even further, but I’d love to hear your experiences or recommendations.
This post offers really practical insights—especially about matching your microphone type to your environment and voice. I’ve found that regardless of the mic quality, poor placement can negate a lot of the benefits. For example, experimenting with mic angles and distances has completely transformed how natural my recordings sound, avoiding the overly boomy or thin results. Plus, I’ve recently started using different polar patterns on my condenser mic to tackle room echo, with surprisingly good results. Has anyone else played around with polar pattern adjustments? I’m curious how others have optimized their mic setups for tricky spaces or specific voices. Sometimes, a seemingly minor tweak can make a big difference in clarity and warmth. Do you think advanced features like polar pattern selection are underused by most creators, or are they too technical for everyday use? Would love to hear your experiences and any tips for choosing the right pattern for different environments.
This post really emphasizes the importance of choosing the right microphone for your specific needs, and I couldn’t agree more. When I started streaming and recording voiceovers, I initially underestimated the impact of environment and proper setup. Moving from a basic USB mic to a quality XLR with proper acoustic treatment made a world of difference. I also found that experimenting with microphone placement and gain settings was crucial to achieving professional sound. I’d be interested to hear from others—how do you approach testing and calibrating your mic to ensure consistent quality across different sessions? Do you have particular software or techniques you swear by? I believe that ongoing maintenance and understanding your gear are just as vital as picking the right model in the first place. Would love to hear everyone’s routines or tips for keeping your audio crisp and reliable over time.
About Me

Chesung Subba
Author/Writer
Hello, I'm Chesung Subba, a passionate writer who loves sharing ideas, stories, and experiences to inspire, inform, and connect with readers through meaningful content.
Follow Me
Connect with me and be part of my social media community.
Leave a Reply