Ultimate Guide to Shotgun Microphones & Voice Recording in 2025
I remember the first time I tried recording a podcast episode in my cluttered home studio. I was excited but soon frustrated—my voice sounded distant, muddled, and completely unprofessional. It was a lightbulb moment for me. I realized that choosing the right microphone isn’t just a tech decision; it’s the difference between sounding like a pro and sounding like you’re talking into a tin can.
Why Voice Clarity Matters More Than Ever in 2025
In a world where content is king, your voice is your crown. Whether you’re creating videos, podcasts, or voiceovers, the quality of your audio can make or break your audience’s experience. And let’s be honest, with the surge of remote work and virtual meetings, clear voice recordings have become essential—not just for professional projects but for personal branding too.
Here’s the kicker: studies show that listeners are 15 times more likely to stay engaged with high-quality audio (source: CreatorRigReviews). That means investing in the right microphone isn’t just a luxury; it’s a necessity in 2025. But, I know what you’re thinking—”Is this really worth the hype? Do I need a fancy setup?” Trust me, I’ve been there. I bought a cheap USB mic early on, only to realize I was missing out on the crispness and depth I wanted. That mistake almost made me give up before I discovered the power of shotgun and XLR mics.
So, what’s the secret to getting that professional sound? It’s all about understanding your options—like the difference between a shotgun mic and an XLR setup—and knowing how to make them work for your space and budget. That’s exactly what I’ll help you with today.
Have you ever faced the frustration of muffled audio or inconsistent voice quality? Keep reading. We’re about to turn your recordings into a clarity-rich experience.
Let’s dive into the practical steps that will help you elevate your voice recordings and sound as confident and polished as the pros.
Choose the Right Microphone for Your Needs
Start by selecting a microphone that fits your recording environment and budget. For a simple setup, a USB microphone offers plug-and-play convenience, perfect for beginners. If you want professional quality and flexibility, an XLR microphone paired with an audio interface provides richer sound and durability. I once started with a USB mic, but after upgrading to an XLR setup, my recordings gained depth and clarity, making a noticeable difference for my audience.
Understand Your Microphone Types and Their Benefits
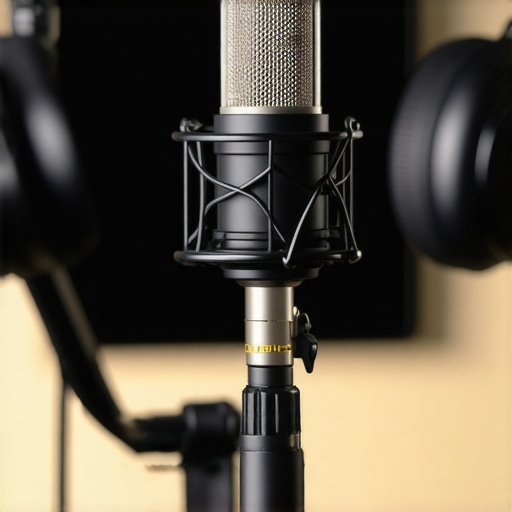
Knowing the differences between shotgun, USB, and XLR mics helps you pick the best tool for your voice. Shotgun microphones excel at capturing focused sound from a distance, ideal for podcasting in noisy environments. XLR mics are versatile and durable, suitable for professional studio recordings. USB mics are user-friendly, great for quick setups. I experimented with a shotgun mic during outdoor recordings, and the directional focus significantly reduced background noise, boosting my voice clarity.
Optimize Your Recording Environment
Sound quality isn’t just about the mic; your environment matters. Use soft materials like foam panels or blankets to dampen echo and reduce ambient noise. Position your mic close to your mouth—about 6-12 inches—to capture your voice clearly and minimize room reflections. I once recorded in a cluttered room with hard surfaces, which caused echo. After adding some foam panels and adjusting mic placement, the difference was night and day, resulting in crisp, professional-sounding audio.
Properly Set Up and Position Your Microphone
Placement is crucial. For handheld microphones, hold it about an inch from your mouth at a slight angle. For stand-mounted mics, adjust the height so the capsule is at mouth level. Use a pop filter to reduce plosive sounds. I learned this the hard way—initially, my plosives caused popping sounds. Adding a pop filter and adjusting the mic distance eliminated those issues, making my recordings much cleaner. For detailed setup tips, check out the ultimate guide to voice recording.
Test and Adjust Your Settings
Always record a test clip to check levels and clarity. Use software to monitor your audio, ensuring your volume stays consistent without clipping. Adjust gain levels on your microphone or audio interface so your voice is clear but not distorted. I once recorded a long session without testing, only to realize my levels were too high, causing distortion. A quick test saved me hours of re-recording. Take time to listen critically and tweak your setup until the sound is perfect.
Post-Processing Enhances Clarity
After recording, use editing software to remove background noise, normalize volume, and apply equalization. Even simple tweaks can make your voice sound more professional. I use basic noise reduction and a slight EQ boost to enhance vocal warmth. This step is essential for podcasts or voiceovers where clarity can make or break engagement. For advanced techniques, explore tools like voice recording tips.
Many creators believe that the type of microphone—be it USB, XLR, shotgun, or a dedicated podcast mic—is the only factor that determines audio quality. But let’s dig deeper. The truth is, most people overlook nuanced pitfalls and fall for some widespread myths that can sabotage their recordings from the start.
Myth 1: All USB microphones are created equal. This couldn’t be further from the truth. While USB mics are convenient, not all deliver the same sound quality. Many affordable models sacrifice detail and clarity, leading creators to think they need an expensive XLR setup for professional results. However, premium USB microphones, like those highlighted in this guide, can rival XLRs in clarity when paired with proper environment and settings.
Myth 2: XLR microphones automatically sound better. This is a common misconception. An XLR mic’s quality depends heavily on the audio interface and the environment. A cheap interface or untreated space can turn a high-end XLR into a muffled or noisy recording. The real secret is in the setup, not just the hardware. For advanced tips, check this comprehensive setup guide.
Myth 3: Shotgun mics are only for film or outdoor use. Many overlook their versatility inside a controlled environment. Shotgun mics, like those discussed in this article, excel at isolating voice from background noise, even indoors. They’re perfect for podcast recordings in less-than-ideal rooms or noisy environments, provided you position them correctly.
Common trap: Ignoring room acoustics. Creators often focus solely on microphone choice, neglecting their recording environment. A mic can only do so much if the room is echoey or filled with background noise. Soft materials like foam panels or even blankets, as shown in this guide, drastically improve clarity. Remember, you’re only as good as your environment.
Beware of over-reliance on technology. Advanced equipment won’t fix poor technique or bad acoustics. Proper mic placement, gain settings, and post-processing are equally crucial. An often overlooked mistake is thinking that a $500 mic compensates for poor setup—spoiler: it doesn’t. Consistent testing and calibration can make a world of difference, as I learned through trial and error.
What advanced adjustments can truly optimize voice clarity?
For seasoned creators, fine-tuning your audio chain involves considering not just hardware but also software. Noise gates, EQ, and compression tailored to your voice can eliminate unwanted sounds and highlight your natural tone. Studies indicate that mastering these post-processing techniques enhances engagement significantly (source). Even the best mic can fall flat if not used with proper post-production care.
In conclusion, avoid falling for oversimplified myths. Focus on environment, technique, and nuanced setup adjustments. Your voice deserves the attention to detail that transforms ordinary recordings into compelling audio experiences. Have you ever fallen into this trap? Let me know in the comments.
Maintaining your microphone setup, whether it’s a USB microphone, XLR mic, or shotgun mic, is essential for ensuring consistently high-quality recordings. Over time, dust, cable wear, and environmental factors can degrade performance. I’ve found that using specific tools and adopting regular maintenance routines can extend the lifespan of your gear and keep your sound crisp and clear. For example, investing in a good microphone cleaner spray and a set of cable testers helps me identify and resolve issues before they impact my recordings.
One of my favorite tools is the Miniature Compressed Air Duster. I use it monthly to remove dust from my microphone grilles and internal components, especially in my XLR setups where dust can settle unnoticed. This simple step prevents unwanted noise and ensures the capsule remains free of debris. Pairing this with a soft brush helps me gently dislodge stubborn particles without damaging delicate parts.
Regularly inspecting and replacing cables is another critical step. I personally rely on cable testers to verify my XLR connections. Faulty cables can introduce noise or cause intermittent signals that ruin a recording session. I recommend labeling cables and storing them in a dedicated case to prevent unnecessary wear and tangling.
For software maintenance, I use Reaper for post-processing and Audacity for quick edits. These programs allow me to apply noise reduction, equalization, and compression efficiently. Updating your digital audio workstation (DAW) regularly ensures you have the latest features and bug fixes, which can significantly improve your workflow and the final sound quality.
Looking ahead, I believe the trend toward integrated smart maintenance tools will grow. Imagine a future where your audio interface or mic could self-diagnose issues and suggest repairs or replacements automatically. For now, the best practice is to develop a routine: clean your equipment monthly, check cables quarterly, and keep your software updated. These small investments in maintenance can save you hours of rework and keep your recordings sounding professional every time.
How do I maintain my voice recording setup over time?
The key is consistency. Set a schedule to clean and inspect your gear, replacing worn cables and filters as needed. Use tools like cable testers and cleaning sprays to prevent performance drops. Also, keep your software updated to benefit from ongoing improvements. By treating your equipment with care and attention, you’ll ensure your voice recordings stay clear, professional, and impactful for years to come. Ready to boost your setup? Try integrating a monthly cleaning routine with a cable check — it’s a small step that makes a big difference. For more detailed advice, check out this comprehensive guide.
The Hardest Lesson I Learned About usb mic, xlr mic, shotgun mic, podcast mic, voice recording
One of the toughest realizations was understanding that even the most expensive microphone can’t fix poor technique or an unsuitable environment. I spent months chasing the perfect hardware only to realize that proper placement and room acoustics are just as vital. That lightbulb moment taught me to focus on setup and environment first, then invest in quality gear.
What Experts Won’t Tell You About usb mic, xlr mic, shotgun mic, podcast mic, voice recording
Most professionals keep quiet about the importance of routine maintenance. Regularly cleaning your microphone and inspecting cables can prevent noise issues and prolong gear lifespan. I started using compressed air and cable testers, which drastically reduced unexpected pops and static in my recordings, saving me hours in rework.
The Biggest Myth That Held Me Back from Great Voice Recording
I believed that an XLR microphone automatically meant superior sound. It’s not true—your setup, environment, and post-processing matter more. Upgrading my audio interface and treating my room made a bigger difference than just choosing a higher-end mic. This lesson pushed me to optimize all parts of my chain, not just the hardware.
Where I Went Wrong With My First Shotgun Microphone
I thought shotgun mics were only for outdoor or film use. But I found they excel indoors too, especially for isolating my voice from background noise. Proper positioning and using a dedicated pop filter transformed my indoor recordings, proving versatility is key. Now, I recommend shotgun mics for creators working in less-than-ideal spaces.
How Neglecting Room Acoustics Sabotaged My Audio Quality
Ignoring my room’s echo and reflection issues caused muffled and inconsistent voice recordings. Once I added foam panels and moved my mic closer, the clarity improved dramatically. This experience taught me that environment tweaks often outperform hardware upgrades.
Curated Resources for Voice Recording Excellence
My go-to guide is the Ultimate Guide to USB, XLR, and Shotgun Microphones. It’s comprehensive and practical, helping me choose the right gear for my needs. I also trust this XLR setup guide for detailed calibration tips and shotgun mic reviews to find the best models.
Your Journey to Crystal Clear Voice Starts Today
Taking control of your microphone setup and environment can elevate your voice recordings from amateur to professional. Remember, consistent maintenance and environment tuning are just as important as hardware choice. Your voice has the power—make sure it’s heard loud and clear every time.
What’s been your biggest challenge in improving your voice recording setup? Share your experience below and let’s grow together!
,
One response to “Ultimate Guide to Shotgun Microphones & Voice Recording in 2025”
About Me

Chesung Subba
Author/Writer
Hello, I'm Chesung Subba, a passionate writer who loves sharing ideas, stories, and experiences to inspire, inform, and connect with readers through meaningful content.
Follow Me
Connect with me and be part of my social media community.
Leave a Reply