Top Voice Recording & Microphone Gear: USB, XLR & Shotgun Microphones 2025
Have you ever hit record, only to realize your voice sounds flat, muffled, or just plain off? I’ve been there. I remember spending hours swapping microphones, tweaking settings, and still ending up with audio that didn’t do my voice justice. It was frustrating—like trying to speak through a pillow. That lightbulb moment hit me hard: the right mic makes all the difference.
Why microphonology matters more than ever in 2025
Microphone technology has exploded over the past few years. From simple USB plug-ins to professional XLR setups, the options are staggering. But here’s the truth I’ve learned: selecting the right gear isn’t just about brand names or price tags. It’s about understanding your needs and matching them with the best tools available today. Whether you’re a budding podcaster, a content creator, or just someone who loves good sound, your voice deserves clarity and warmth.
Partnering with the right microphone can elevate your recordings, making your voice resonate with authenticity. And no, you don’t need to break the bank. Today, there are fantastic options in every price range, tailored for different scenarios—be it streaming, professional podcasting, or voice-over work. Want to know what’s hot in 2025? Check out this comprehensive list of top microphones for voice recording.
Does choosing the right microphone really matter?
Absolutely. I once thought I could get away with a cheap mic, thinking, “It’s just my voice.” Big mistake. I learned the hard way that a subpar mic adds background noise, muddles your tone, and makes editing a nightmare. The right choice can save you so much time and stress, giving your voice that professional sparkle. If you’re still skeptical, I get it—there’s a lot of hype and flashy tech out there. But trust me, investing in quality gear is worth every penny, especially if you’re serious about your sound. For more tips, check out my guide on microphone setup.
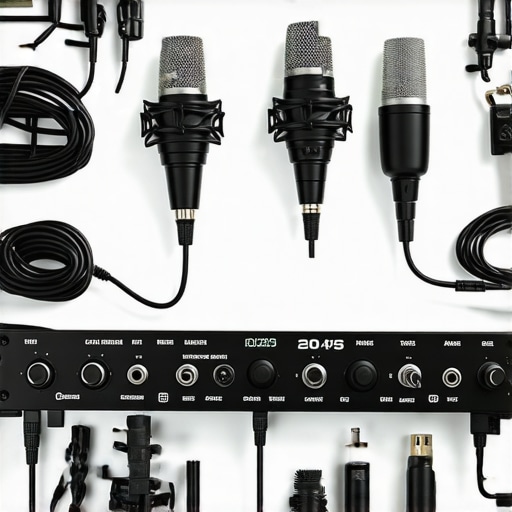
Choose Your Microphone Wisely
Start by identifying your primary recording environment. Do you record in a quiet home studio or on the go? For stationary setups, XLR microphones are often preferred because they deliver professional-quality sound and offer greater control over your audio. If portability and simplicity are key, a USB microphone might be the best fit because it connects directly to your computer without extra gear. For dynamic environments, shotgun microphones excel at isolating your voice from background noise. I once switched from a basic USB mic to an XLR setup for my podcast, and the difference was night and day, especially during live recordings. Check out top options in 2025 to see what fits your needs.
Set Up Your Microphone Correctly
Proper placement is crucial. Position your microphone about 6-12 inches from your mouth, slightly off-axis to avoid plosives. Use a pop filter to reduce harsh sounds. When using an XLR mic, connect it to a quality audio interface that provides clean power and minimal noise—think of it as the bridge between your mic and your computer. For USB mics, ensure your software settings are optimized—set the sample rate and bit depth for clarity. I once struggled with muffled recordings because my mic was too close to a noisy fan; after repositioning and adding a pop filter, my clarity improved instantly. For detailed setup advice, see this comprehensive guide.
Optimize Your Recording Environment
Minimize echo and background noise by treating your space. Use foam panels, carpets, and curtains to absorb sound reflections—think of it as giving your room a mini sound booth. Avoid recording near windows or noisy appliances. During my first few recordings, my barking dog and the street noise wrecked my audio. After adding some foam panels and closing the window, I noticed a dramatic drop in unwanted sounds. For best results, consider using a shotgun mic if you’re recording outdoors or in an untreated room. Check out top shotgun mics for 2025 for outdoor and on-location recording.
Test and Tweak Your Setup
Never settle for the first take. Record short test clips, listen critically, and make adjustments. Adjust gain levels so your voice isn’t too loud or too quiet—think of it as setting your volume to hit the sweet spot. Use headphones to monitor your audio live; this helps catch issues immediately. I spent hours tweaking my gain because I was recording too hot, causing distortion. A quick test and some adjustments saved me hours of post-production editing. For expert tips on fine-tuning your setup, explore this resource.
Leverage the Right Accessories
Invest in a sturdy mic stand, a shock mount for XLR mics to reduce vibrations, and a quality pop filter to prevent plosives. These small accessories can make a big difference in your recording quality. I initially recorded with a makeshift stand, which caused noise from vibrations. Upgrading to a shock mount improved clarity significantly. For specific accessory recommendations, visit this curated list.
Many content creators assume that choosing a high-end microphone guarantees perfect audio, but this is a misconception. The real pitfalls often lie in how you set up and use your gear. Let’s dig into some nuanced mistakes that even seasoned podcasters and streamers make—and how to avoid them.
Why Overemphasizing Equipment Can Backfire
It’s tempting to believe that the latest microphone model will solve all your sound issues, but this isn’t always true. A common myth is that top-tier gear automatically produces professional-quality audio. In reality, without proper setup, even the most expensive mic can sound mediocre. For example, microphone placement, room acoustics, and gain settings often have a far more significant impact than the model itself. This is why I recommend focusing on proper setup and environment rather than just the gear.
Another misconception is that USB microphones are inherently inferior. While XLR setups offer more control, a well-chosen and correctly configured USB mic can outperform a poorly set up XLR. It’s all about understanding your environment and recording needs.
Common Mistakes That Undermine Your Audio
One trap many fall into is neglecting room acoustics. Even a great mic can pick up echo, reverb, or background noise if your environment isn’t treated properly. Using basic foam panels and positioning your mic away from reflective surfaces can dramatically improve clarity.
Another frequent mistake is ignoring gain staging. Setting your gain too high causes distortion, while too low results in weak audio. Regularly testing and adjusting your levels ensures your voice remains clear and natural. Remember, monitoring with headphones during recording is crucial to catch these issues early.
Advanced Tip: Don’t Overlook the Power of Proper Microphone Orientation
Many overlook the importance of mic orientation and polar patterns. For instance, a cardioid pattern is excellent for isolating your voice from background noise, but only if you position the mic correctly—about 6-12 inches from your mouth, slightly off-axis. Misplacing your mic or choosing an inappropriate pattern can introduce unwanted noise or an unnatural sound. For professional results, experiment with different placements and patterns, and consider using a shotgun mic for outdoor or noisy environments.
Finally, avoid the trap of relying solely on post-production to fix audio issues. While editing can help, it’s always better to get the best possible sound during the recording phase. This saves time and results in a more authentic, high-quality output.
Have you ever fallen into this trap? Let me know in the comments. Improving your setup with attention to these nuances can make a world of difference in your audio quality.
Maintaining your microphone setup is crucial to ensuring consistent, professional-quality recordings over time. Even the best gear can deteriorate or fall out of optimal performance if not properly cared for. In this section, I’ll share the exact tools, methods, and routines I use to keep my audio gear functioning flawlessly, along with predictions on where this maintenance trend is headed.
How do I maintain my microphone equipment over time?
First, invest in a high-quality microfiber cloth and some compressed air cans. I use these regularly to gently clean my microphone capsules and prevent dust buildup that can cause muddiness or unwanted noise. For XLR microphones, I make it a point to check the connections and clean the contacts with contact cleaner (like DeoxIT) every few months. This prevents oxidation that can lead to signal loss or hums. When it comes to cables, I always coil them properly after each use, avoiding tight bends that can damage the internal wires over time. These small but consistent habits keep my gear reliable.
For software, I rely heavily on a dedicated digital audio workstation (DAW) like Reaper because it provides detailed control over input levels and allows me to run real-time diagnostics. I also use noise reduction plugins sparingly—mainly during post-production—to clean up any residual hums or background sounds. Regularly updating your firmware and drivers for your audio interfaces and microphones (if applicable) is another important step. I schedule these updates quarterly, so I never fall behind on compatibility or security patches.
Looking ahead, I believe the future of microphone maintenance will be increasingly automated. Smart interfaces with self-diagnostic capabilities, integrated cleaning protocols, and AI-powered noise detection will make upkeep easier and more foolproof. Companies are already exploring self-cleaning microphone membranes and adaptive calibration tools—like those discussed in this guide—which will be standard in a few years.
Don’t forget to regularly check and calibrate your gear
One of the most overlooked aspects of maintenance is calibration. For instance, if you use a high-end XLR microphone, it’s vital to periodically verify that your audio interface’s gain settings are accurate and that your mic’s response hasn’t shifted. I recommend testing with a known-good reference signal every few months and adjusting your setup accordingly. Doing this prevents subtle quality drops that can go unnoticed until post-production reveals inconsistencies.
Finally, I suggest creating a maintenance checklist and sticking to it. For example, weekly visual inspections, monthly cleaning routines, quarterly firmware updates, and biannual calibration checks. These small routines, combined with quality tools like professional-grade microphones, will ensure your setup remains reliable for years to come.
I encourage you to try implementing one of these maintenance tips today—just a quick check or clean can extend your gear’s lifespan and keep your audio sounding crisp and clear. Remember, the key to long-term success is proactive upkeep. Keep your tools in top shape, and your voice will always shine through.
The Hardest Lesson I Learned About Microphone Mastery
One of my biggest surprises was realizing that even the most expensive microphone can’t fix poor placement or bad acoustics. I used to believe tech alone would elevate my sound, but I soon discovered that setup and environment are king. That lightbulb moment taught me to prioritize positioning, environment, and calibration above gear specs.
Three Myths About Microphones That Held Me Back
I used to think USB mics were inferior to XLR setups, but after experimenting, I found a well-placed USB mic can outperform a poorly set-up XLR. Also, I believed that buying the latest model was enough—until I learned that proper gain staging and room treatment matter far more.
What Experts Won’t Tell You About Maintaining Your Microphone Gear
Regular cleaning and calibration are often overlooked. I now schedule quarterly firmware updates, use compressed air to keep dust out, and test my gear with reference signals to ensure consistent quality. These small habits keep my audio sharp and reliable over time.
My Essential Toolkit for Voice Recording
I’ve come to trust the top microphones for voice recording because they balance quality and affordability. For setup, I rely on a sturdy shock mount, pop filter, and a quality audio interface—these accessories significantly reduce noise and vibrations. Lastly, software like Reaper helps me monitor levels and tweak recordings on the fly. These tools have transformed my voice recordings from amateur to professional.
Step Into Your Voice: The Future of Microphone Mastery
Now it’s your turn to take action. Whether you’re upgrading your gear or refining your setup, remember that consistent practice and attention to detail will unlock your true vocal potential. Microphonology in 2025 isn’t just about the latest tech—it’s about mastering the nuances that make your voice stand out. So, what’s the first step you’ll take today to improve your microphone game?
Have you ever struggled with placement or calibration? Share your experience below—I’d love to hear what’s worked for you!
4 responses to “Top Voice Recording & Microphone Gear: USB, XLR & Shotgun Microphones 2025”
About Me

Chesung Subba
Author/Writer
Hello, I'm Chesung Subba, a passionate writer who loves sharing ideas, stories, and experiences to inspire, inform, and connect with readers through meaningful content.
Follow Me
Connect with me and be part of my social media community.
Leave a Reply