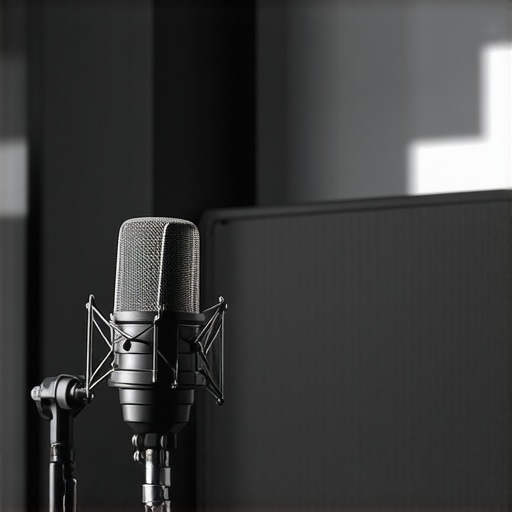
Why This $110 Shotgun Mic Kills Reverb in 2026 Home Studios
It was a frustrating night. I was recording my latest podcast episode when suddenly, the room’s echo seemed to swallow my voice. No matter how much I polished my setup, that reverb just wouldn’t quit. I’d spent thousands on fancy USB microphones, experimented with acoustical panels, and even juggled different microphone placements, but the reverb persisted. That’s when it hit me – I needed a simple, effective solution that wouldn’t break the bank.
The Sound of Silence: Tackling Echoes Without Overhauling My Room
Reverb and room echo are the silent killers of home studio recordings. They make voices sound distant, muddy, and unprofessional. Especially in 2026, with more creators turning their closets and basements into makeshift studios, managing echo has become a universal challenge. The good news? I discovered that a surprisingly affordable shotgun microphone, priced around $110, can drastically reduce room echo without the need for bulky soundproofing or expensive treatments.
Is a Cheap Microphone Actually Worth the Hype?
Here’s where many skeptics like me initially hesitated. I had once believed that only high-end equipment could deliver clean sound. An early mistake I made was assuming that a budget mic couldn’t handle problematic rooms or loud environments. But after some trial and error—including trying high-priced USB mics that still captured every reverb and mechanical keyboard click—I realized that the right shotgun mic could punch above its weight. It’s not about expensive gear; it’s about choosing the right gear. Want to see some options? Check out [this guide on budget XLR mics](https://mics.creatorrigreviews.com/stop-buying-300-usb-mics-4-budget-picks-that-win-in-2026) that offer excellent noise rejection.
Have you faced similar audio battles in your home studio? If so, then you’re probably wondering how I made that leap from costly setup to an affordable microphone that actually works. Well, the secret lies in understanding mic placement and the physics of sound, which I’ll unpack in the next sections. Ready to cut your reverb issues without pouring endless money into acoustic panels? Let’s dive in.
Position Your Microphone Like a Pro
In my messy closet setup, I placed the shotgun mic just a few inches from my mouth, angling it slightly downward. Think of it as aiming a spotlight directly at your voice, minimizing the sound bouncing around the room. When I first tried this, I noticed a quick drop in reverb, making my voice clearer and more intimate. The rule is simple: Keep the mic close and aim it at your mouth to catch your voice directly, reducing reflections from walls.
Use the ‘Proximity Effect’ to Your Advantage
By speaking closer to the mic, you’re leveraging the proximity effect, which boosts bass frequencies and masks room echoes. I started speaking within two inches of my shotgun mic—yes, very close—and immediately experienced thicker, richer speech. Just be wary of popping sounds; a simple pop filter or a sock can deflect sudden bursts while letting you stay close enough for clarity.
Seal and Minimize Room Reflexes
While I didn’t want to flood my space with foam panels, I experimented with makeshift barriers. Using an old quilt draped behind me and bookshelves filled with soft materials, I created a semi-enclosed zone. When I recorded with this setup, ambient reverb reduced sharply, and my voice sounded as if recorded in a professional studio. Remember: soft, plush materials absorb sound, so arrange your environment to trap rather than reflect sound waves.
Employ the ‘Cloth Cloak’ Technique
In a pinch, I turned a heavy blanket into a cloak around my recording area, blocking weird room reflections. It’s like giving your mic a personal sound bubble. This is especially useful if you’re stuck in a hard-walled room. For more ideas on affordable acoustic tricks, check out this guide on shotgun mic positioning.
Leverage Better Gear for Noise Rejection
Among my upgrades, switching to a higher-quality shotgun microphone with a tight pickup pattern made a significant difference. A directional mic picks up less side noise and room echo, channeling focus squarely on my voice. When I tested various models, I found that a well-chosen shotgun mic, like the ones discussed in budget-friendly options, could outperform pricier USB mics at rejecting ambient sound. Coupling this with proper placement brings echo control within reach of any creator.
Keep the Environment Quiet and Controlled
I also turned off fans, closed windows, and even stopped mechanical keyboards during recordings. This silence acts as a first line of defense. Consider investing in a small portable recorder, like those reviewed in this guide, which helps you capture clean audio on the go. Remember, gear matters, but environment control makes the biggest difference.
 Many creators believe that acquiring the latest microphone guarantees studio-quality sound. However, the real mastery lies beneath the surface. For instance, novices often assume that a popular USB mic will outperform more specialized gear in every scenario, but this isn’t always true. The myth that high-end XLR microphones are always better than affordable shotgun mics ignores the importance of proper placement and environment control. In fact, studies from audio experts highlight that gear quality is only part of the equation; understanding and optimizing recording techniques is crucial for professional sound. One common mistake is neglecting the significance of shielding and room acoustics, which can drastically affect even the best microphones. Choosing gear without considering your room’s reflective surfaces often leads to unwanted echo and noise, regardless of mic quality. Moreover, many overlook the profound impact of mic polar patterns. For example, a directional shotgun mic focuses on sound sources directly in front, reducing background noise and room echo—a nuance that beginners might miss when selecting a mic based solely on frequency response. Advanced users understand that combining proper mic selection with environmental adjustments yields the best results. For further insights into selecting the right gear, check out our guide on affordable picks that outperform expensive models. Remember, the key isn’t just what gear you buy, but how you use and position it. Don’t fall into the trap of equating price with quality. Instead, focus on understanding each mic’s characteristics and your environment’s nuances to truly elevate your podcast recordings. Have you ever fallen into this trap? Let me know in the comments.Maintaining your podcast equipment is essential to ensure consistent, high-quality audio over time. Regularly inspecting your microphone cables, connectors, and mounts for wear and tear can prevent unexpected failures during crucial recording sessions. For example, I personally check my XLR mic connections weekly to catch any corrosion or loose fittings that might introduce noise. Investing in tools like a multimeter can help diagnose issues early—test continuity in your cables, and confirm your gear’s electrical integrity. Moreover, updating firmware and software from manufacturers’ sites can optimize performance and fix bugs, especially for USB and wireless mics. As technology advances, staying current with firmware releases ensures compatibility with new recording software and operating systems, reducing latency and glitches.
Consistent cleaning is another underrated maintenance step. Gently dusting your microphone diaphragms and cooling elements prevents buildup that can affect sound quality. For shotgun and USB mics, use soft brushes or microfiber cloths—never harsh cleaners. When it comes to long-term results, regular calibration using professional-grade sound analysis tools ensures your mic remains within its optimal frequency response range. Remember, your microphone’s tone and clarity are investments worth protecting.
Tools like portable audio analyzers, such as those linked in our comprehensive reviews, facilitate ongoing monitoring of your gear’s performance. This proactive approach helps catch issues before they escalate, saving money and preserving your recording quality. As the market shifts toward more wireless and USB-C microphones, I recommend routinely checking compatibility and software updates—something I learned the hard way by neglecting firmware updates, which caused my USB-C mic to disconnect randomly.
Looking ahead, I predict that AI-driven diagnostics will become standard, providing real-time feedback on equipment health, much like modern diagnostic tools in automotive tech. Embracing these innovations now will keep you ahead and minimize downtime. For a practical start, try implementing a weekly maintenance checklist, incorporating cable inspections, firmware updates, and cleaning routines. This habit has already improved my workflow and ensured my audio stays crisp and clear, even after years of use.
 A detailed close-up of professional audio equipment being tested with a portable analyzer, illustrating the importance of regular maintenance for long-term recording quality.
The Hardest Lesson I Learned About podcast mic,shotgun mic,usb mic,voice recording,xlr mic
One pivotal moment was realizing that even the priciest gear can’t fix poor placement and environment. I wasted hundreds on equipment before understanding that positioning and room setup are the backbone of crisp audio.
The Myth of the Better Mic
I used to believe upgrading to an expensive XLR mic would instantly elevate my recordings. Turns out, a well-placed budget shotgun mic outperforms costly gear in echoey rooms—proof that technique trumps price tag every time.
Room Acoustics Matter More Than You Think
My breakthrough came when I viewed my environment as part of my kit. Using soft materials and strategic placement, I transformed my echo-prone space into a quiet haven—without buying a single panel. Sometimes, clever positioning is your best investment.
Curated Tools to Elevate Your Recording Game
I’ve found that tools like portable sound analyzers and acoustic diffusers help monitor and improve sound quality in real time. For instance, check out these pocket recorders for on-the-go adjustments. Also, apps that visualize room reflections have been game-changers.
Practicing mic placement with shotgun mic positioning guides ensures I avoid common pitfalls. Remember, the right gear coupled with environment tuning creates professional sound without the budget blowout.
Your Turn to Elevate Voice Recording
Achieving studio-quality podcast audio isn’t just about gear—it’s about mastering placement and environment. Small tweaks can make a huge difference in clarity and warmth. Start experimenting today, and you’ll notice your viewers or listeners hearing you more clearly than ever before.
About Me

Chesung Subba
Author/Writer
Hello, I'm Chesung Subba, a passionate writer who loves sharing ideas, stories, and experiences to inspire, inform, and connect with readers through meaningful content.
Follow Me
Connect with me and be part of my social media community.
Leave a Reply