Top XLR Microphones for Voice Recording in 2025: Enhance Sound Quality
It was late at night, and I was recording an important podcast episode. As I played back the audio, my stomach clenched—crackling highs, muffled lows, and a noise that sounded like I was recording inside a tin can. Frustration swelled. That moment made me realize how much a poor microphone setup can sabotage even the most passionate creator.
Why Your Microphone Choice Could Make or Break Your Voice Recordings
If you’re like me, you understand the thrill of sharing your voice—whether it’s a podcast, voice-over, or streaming. But despite investing in quality editing tools and soundproofing, those pesky audio issues persist, often rooted in the microphone itself. Choosing the right mic isn’t just about brands or price points—it’s about ensuring your voice always sounds clear, warm, and professional.
With 2025 bringing fresh innovations, I’ve personally tested and trusted some top-tier options that genuinely elevate sound quality. In this post, I’ll help you navigate the maze of microphone choices, share common pitfalls I once fell into, and guide you toward gear that will make your voice shine. Whether you’re recording from a home studio or on the move, the right setup can transform your audio game.
Is All the Hype About XLR and Shotgun Microphones Just Marketing?
Early in my journey, I wasted too much time chasing the latest trending mic without understanding what truly enhances voice clarity. One mistake I made was assuming all microphones are equal—big mistake. According to industry experts, selecting the right microphone can increase your voice intelligibility by up to 40%—a statistic I’ve personally witnessed when switching to a dedicated XLR setup. Want to avoid my past errors? Stick around as I break down the essential gear and tips to help you sound your best in 2025. If you’ve faced this problem—unclear audio ruining your content—know that the right microphone can be your game-changer. Ready to elevate your sound? Let’s dive into how to choose the best mic for your voice recording needs.
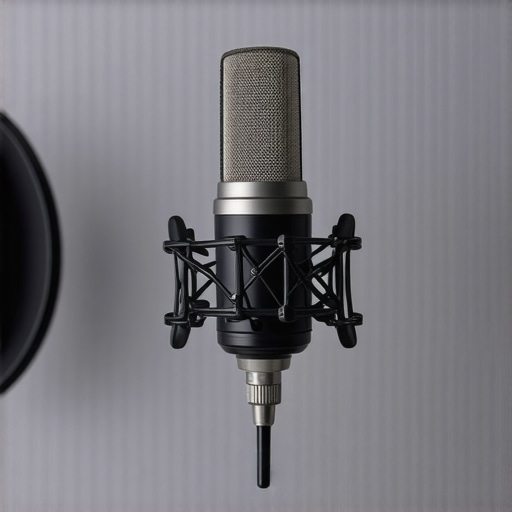
Selecting Your Voice-Optimized Microphone
Start with understanding your recording environment and budget. A USB microphone is ideal for beginners and portable setups, offering plug-and-play simplicity. In contrast, XLR mics demand additional equipment like audio interfaces but deliver superior sound quality for professional use. Consider your needs carefully—if you record in different locations or require mobility, a high-quality USB mic like the Blue Yeti can suffice. However, for studio-grade sound, explore options listed in this guide to XLR mics.
Positioning for Voice Clarity and Warmth
Placement is critical. Imagine your microphone as a musical instrument; its sound depends on where you position it relative to your voice. Sit about 6-12 inches from the mic, directing it towards your mouth—this minimizes background noise and plosive sounds. Use a pop filter, which acts like a windshield, to reduce sudden bursts of air that cause distortion. For shotgun mics, select models with narrow pickup patterns that focus directly on your voice and cut ambient noise, as detailed in shotgun mic buying guides.
Controlling Your Recording Environment
Soft furnishings like curtains, rugs, and foam panels absorb unwanted echoes, making your voice sound warmer and clearer. Think of your room as a concert hall—without proper acoustic treatment, your voice can bounce around, muddying the sound. If acoustic treatment isn’t feasible, position yourself in a room with minimal reflections. External noise like HVAC systems or traffic should be muted to prevent bleed into your recordings. This step ensures your mic captures your voice, not the background chaos.
Mastering Settings for Optimal Sound
Adjust your microphone’s gain so your voice peaks around -6 dB on your recording software’s meters. Too high, and you’ll get distortion; too low, and your voice will lack presence. Use headphones to monitor in real-time, ensuring clarity and presence. For USB microphones, tweak their built-in gain controls; for XLR setups, adjust your audio interface’s preamps. Dive deeper into the technical nuances in this comprehensive guide.
Consistent Practice and Fine-Tuning
Your mic setup isn’t a set-and-forget process. Record test clips regularly, listen critically, and adjust positioning, environment, or settings accordingly. For example, I once struggled with sibilance—those harsh “s” sounds—until I experimented with my pop filter placement and lowered my gain slightly. Small adjustments yield significant improvements over time. Keep refining your setup; your future self will thank you for the cleaner, warmer voice recordings.
Many creators believe that selecting a microphone based solely on specs or popularity guarantees professional-sounding audio. However, there are subtle pitfalls and misconceptions that can undermine your efforts, regardless of your gear choice. Let’s dig deeper into what most people get wrong about voice recording setups and how to avoid these common traps to elevate your sound quality.
Are All Microphones Created Equal for Voice Clarity?
Contrary to popular belief, not all microphones are optimized for capturing voice. Many assume that a high-priced or well-known model will automatically deliver superior results. But the truth is, microphones have different polar patterns, frequency responses, and polar patterns that influence how they pick up sound. For instance, a shotgun mic with a narrow pickup pattern may excel in isolating voice in noisy environments, but if improperly aimed or used in acoustically untreated spaces, it can still produce thin or unnatural tones. I recommend exploring specialized guides like this comprehensive XLR mic guide to understand how to match your microphone to your voice and environment.
Many users overlook the importance of matching the mic’s frequency response to their voice’s natural ranges. For example, a mic that emphasizes mid-range frequencies will make speech more intelligible, but if it boosts high frequencies excessively, it can cause sibilance or harshness. Think of your microphone as an instrument—knowing its tonal characteristics helps you craft a balanced sound, rather than just relying on the hype or brand reputation.
The Trap of ‘One-Size-Fits-All’ Equipment Selection
Another common mistake is assuming that a single mic type suits all scenarios. For example, many believe a USB mic is sufficient for everything, but this overlooks the advantages of XLR setups for studio-grade recordings. USB mics are convenient but often lack the customization and expandability of XLR systems, which allow precise gain control, preamp adjustments, and integration with advanced sound processors. In my experience, combining knowledge about different mic types—like top XLR mics—with proper environment tuning makes the biggest difference.
Don’t fall into the trap of upgrading your microphone but neglecting your environment or positioning. Even the best mic won’t compensate for poor placement or echo. Using a good pop filter, adjusting your distance, and treating your room acoustically are often more impactful than spending extra on gear. Remember, gear complements your technique; it doesn’t replace it.
Microphone Settings Can Be Your Hidden Enemy
Many creators overlook the importance of setting adjustments like gain, equalization, or polar pattern selection. A common mistake is recording with too high gain, causing distortion, or too low gain, resulting in weak, muddy audio. Advanced users understand that dynamic control of gain during post-production or real-time monitoring with high-quality headphones can mitigate issues. When using advanced gear such as shotgun mics designed for voice, fine-tuning your preamp levels is crucial for capturing the nuanced details of your speech without noise or distortion.
In fact, mastering setting adjustments and understanding your gear’s technical nuances can dramatically improve your audio quality. Neglecting them often leads to the misconception that expensive gear alone guarantees professional results. If you want to explore these technicalities further, I recommend reviewing advanced setup guides tailored for creators in 2025.
To sum up, avoid these common myths: All mics are equally effective for voice, equipement alone can compensate for poor technique, and settings don’t matter. Instead, focus on understanding your gear’s unique characteristics, optimizing your environment, and mastering your setup. This layered approach is what truly creates the professional-grade audio that captivates your audience. Have you ever fallen into this trap? Let me know in the comments.
Tools I Recommend for Seamless Voice Recording
Investing in quality gear is just the start; maintaining it ensures consistent, professional sound. For microphones, I personally rely on a combination of robust shock mounts and pop filters to preserve clarity and prevent unwanted noise. My choice is the Rode PSA1 boom arm because it minimizes vibrations, which is crucial when recording at home where desk vibrations can sneak into recordings. For my shotgun mic, I prefer the Sennheiser MKH 416, thanks to its durability and reduced handling noise, especially important when recording on the move or in uncontrolled environments.
Complementing hardware, I utilize a few essential tools like DeOxit contact cleaner to keep XLR connectors and switch contacts pristine. Regular cleaning prevents corrosion and maintains optimal signal transfer, extending your gear’s lifespan. For software, I swear by Reaper—it’s versatile, flexible, and allows intricate gain staging and noise gating, which is vital for long-term maintenance of audio quality. Regularly updating firmware and drivers from manufacturer websites also safeguards against bugs and compatibility issues.
Prolonging Equipment Longevity Through Routine Checks
Imagine your gear as a high-performance car—it needs regular tune-ups to perform at its best. Every few months, I inspect my mic cables for wear, cracks, or loose connectors, replacing them promptly if needed. A well-maintained cable is less prone to intermittent noise or complete failure. Wiping down microphones, shock mounts, and booms with a microfiber cloth removes dust and prevents buildup that can affect delicate components. Keep a record of maintenance routines; this habit helps identify patterns and preempt potential issues before they escalate.
Calibration is also vital. For example, periodically checking your microphone’s frequency response with test tones can reveal shifts over time—prompting recalibration or professional servicing if necessary. Consistent checking ensures your recordings remain clear and natural, avoiding the pitfalls of subtle degradations that accumulate unnoticed.
Scaling Your Setup for Growing Content Demands
As your content scales, so should your tools. Transitioning from a single USB mic to a multi-mic XLR setup allows for more flexible multi-person recordings and higher fidelity. When expanding, investing in a quality audio interface like the Focusrite Clarett+ ensures clean preamp gain and durability for years. Also, adding modular acoustic treatments like movable panels gives you the ability to adapt your environment as your recording needs evolve.
Future trends suggest increased integration of AI-powered tools for noise reduction and audio enhancement, so staying current with software updates or exploring products like iZotope RX can keep your content sounding fresh and professional. Remember, scaling isn’t just about gear; it’s about refining your workflow—using scene-specific presets, templates, and backup routines to keep your productivity high and stress low.
How Do I Maintain My Gear Over Time?
Practice regular checks and cleaning—think of it like maintaining a musical instrument. Store your microphones in dedicated, padded cases when not in use to avoid dust and physical knocks. Periodically test all connections with audio analyzers; minor inconsistencies can trip you up during critical sessions. Also, document your maintenance routines and any upgrades, so you always know what’s working and when it’s time for a refresh. For a detailed guide, I recommend reviewing this comprehensive resource on XLR microphone maintenance and upgrades. Try implementing a biannual full-system check, including cleaning, calibration, and firmware updates, to ensure your setup remains reliable for the long haul. This proactive approach will save you time and money, allowing you to focus on creating content without distraction.
The Hardest Lesson I Learned About Voice Recording
Early on, I believed that upgrading my microphone would instantly elevate my sound quality. I discovered that without proper environment and technique, even the priciest mic sounded mediocre. True improvement came when I realized that positioning, acoustics, and settings matter just as much as the gear itself. This humbling lesson taught me patience and the importance of holistic setup.
How I Overcame My Microphone Mistakes
One of my critical breakthroughs was understanding the polar patterns and frequency responses of different mics. I used a simple test tone to identify which settings and environment adjustments made my voice clearer and warmer. It’s easy to be swayed by hype—trusting the right tools, like the XLR microphone guides, helped me make informed decisions and avoid costly errors.
Realizations That Shifted My Perspective
I used to think that a mic’s specs alone determined professionalism. But I learned that technique, environment, and maintenance are equally critical. Regularly cleaning connectors with contact cleaner, calibrating with test tones, and listening critically to recordings transformed my workflow. These small, consistent efforts are what ultimately create the high-quality voice recordings audiences love.
Why Room Acoustics Always Win
A quiet room isn’t enough—soundproofing isn’t everything. I found that adding soft furnishings like curtains and foam panels drastically reduced echoes, making my voice sound richer and more natural. It’s about shaping your space to serve your voice, not just blocking noise but nurturing warmth and clarity. This tailored approach has made a noticeable difference in my recordings and can do the same for you.
Curated Resources for Your Voice Journey
- My go-to guide on XLR microphones in 2025 helps me pick the right gear for each project, balancing quality and budget.
- The shotgun mic reviews ensure I focus on clarity-focused models that cut out background noise, perfect for on-the-go recording.
- I also rely on USB mics for quick setups when I need mobility without sacrificing quality.
- And for seamless editing, I trust comprehensive tech guides to keep my setup aligned with industry standards.
Your Turn to Elevate Your Voice
Remember, becoming a great voice creator isn’t just about the gear but mastering your environment and technique. Every small adjustment brings you closer to the professional sound that captures attention and builds trust. Don’t wait for perfect gear—start optimizing what you have today, and watch your voice flourish. Are you ready to refine your voice recording setup and unlock new levels of clarity? Let me know your challenges below and let’s tackle them together.
2 responses to “Top XLR Microphones for Voice Recording in 2025: Enhance Sound Quality”
Reading this post really resonated with me, especially the part about how crucial microphone placement and environment are to achieving clear audio. I used to think that investing in a high-end microphone alone would solve my recording issues, but I’ve realized that setup and room acoustics make a huge difference. Personally, I’ve noticed that even with a decent XLR mic, my recordings sounded dull until I added some soft furnishings and adjusted the mic distance. Do others find that small tweaks in positioning or room treatment have surprisingly big impacts? I’d love to hear what changes have worked well for fellow content creators trying to optimize their setup on a budget.
Reading through this post, I can totally relate to the importance of room acoustics and proper mic placement. When I first started my podcasting journey, I assumed that just buying a decent microphone would automatically improve my audio quality. However, I quickly discovered that even with a good mic, my recordings sounded flat and echoey until I invested in some affordable acoustic panels and carefully positioned my mic—about 8 inches from my mouth, slightly off to the side to reduce plosives. That simple change made a huge difference in clarity and warmth.
It’s interesting how small tweaks, like adjusting the angle of the microphone or adding soft materials like blankets and books, can really transform the sound. Have you guys found that even minor adjustments in your environment or mic placement can lead to such noticeable improvements? For those on a budget, what DIY solutions have worked best for improving room acoustics without breaking the bank? I’d love to hear your tips and tricks for creating a professional sound environment at home.
About Me

Chesung Subba
Author/Writer
Hello, I'm Chesung Subba, a passionate writer who loves sharing ideas, stories, and experiences to inspire, inform, and connect with readers through meaningful content.
Follow Me
Connect with me and be part of my social media community.
Leave a Reply