Best USB, Shotgun & XLR Microphones for Voice Recording in 2025
I remember the frustrating mornings spent trying to record a podcast, only to be drowned out by background noise or muffled audio. I’d spend hours tweaking settings, swapping microphones, and still walk away feeling like my voice was lost in a sea of static. It was a lightbulb moment for me—realizing that the right microphone isn’t just a luxury; it’s the backbone of professional-sounding voice recordings.
Why Microphone Choice Matters More Than Ever in 2025
Today, with remote work, content creation booming, and the rise of voice-activated technologies, having a high-quality microphone can make or break your audio quality. Whether you’re a budding podcaster, streamer, or voice-over artist, your microphone is your voice’s most crucial tool. Investing in the right equipment ensures clarity, warmth, and professionalism, helping your content stand out in a crowded digital landscape. According to a recent study by Sound on Sound, poor audio quality can reduce listener engagement by up to 60%, which is staggering.
But here’s the catch—navigating the vast selection of microphones can feel overwhelming. USB mics, shotgun mics, XLR setups—what’s truly worth your money? I’ve been there, and I know the struggle of choosing the perfect gear without wasting hundreds of dollars on options that fall short of expectations. That’s why I’ve dedicated this guide to helping you cut through the noise and find the best microphones for your voice recording needs in 2025.
Are Microphones Actually Worth the Hype?
Early in my journey, I made the mistake of thinking all microphones are created equal. I bought a cheap USB mic, expecting studio-quality sound. Instead, I got a muffled, tinny output that made my content sound amateurish. That mistake taught me an important lesson: investing in quality pays off. When you choose the right microphone—whether it’s a versatile USB model or a professional XLR setup—you’re investing in your voice’s clarity and your audience’s experience. Want to avoid my pitfalls? Check out our top picks for best microphones for voice recording in 2025.
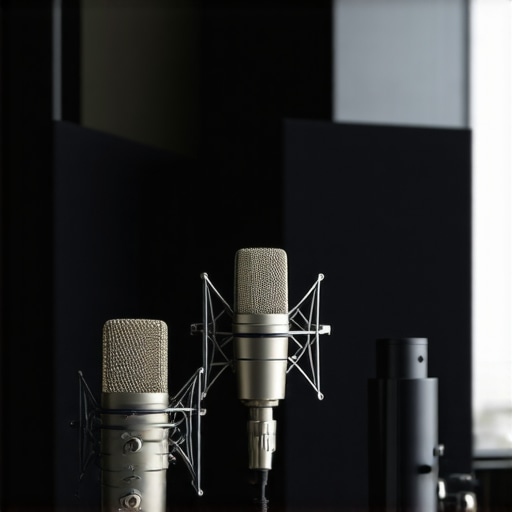
Choosing Your Microphone Type and Setup
Start by determining whether a USB, shotgun, or XLR microphone best suits your needs. For beginners or those on a budget, a high-quality USB mic like the best USB microphones in 2025 offers plug-and-play simplicity with decent sound quality. If you’re aiming for professional-grade recordings, consider an XLR microphone, which requires an audio interface but provides superior sound clarity. Shotgun mics are ideal for capturing voice from a distance, especially in noisy environments, making them perfect for field recordings. Decide based on your environment and future plans.
Step 1: Evaluate Your Environment
Before purchasing, analyze your recording space. Is it a quiet room, or are there background noises? If your space is noisy, an XLR microphone with a shock mount and windscreen can significantly reduce unwanted sounds. For a controlled environment, a good USB microphone might suffice. Remember, the right environment enhances microphone effectiveness.
Step 2: Match Microphone to Your Voice
Different microphones respond uniquely to voice characteristics. For example, a cardioid pattern minimizes side and rear noise, focusing on your voice. I once tested a shotgun mic in my cluttered home studio, and it surprisingly isolated my voice well, even with background noise. Use resources like this XLR mic setup guide to understand which microphone pattern fits your voice best.
Step 3: Connect and Configure Your Microphone
For USB mics, simply plug into your computer and select the microphone as your input device in your system settings. For XLR microphones, connect via an audio interface, then adjust gain levels. Start with a low gain and increase gradually until your voice is clear without distortion. I once set my gain too high, causing clipping, but a quick adjustment saved my recording. Use tools like this guide for detailed setup instructions.
Optimizing Your Microphone for Quality Sound
Step 4: Position Your Microphone Correctly
Placement is crucial. Position your microphone about 6-12 inches from your mouth. Use a pop filter to reduce plosive sounds—those harsh ‘p’ and ‘b’ sounds that cause distortion. For example, I once neglected this step and ended up with popping sounds in my recording, which was frustrating to fix later. Proper positioning ensures clarity and reduces editing time.
Step 5: Use Proper Acoustic Treatments
Minimize echo and background noise by adding foam panels or diffusers in your recording space. I improved my vocal clarity significantly after installing basic acoustic treatments, which prevented my voice from bouncing off the walls. Focus on reducing reflective surfaces and background distractions to get the best sound quality.
Step 6: Test and Adjust Settings
Always record test clips before your actual session. Listen critically and tweak gain, placement, or environment as needed. Use headphones to monitor in real-time, catching issues like background noise or clipping. This iterative process was vital when I once recorded an entire episode only to realize my microphone was picking up a refrigerator hum—quick adjustments saved the final product.
Final Tips for 2025 Voice Recording Excellence
Stay updated with the latest tech by exploring new models like the top picks for 2025. Experiment with different setups, and don’t be afraid to invest in quality gear that fits your voice and environment. Remember, consistent testing and environment optimization are key to professional-sounding recordings every time.

Let’s dig deeper into some of the most prevalent misconceptions surrounding microphones and their usage. Many newcomers fall into traps that hinder their audio quality, often due to misunderstandings or oversimplified advice. By examining these myths critically, we can uncover the hidden nuances that separate amateur recordings from professional-quality audio.
Myth 1: All Microphones Sound the Same if They Have Similar Specifications
This is a widespread misconception. People often assume that a microphone with similar specs, such as frequency response or polar pattern, will sound identical. However, two mics with the same technical specs can still produce markedly different sound signatures due to internal components, diaphragm material, and construction quality. For example, a condenser mic from a premium brand might deliver a warmer, more natural tone compared to a budget model with similar specs. It’s essential to *listen* and test before purchasing, rather than relying solely on specs.
Myth 2: Higher Price Always Means Better Sound
While investing in quality gear is generally wise, price isn’t the sole indicator of performance. Many high-priced microphones are tailored for specific applications and may not suit your voice or environment. Conversely, some mid-range models outperform their more expensive counterparts in real-world scenarios. The key is understanding your specific needs—such as voice tone, recording environment, and intended use—and selecting a microphone that matches those needs. Check out top picks for 2025 to find models that offer the best value for your situation.
Oops! The Hidden Trap of Over-Processing Audio
Many creators believe that post-processing can fix poor microphone choice or bad recordings. While editing can enhance sound, it’s no substitute for capturing a clean, well-recorded voice. Overuse of EQ, compression, and noise reduction can introduce artifacts, making your voice sound unnatural or hollow. A better approach is optimizing your microphone setup — placement, environment, and settings — to get the best raw recording possible. This way, your post-production becomes a polishing step, not a crutch. For advanced tips, see this comprehensive setup guide.
What Advanced Users Should Consider: Does Microphone Polar Pattern Really Matter?
Absolutely. The polar pattern determines how a microphone picks up sound from different directions. While cardioid patterns are popular for voice because they reject side and rear noise, some environments benefit from omnidirectional or hypercardioid mics. For instance, in a noisy environment, a supercardioid or shotgun mic can focus solely on your voice, minimizing background distractions. Understanding the nuances of polar patterns can prevent missteps — such as using a microphone that captures too much ambient noise, resulting in muddled recordings. For more detailed insights, explore this resource.
Have you ever fallen into this trap? Let me know in the comments. Remember, mastering your microphone setup is about more than specs — it’s about understanding the nuances that make your voice stand out.
Maintaining your microphone setup and tools is crucial to ensure consistent, high-quality voice recordings over the long term. Just like any piece of professional equipment, microphones and audio accessories require regular care, updates, and strategic upgrades to keep pace with evolving technology and your growing needs.
How do I maintain my voice recording tools over time?
First, always keep your microphones clean. Dust and debris can settle on diaphragms and internal components, degrading sound quality. Use a soft microfiber cloth and, if necessary, a gentle air blower to remove dust from your microphone grilles and ports. For XLR microphones, periodically check and clean the connectors with contact cleaner to prevent corrosion, which can cause signal loss or noise issues. Additionally, store your gear in a controlled environment—avoid extreme temperatures and humidity, which can damage sensitive components.
Next, invest in a reliable hardware maintenance kit. I personally recommend keeping a set of replacement cables, shock mounts, and windscreens on hand. Over time, cables can develop internal breaks or loose connections, and replacing them promptly prevents interruptions during recordings. For example, I once replaced a worn-out XLR cable, which instantly eliminated a persistent hum in my recordings—small investments that make a significant difference.
On the software side, regularly update your digital audio workstation (DAW) and audio drivers. Software updates often include bug fixes, performance improvements, and compatibility enhancements with new hardware. For instance, staying current with this guide helps me optimize my setup, ensuring smooth operation and access to new features.
What tools do I use to keep my voice recordings top-notch?
My go-to tools include a high-quality portable audio interface—like the Focusrite Scarlett series—which provides clean preamps and reliable connectivity. I also swear by a professional-grade shock mount and pop filter combo for reducing handling noise and plosive sounds, respectively. For cleaning, I use a small, dedicated ultrasonic cleaning device for tiny parts like microphone capsules, which keeps my gear in pristine condition.
Additionally, I use software like iZotope RX for post-production cleanup, which helps me remove background noise and clicks without compromising voice clarity. These tools, combined with regular physical maintenance, extend the lifespan of my equipment and ensure that every recording maintains its professional quality.
Looking ahead: The future of microphone maintenance and tools
As technology advances, expect smart microphones with built-in diagnostics and self-cleaning features. AI-powered tools will soon be able to predict component failures before they happen, allowing for preventative maintenance. Embracing these innovations now will prepare you for seamless long-term recording sessions, reducing downtime and costly repairs.
To stay ahead, I recommend trying out advanced maintenance routines like routine calibration checks with specialized tools or experimenting with acoustic treatment upgrades to complement your gear. By prioritizing regular upkeep and leveraging cutting-edge tools, you can ensure your voice recordings remain crisp, clear, and professional for years to come.

Explore how professional-grade acoustic treatments and maintenance tools can extend the lifespan of your microphone setup, ensuring consistent quality over time.
The Hardest Lesson I Learned About Microphones and Voice Clarity
One of my most eye-opening moments was realizing that even a slightly off-position microphone can ruin an otherwise perfect recording. I used to chase the latest tech, thinking that more expensive meant better, but I learned that understanding my environment and voice was far more important. This taught me to always test, listen critically, and fine-tune my setup, which drastically improved my audio quality.
3 Myths About Microphone Quality That Held Me Back
For a long time, I believed that a high price tag guaranteed top-tier sound. Turns out, many mid-range microphones outperform their pricier counterparts in practical scenarios. Additionally, I thought all microphones sounded similar if they had the same specs, but internal design and quality components make a big difference. Lastly, I underestimated the importance of proper placement and acoustic treatment, which are crucial for professional results.
What Experts Won’t Tell You About Microphone Choice and Voice Recording
Many seasoned creators keep quiet about how much environment and technique influence sound quality. They focus on gear, but neglect the setup and acoustic space. The real secret is that consistent testing, environment optimization, and understanding polar patterns can turn a good microphone into a game-changer. Investing in education about these nuances pays off more than just upgrading your gear.
My Essential Toolkit for Voice Recording Excellence
Over the years, I’ve trusted tools like the Focusrite Scarlett series for clean audio interfaces, which provide reliable preamps. A good shock mount and pop filter have become staples in my kit, reducing noise and plosive sounds. For post-production, I rely on iZotope RX to clean up background noise without sacrificing voice clarity. These tools have been vital in maintaining professional quality, even in less-than-ideal environments.
Your Turn to Elevate Your Voice Recordings in 2025
Remember, mastering your microphone setup is an ongoing journey. Keep experimenting, stay informed about new tech, and prioritize environment and technique. Your voice has the potential to stand out—make sure your gear and skills support that vision. The future of voice recording is bright for those willing to learn and adapt.
What has been your biggest challenge when setting up your microphone? Share your experiences below—I’d love to hear your story!
2 responses to “Best USB, Shotgun & XLR Microphones for Voice Recording in 2025”
About Me

Chesung Subba
Author/Writer
Hello, I'm Chesung Subba, a passionate writer who loves sharing ideas, stories, and experiences to inspire, inform, and connect with readers through meaningful content.
Follow Me
Connect with me and be part of my social media community.
Leave a Reply