Ultimate Guide to XLR Microphones & Podcast Mic Setup for Creators 2025
Discovering the Power of XLR Microphones: A Personal Tale
As someone who’s been passionate about content creation for years, I vividly remember the first time I stepped into the world of professional audio. I was overwhelmed by the variety of microphones out there, but nothing captured my attention like the XLR microphone. The rich, warm sound quality and the versatility it offered was a game-changer for my podcasting journey. Over time, I realized that choosing the right XLR microphone for creators isn’t just about equipment; it’s about how well it complements your voice and setup.
Why I Switched to XLR Microphones for My Podcast
Initially, I relied on USB microphones, which were convenient but limited in quality and upgradeability. After diving into the ultimate guide to XLR mics, I decided to invest in a quality XLR setup. The difference was astonishing — clearer sound, less background noise, and a professional feel that elevated my content. I also appreciated how XLR systems allowed me to expand my setup — adding mixers, different microphones, and other accessories.
My Podcast Mic Setup: From Beginners to Pro
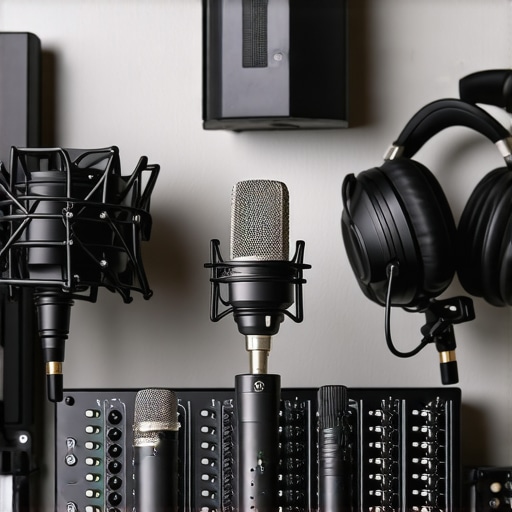
Setting up my podcast mic was initially daunting, but I learned that a simple shotgun XLR microphone combined with a good audio interface could deliver studio-quality sound. I opted for a dynamic microphone, which helped reduce background noise in my recording environment. I also invested in a sturdy boom arm and pop filter, which made my recordings more professional and comfortable.
What Makes an XLR Microphone Ideal for Creators?
From my experience, the key advantages are sound quality, flexibility, and durability. Unlike USB mics, XLR mics require extra equipment, but that investment pays off in the long run. They are especially suitable for voice-over work, podcasting, and streaming. According to industry experts, the best XLR mics are built to last and provide consistent performance under various conditions.
Deep Dive: Why Do Creators Prefer XLR Microphones?
What’s the real difference between XLR and USB for voice recording?
In my honest opinion, the main difference lies in sound processing and upgrade options. XLR microphones connect to dedicated audio interfaces, which allow for more nuanced control of the audio signal, resulting in a richer, more natural sound. This setup is ideal if you’re serious about creating professional-quality podcasts or videos. For detailed insights, I recommend checking out this comprehensive guide.
Whether you’re just starting or looking to upgrade your setup, understanding the nuances of microphone technology can significantly impact your content quality. I encourage you to experiment with different configurations and find what works best for your voice and environment.
If you’ve had your own journey with XLR mics or want to share tips, I’d love to hear your story in the comments below!
Mastering Microphone Choice: The Nuances That Elevate Your Voice Recording
As I delved deeper into the world of professional audio, I discovered that selecting the right XLR microphone is just the beginning. The true mastery lies in understanding the subtleties that influence sound quality, durability, and ease of use. For instance, the polar pattern of a microphone—whether cardioid, hypercardioid, or omnidirectional—can dramatically impact how well it captures your voice while rejecting unwanted ambient noise. This choice becomes especially critical when recording in less-than-ideal acoustic environments.
Why Polar Patterns Matter for Creators
Imagine you’re recording a podcast in a noisy café or a bustling studio. A shotgun XLR microphone with a highly directional polar pattern, such as supercardioid or hypercardioid, can focus on your voice and minimize background sounds. Conversely, omnidirectional mics pick up sound from all directions, which might be suitable for group discussions or capturing room ambiance, but less ideal for solo voice work. Understanding these nuances allows creators to tailor their setup to their specific needs, enhancing overall audio clarity.
The Role of Build Quality and Longevity
Beyond sound characteristics, the build quality of an XLR microphone influences its longevity and reliability. Professional-grade mics often feature rugged metal bodies, high-quality internal components, and resilient connectors. This robustness ensures consistent performance over years of use, making them a worthwhile investment. For creators who frequently record on location, durability becomes even more vital, as equipment must withstand transport and varied environmental conditions. Exploring reviews and specifications—like those found in top professional mics—can guide you toward models that balance sound excellence with durability.
How Can External Accessories Complement Your XLR Microphone?
Choosing the right microphone is just part of the equation. Accessories such as shock mounts, pop filters, and high-quality audio interfaces significantly influence your end result. For example, a good shock mount isolates the mic from vibrations and handling noise, ensuring cleaner recordings. Pop filters prevent plosive sounds from damaging your audio quality, especially when recording close-up vocals. Additionally, investing in a reliable audio interface with excellent preamps can further enhance the richness and clarity of your sound. Combining these elements with a high-caliber XLR mic creates a professional studio environment, even if your space isn’t acoustically perfect.
What’s the best way to fine-tune your microphone setup for optimal voice clarity?
Achieving pristine voice recordings involves more than just equipment—proper positioning, environment control, and post-processing all play vital roles. Position your mic at an appropriate distance—typically 6-12 inches from your mouth—and experiment with angles to find the sweet spot that captures your voice naturally while minimizing room reflections. Using acoustic panels or diffusers can significantly reduce echo and reverb, creating a clearer recording environment. Finally, mastering basic editing techniques, such as equalization and noise reduction, can further polish your audio, making your voice stand out with professional finesse. For an in-depth look at setup tips, check out expert advice on voice recording.
If you’re eager to explore more about selecting the perfect XLR microphone or want to share your setup tips, I invite you to leave a comment below. Sharing experiences helps build a community of quality creators dedicated to achieving top-tier audio!
Beyond the Basics: Embracing the Complexities of XLR Microphone Selection
As I ventured deeper into the world of professional audio, I realized that choosing an XLR microphone is not merely about picking a high-quality device but understanding the intricate nuances that can transform your recordings from good to exceptional. The journey involved experimenting with polar patterns, considering the environment, and recognizing how external accessories could elevate my setup. This experience has profoundly shaped my approach to content creation, emphasizing that mastery lies in the details.
How Do Polar Patterns Truly Impact Your Recording Environment?
Reflecting on my own recordings, I found that polar patterns are like the personality traits of microphones—they dictate how they interact with their surroundings. For instance, I initially favored cardioid mics for their ability to focus on my voice while rejecting side noise. However, in more challenging environments with background chatter or ambient noise, I discovered that supercardioid or hypercardioid mics provided sharper focus and minimized unwanted sounds. This realization led me to experiment with different polar patterns based on my recording space, which dramatically improved clarity and intimacy in my audio. For a detailed exploration of polar patterns and their practical applications, I recommend checking out this comprehensive guide.
Why Is Build Quality More Than Just Durability—It’s a Sound Quality Factor?
In my experience, the build quality of an XLR microphone extends beyond its physical robustness; it influences the internal components and ultimately the sound it produces. I’ve had the chance to test budget-friendly models that, despite their sturdy shells, produced inconsistent audio signals and suffered from internal noise. Conversely, high-end mics with rugged metal bodies and precision-engineered internal parts delivered consistently warm, clear tones, even after years of use. Investing in a well-built microphone means investing in reliability and superior sound, especially when recording in varied environments. For more insights, I found this article invaluable in understanding which models balance durability with sound excellence.
What Are the Hidden Benefits of External Accessories in Microphone Setup?
While I initially underestimated the importance of accessories, I soon realized that they are essential for achieving professional-grade recordings. A shock mount, for example, isolates the microphone from vibrations caused by handling or external movements, preventing unwanted rumble in my recordings. Pop filters helped me manage plosive sounds, ensuring my voice remained clear and natural. Additionally, a high-quality audio interface with low noise preamps transformed my setup, providing clean gain and richer sound. Combining these accessories with a premium XLR mic created a synergy that elevated my content quality significantly. If you’re curious about specific accessory recommendations, check out this ultimate guide.
How Can Advanced Microphone Positioning Techniques Enhance Your Audio?
Positioning has been a game-changer in my recording process. I learned that placing the mic at an optimal distance—usually 6 to 12 inches from my mouth—and angling it slightly can significantly reduce room reflections and echo. Using acoustic panels and diffusers further minimizes reverb, creating a controlled environment that captures my voice with clarity. I also experimented with different angles and heights, discovering that subtle adjustments can make a noticeable difference in tone and presence. For those eager to refine their setup, exploring techniques in this resource has been incredibly helpful.
Sharing my experiences, I encourage you to consider not just your equipment but also how you position and treat your environment. Small tweaks can unlock a new level of professionalism in your recordings. If you’ve found particular positioning tricks or accessories that work well for you, I’d love to hear your insights—leave a comment below and join the conversation!
Refining Your Microphone Technique for Studio-Quality Sound
While selecting the perfect XLR microphone is fundamental, mastering the art of microphone technique can dramatically influence your recording outcomes. Over the years, I’ve discovered that subtle adjustments—such as mic placement, angle, and environmental considerations—are crucial for capturing a natural, professional tone. For instance, maintaining a consistent distance of 6-12 inches from your mouth, and angling the mic slightly upward or downward depending on your voice, can reduce plosives and sibilance, resulting in a smoother sound. Additionally, employing acoustic treatments like bass traps and diffusers in your recording space, as discussed in this guide, helps control reflections and reverberations that distort clarity.
How Do Polar Patterns Influence Your Recording Environment?
Understanding the polar pattern of your XLR microphone—whether cardioid, hypercardioid, figure-8, or omnidirectional—enables you to tailor your setup to specific recording contexts. For example, I often prefer cardioid mics for solo voice work because they focus on sound directly in front, rejecting side and rear noise. However, in environments where ambient sound is unavoidable, a hypercardioid or supercardioid pattern can offer enhanced rejection capabilities. Conversely, omnidirectional mics excel in capturing room ambiance or multiple voices, but require a quieter environment to avoid background noise intrusion. For an in-depth exploration, I recommend reviewing this detailed resource.
Can External Accessories Truly Elevate Your Audio Quality?
Absolutely. In my experience, external accessories such as shock mounts, high-quality pop filters, and dedicated audio interfaces significantly elevate the final output. Shock mounts, for example, isolate the XLR microphone from vibrations caused by movement or handling, preventing low-frequency rumble. A premium pop filter minimizes plosive sounds like “p” and “b,” which can cause distortion if unfiltered. Moreover, investing in a high-end audio interface with low-noise preamps ensures your microphone’s signal is amplified cleanly, preserving rich detail. Combining these elements allows you to create a controlled, professional recording environment even in imperfect spaces.
What Are the Most Common Pitfalls in Microphone Placement and How to Avoid Them?
One mistake I see frequently is improper mic positioning—either too close or too far from the mouth. Too close, and you risk capturing excessive proximity effect or plosives; too far, and your voice may sound distant and thin. A balanced approach is positioning the mic approximately 6-12 inches from your mouth, slightly off-axis to reduce sibilance. Additionally, neglecting room acoustics can introduce unwanted reverb and echo, compromising clarity. To mitigate this, I recommend setting up acoustic panels and experimenting with different angles and heights to find the optimal position. For detailed techniques, I encourage exploring this comprehensive guide. Sharing personal tweaks and adjustments with your setup can unlock nuances that elevate your voice recordings to new levels of professionalism.
How Can You Leverage Advanced Microphone Settings for Artistic Control?
Many high-end XLR microphones offer adjustable features such as high-pass filters, pad switches, and pattern selectors, providing creative control over your sound. For instance, activating a high-pass filter can reduce low-frequency rumble or handling noise, while a pad switch allows for capturing loud sources without distortion. Pattern selectors enable switching between cardioid, omnidirectional, or figure-8 patterns, offering flexibility for various recording scenarios. I’ve found that experimenting with these settings—particularly in conjunction with external equalization during post-processing—can produce a tailored, polished sound that aligns with my artistic vision. To deepen your understanding of these features, I highly recommend reviewing this authoritative resource. If you’re eager to push your recordings beyond basic techniques, I invite you to share your experiences or ask questions—let’s advance our mastery together.
Things I Wish I Knew Earlier (or You Might Find Surprising)
1. The Polar Pattern Secret
Early in my journey, I underestimated how crucial polar patterns are. Discovering that cardioid mics focus directly on your voice while rejecting side noise was a game-changer, especially when recording in imperfect environments. This knowledge allowed me to tailor my setup and significantly improve clarity.
2. Build Quality Matters More Than You Think
It’s tempting to go for budget options, but I learned that a well-built microphone with rugged internal components produces more consistent, warmer sound over time. Durability isn’t just about longevity; it directly impacts your audio quality.
3. Accessories Are Your Best Friends
Shock mounts, pop filters, and quality audio interfaces aren’t optional—they’re essential. Using a shock mount reduced vibrations, while a pop filter made my recordings sound more professional and natural. These small investments paid off immensely.
4. Positioning Is an Art
Perfecting mic placement—about 6-12 inches from your mouth, slightly off-axis—can drastically reduce plosives and room noise. I spent hours experimenting, and the difference in sound quality was remarkable. Environment treatment like acoustic panels further refined my recordings.
5. Advanced Settings Unlock Creativity
Features like high-pass filters and pattern switches on high-end XLR mics gave me control over tone and rejection, allowing for more artistic flexibility. Playing with these settings helped me craft a signature sound that truly represents my style.
Resources I’ve Come to Trust Over Time
- Sweetwater: Their extensive reviews and expert advice helped me understand what to prioritize in a microphone. I trust their insights for building a reliable setup.
- Recording Revolution: Their tutorials on mic placement and acoustics are invaluable. I recommend this channel to anyone serious about audio quality.
- Sound On Sound Magazine: For in-depth articles on microphone technology and industry trends, this publication is a goldmine of knowledge.
- Shure’s Official Site: Their product specs and demos helped me compare different models and understand what features matter most.
Parting Thoughts from My Perspective
Choosing the right XLR microphone is a blend of understanding technical nuances and trusting your ears. The journey from initial confusion to mastering the details has been rewarding. Remember, the best mic for you depends on your environment, voice, and creative goals. Don’t hesitate to experiment with polar patterns, accessories, and positioning—these small tweaks can elevate your recordings from good to exceptional. If this resonated with you, I’d love to hear your experiences or questions. Feel free to share your story or drop a comment below—let’s grow together as creators!
6 responses to “Ultimate Guide to XLR Microphones & Podcast Mic Setup for Creators 2025”
Reading this personal journey into XLR microphones really resonated with me, especially since I’ve gone through similar transitions in my audio setup. I started with basic USB mics but quickly realized the limitations once I tried to upscale my content quality. Moving to an XLR system was a game-changer, providing that richer sound that truly elevates professional projects. I particularly appreciated the detailed explanation about polar patterns and their impact in different environments — it’s something I wish I knew earlier, as I often recorded in varied spaces that could benefit from more directional mics. I’ve found that investing in accessories like pop filters and shock mounts has made a huge difference, even in my modest home studio. My question is, for creators working in small, untreated rooms, what would be your recommended approach to minimize background noise without extensive acoustic treatment? Would love to hear some practical tips from experienced creators on managing sound in challenging environments.
This post really hits home for me, especially the emphasis on understanding polar patterns and their role in noisy environments. I’ve been experimenting with different mics for my home setup, and I’ve found that choosing a shotgun mic with a hypercardioid pattern really makes a difference—not only in rejecting ambient noise but also in capturing my voice with clarity. One trick I’ve started using is placing the mic slightly above mouth level and angling it downward, which helps reduce plosives and sibilance, plus it minimizes unwanted room reflections. For those working in untreated rooms, I’ve also added a few DIY acoustic panels made of foam and heavy curtains, which surprisingly helped dampen echo without costly professional treatment. Does anyone have advice on affordable acoustic solutions that actually work well? I believe small adjustments and accessories can turn a less-than-ideal space into a decent recording environment, and I’d love to hear other creative tips from this community.
This detailed account really resonates with my own journey into high-quality audio. I remember starting out with a basic USB mic and feeling frustrated by the limited sound quality and lack of upgrade options. Moving to an XLR setup completely transformed my recordings; I now enjoy richer tones and more control over my sound. What really struck me in this post was the emphasis on polar patterns and acoustic treatment. I’ve found that even small tweaks, like positioning the mic slightly off-axis or adding DIY foam panels, have made a significant difference in noisy environments. For those working in limited spaces, I’ve had success with portable reflection filters that aren’t too bulky but still improve clarity. How do other creators manage to optimize their sound in tight or untreated spaces without breaking the bank? Would love to hear your tips or experiences—sharing real solutions helps us all improve!
This article really highlights the importance of understanding the technical nuances of XLR microphones, which can be a game-changer for creators aiming for professional sound quality. I’ve personally transitioned from USB mics to high-end XLR setups, and the difference is profound—especially in how well the microphone captures nuances in voice and cancels background noise. One thing I’ve learned is that the environment plays a huge role; even with a great mic, poor placement or untreated rooms can undermine your efforts. I’ve experimented with DIY acoustic panels and reflection filters, which significantly improved clarity without spending a fortune. I’m curious—what are some affordable yet effective solutions other creators have used to improve audio quality in small, acoustically challenging spaces? Also, how do you decide which polar pattern to choose based on your recording environment? Looking forward to hearing everyone’s tips and experiences—sharing this knowledge really helps us grow as creators.
This post really resonated with me, especially when it comes to choosing the right polar pattern for different environments. I’ve found that starting with a cardioid mic works well for my home studio, but I’ve been thinking about trying a supercardioid pattern to better reject background noise in occasionally noisy spaces. I’ve also had good luck with DIY acoustic panels made from thick blankets and foam, which are budget-friendly and surprisingly effective. My question is, what do you all recommend for a portable, lightweight acoustic treatment solution that doesn’t compromise on quality? I love experimenting with mic placement and accessories, but environment management is still a key challenge for me. Would love to hear tips from others who’ve navigated similar issues and found practical solutions that fit their budget and space constraints.
Reading this detailed guide really made me reflect on my own journey with XLR mics. I started with a basic dynamic mic and quickly noticed how much clearer and more professional my recordings became once I upgraded to an XLR setup. The importance of choosing the right polar pattern can’t be overstated; I found that in my noisy home environment, a hypercardioid pattern drastically reduced background noise, especially when I positioned the mic correctly. I also added a DIY reflection panel made of foam and a heavy curtain, which made a surprising difference in controlling reverb. For creators working in small, untreated rooms, I’d recommend investing in portable acoustic treatments and positioning your mic thoughtfully. Have others found portable solutions that are affordable but effective? Would love to hear more tips on refining setup and environment for optimal sound.
About Me

Chesung Subba
Author/Writer
Hello, I'm Chesung Subba, a passionate writer who loves sharing ideas, stories, and experiences to inspire, inform, and connect with readers through meaningful content.
Follow Me
Connect with me and be part of my social media community.
Leave a Reply