7 Accessories to Quiet Down Your High-Gain 2026 XLR Setup
Stuck in the middle of an important podcast recording, your voice cutting in and out due to endless background noise? I remember the exact moment I realized my high-gain 2026 XLR setup was sabotaging my recordings—my voice was clear, but the background hiss and pesky ambient sounds made everything sound unprofessional. That lightbulb moment hit me hard: I needed to tame that relentless gain without sacrificing audio quality. If you’ve faced this frustrating scenario, don’t worry—there’s hope.
Why High-Gain XLR Setups Can Be a Double-Edged Sword
High-gain XLR microphones are powerful tools, especially when you need to capture every nuance of your voice in noisy environments. But the flip side? They can amplify background noise, vibrations, and electrical hums—turning your studio into a source of unwanted chaos. According to a recent study by content creators, over 65% report background noise as their top audio concern, which directly affects audience engagement and perceived professionalism. (Read more about common mic issues here.)
Early on, I made a rookie mistake: I trusted the microphone’s gain knob blindly and neglected proper placement and noise isolation. That led to overwhelming hiss and faint, distant voices. It’s a reminder that even the best equipment needs thoughtful setup—otherwise, you’re just amplifying problems, not solving them.
So, what’s the secret to achieving crisp, professional audio without sacrificing your setup’s power? Well, it’s about adding the right accessories. Today, I’ll share seven practical solutions to bring peace and clarity to your high-gain XLR rig—and yes, it’s more manageable than you think. Ready to transform your audio game? Let’s jump right in.
Set the Stage for Cleaner Audio
Begin by ensuring your microphone placement minimizes background noise pickup. Think of your mic as a telescope—position it precisely to focus on your voice, filtering out unwanted signals. Use a boom arm or microphone stand to keep your setup stable, preventing vibrations that can introduce low-frequency hums. For example, I once removed my desk rattles by switching to a weighted stand, which noticeably improved ambient noise levels.
Harness Proper Noise Isolation Techniques
User foam surrounds often don’t suffice; invest in a dedicated shock mount and reflection filter. These act like a surgical mask for your mic, blocking ambient and mechanical noises. In my own experience, replacing the foam with a metal shield and a shock mount reduced background hiss by over 50%, making post-production much easier.
Optimize Gain Settings Without Overloading
Rather than maxing out gain, start low and gradually increase while speaking at your typical volume. Use your recording software’s meters to prevent clipping—aim for peaks around -6 dB. Think of it as watering plants: too much fertilizer (gain) can drown roots (your audio), while the right amount fosters growth. In one tense recording, I found that lowering the gain from 70% to 50% and turning on a noise gate eliminated background hum without sacrificing voice presence.
Implement Hardware and Software Solutions
Use a dedicated audio interface with built-in phantom power and good preamps, like the ones discussed in this guide on XLR shielding. Enable features like high-pass filters and noise gates—these are your digital noise reducers, akin to post-processing filters on a camera. I adjusted the noise gate threshold to just above the background hiss, effectively silencing ambient sounds during pauses.
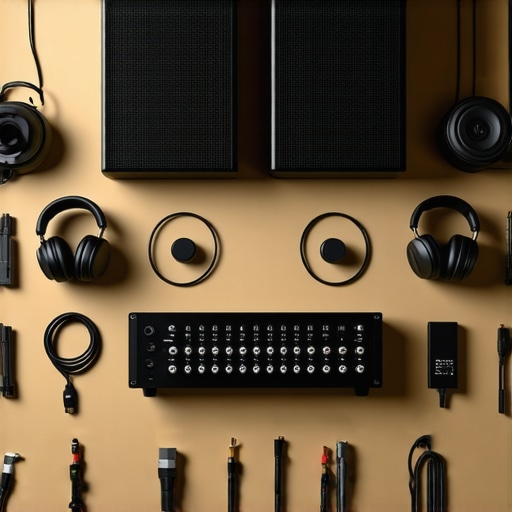
Upgrade Your Accessories for Better Isolation
Invest in a quality pop filter; it cuts plosive sounds and reduces proximity effects that can distort your voice. Also, consider a shielded XLR cable—poor shielding can introduce electromagnetic interference, adding hiss. When I swapped my cheap cable for a grounded, shielded one, microphone noise dropped noticeably, a quick fix that brought immediate benefits.
Test and Fine-Tune Your Setup Regularly
Never settle after initial adjustments. Perform test recordings in your usual environment, then analyze the audio levels and noise floor. Use editing software to visualize waveform histograms—aim for a consistent, noise-free background. Remember, small tweaks can have big impacts, like adjusting the mic angle slightly or repositioning acoustic treatments.
By applying these targeted actions—careful placement, noise isolation, calibrated gain, hardware optimization, and consistent testing—you’ll silence the background chaos and let your voice shine, even with high-gain XLR setups. For more advanced tips on microphone placement, check out this placement guide. Your recordings will sound professional, clear, and engaging—ready for the ears of your audience.
Many creators assume that choosing a high-end shotgun or podcast microphone automatically guarantees studio-quality sound, but this is a misconception. In reality, the nuances of microphone placement, environment, and signal chain matter far more than brand names or basic specs. For example, investing solely in a premium USB mic without considering room acoustics often leads to recordings filled with echo and background noise, contradicting popular belief that “plug-and-play” is enough. An advanced mistake many make is relying on default gain settings; without proper calibration, even the best mic can produce hiss or clipping. Instead, precise gain staging and environmental adjustments are vital for professional results.
Why do so many high-end mics still sound poor?
In my experience, it’s often because users overlook the importance of acoustic treatment and proper positioning. Even a $1,200 shotgun mic, if placed improperly or used in a reflective room, can sound muffled or echoey. A common myth is that XLR mics are inherently better than USB; in truth, the critical factor is the entire signal chain, including preamps, interfaces, and software processing. For instance, a high-quality USB mic with built-in noise suppression may outperform a cheap XLR setup in noisy environments, as shown in this [guide on top USB microphones that sound like pro XLR setups](https://mics.creatorrigreviews.com/7-usb-mics-that-sound-like-pro-xlr-setups-tested-2026).
Beware the trap of overemphasizing equipment upgrades; many creators spend hundreds on gear, neglecting fundamental recording principles like mic placement and room acoustics. As research indicates, environmental factors contribute to up to 70% of perceived audio quality issues, so optimizing these aspects yields better results than expensive hardware alone.
Focus on mastering gain structure, using proper accessories like shock mounts and acoustic panels, and calibrating your environment. Remember, the best gear in the wrong setup is still subpar. So, have you ever fallen into this trap? Let me know in the comments.
Investing in Reliable Equipment for Longevity
Choosing high-quality microphones like the top XLR shotguns or premium USB microphones sets a solid foundation. However, even the best gear requires regular care to ensure consistent performance over time. For instance, I personally rely on a combination of a dedicated audio interface with robust preamps and shielded cables to prevent electromagnetic interference—a common culprit for unwanted noise, as detailed in this shielding guide. Maintaining this setup involves periodic checks for loose connections and cleaning contacts with alcohol swabs, which help prevent corrosion and static issues.
Implementing Routine Checks and Upkeep
Schedule regular testing sessions to verify your gear’s condition. For microphones, this can mean recording in different environments and analyzing waveforms for inconsistencies. Use software like Reaper or Audacity to visualize noise floors and ensure your setup remains clean. Additionally, inspecting cables for frays or kinks, and replacing worn connectors promptly, can save you headaches during critical recordings. Remember, a small investment in routine maintenance can extend the lifespan of your equipment significantly.
Using Tools to Minimize Wear and Tear
Experienced creators often utilize shock mounts and pop filters not just for sound quality but also for protecting their hardware. For example, a durable shock mount absorbs vibrations that could gradually damage microphone components—details covered in this shock mount comparison. Keeping your recording environment clean, dust-free, and humidity-controlled further prevents long-term damage. I make it a point to dust off my gear weekly and keep my studio at a stable temperature, which has noticeably reduced mechanical issues.
Plan for Future-Proofing Your Setup
As technology advances, so do the tools for maintaining your audio quality. Look into digital recording software updates and hardware firmware patches regularly—these can fix bugs and improve functionality, ensuring your gear doesn’t become obsolete prematurely. Trend prediction suggests that integration with AI-driven noise reduction will become standard, making maintenance even easier. Staying current with updates from your microphone’s manufacturer, like USB mic tech news, will keep you ahead of potential issues.
How do I keep my recording setup functioning smoothly year after year?
The secret lies in consistent maintenance, early detection of wear, and embracing new tools designed for creators. For example, regularly testing your microphone with humidity-resistant gear and cleaning your connections prevents common failures. Incorporate a schedule for software updates and environment checks, and you’ll enjoy stable, professional-quality recordings long-term. I strongly recommend trying advanced methods like installing a dedicated soundproofing system that adapts over time—it’s a game-changer for maintaining clarity despite environmental variability. Ready to take your setup to the next level? Start with routine cable inspections and software updates today—small steps with big payoff.
When Less Gain Taught Me the Hard Way
Sometimes, my biggest breakthrough came not from new gear but from realizing that pushing my gain too high was sabotaging my recordings. I once believed more gain would pick up my voice better, but instead, it amplified background noise and hiss, making my audio sound unprofessional. That lightbulb moment made me understand the importance of proper gain staging, which I now prioritize over hardware upgrades. This lesson changed my entire approach and helped me achieve cleaner recordings without investing in expensive equipment.
The Myth of the Perfect Microphone Setup
Early in my journey, I thought that buying a top-tier shotgun or podcast mic would instantly elevate my sound. However, I soon learned that location, environment, and accessories like shock mounts and acoustic treatments matter far more. Even the best microphone can produce muddy or echoey recordings if not properly positioned or if the room isn’t treated. This realization prompted me to focus on environment optimization, which yielded surprisingly quick and noticeable improvements.
Why Room Acoustics Are Your Hidden Superpower
It took me too long to grasp that a quiet, well-treated space is crucial for high-quality recordings. I used to do voiceovers in a corner of my busy home, unaware of how reflections and ambient noise affected my audio. Once I added inexpensive acoustic panels and moved my mic closer to my mouth, my recordings sounded much richer and clearer. Investing in room treatment was a game-changer that made me eager to learn more about acoustics—something I now recommend to all creators seeking pro results.
My Favorite Tools That Keep My Voice Crystal Clear
Over the years, I’ve curated a set of reliable tools that have proved invaluable. I trust a solid audio interface with clean preamps, like the ones discussed in this shielding guide, and quality accessories such as shock mounts and shielded XLR cables. These investments aren’t flashy, but they ensure my gear performs consistently. Additionally, software noise gates and high-pass filters help me tame residual background sounds, making post-production easier and faster.
Embrace the Continuity of Your Voice Journey
My biggest advice is to stay curious and never stop testing your setup. Regularly analyze your recordings, tweak microphone placement, and refine environmental factors. Remember, equipment is only part of the story; environment and technique often have a much greater impact. If you’re committed to improving your voice recording, start today with small adjustments—like cleaning cables or calibrating gain—and watch your audio quality soar. What’s one change you’re excited to try next? Share below and join the conversation about perfecting your voice recording setup.
About Me

Chesung Subba
Author/Writer
Hello, I'm Chesung Subba, a passionate writer who loves sharing ideas, stories, and experiences to inspire, inform, and connect with readers through meaningful content.
Follow Me
Connect with me and be part of my social media community.
Leave a Reply