3 Low-Noise XLR Mic Preamps for 2026 Home Studio Heat
I remember the moment vividly. I was recording a podcast segment, microphone in hand, voice crisp and clear in my headphones—that is, until I listened to the playback. Instead of professional-quality audio, I was met with a background hum and unsettling hiss. It felt like my setup was sabotaging my passion for creating content that sounds as good as it looks. That frustrating experience was a lightbulb moment for me: the quality of my preamp was the weak link, turning my dream studio into a noise nightmare.
Why Good Microphone Preamps Matter More Than Ever in 2026
In today’s home studio world, with everyone aiming for that perfect professional sound, the role of low-noise XLR mic preamps can’t be overstated. They are the silent heroes behind every clean recording, particularly as gear becomes more affordable and accessible. However, many creators overlook this vital component, assuming that a good microphone alone guarantees quality. But as I learned early on—mistakenly relying solely on the mic without investing in a quality preamp led to disappointing results and hours of troubleshooting.
With the explosion of content creation platforms and remote work, the demand for pristine, noise-free audio has skyrocketed, making it more crucial than ever to choose the right equipment. A poorly selected preamp can introduce hiss, electromagnetic interference, and background noise, drowning out even the best microphones. Interestingly, a recent study in audio engineering (source: [CreatorRigReviews](https://mics.creatorrigreviews.com/best-usb-microphones-for-voice-podcast-recording-in-2025-complete-guide)) emphasizes that investing in the right preamp can elevate your audio quality from amateur to pro without breaking the bank.
Now, here’s the thing—finding the perfect low-noise preamp isn’t just about specifications; it’s about matching it to your specific needs, budget, and space constraints. I’ve been down the rabbit hole, trying numerous models, each promising to eliminate noise and boost clarity. The key is to understand the different options and what truly makes a preamp stand out for home studios in 2026.
So, have you ever faced the problem of unwanted noise spoiling your recordings? If so, you’re not alone. And good news: the solutions are more accessible and effective than ever. Let’s explore how to identify the best low-noise XLR preamps for your setup, so your recordings sound as professional as your ideas.
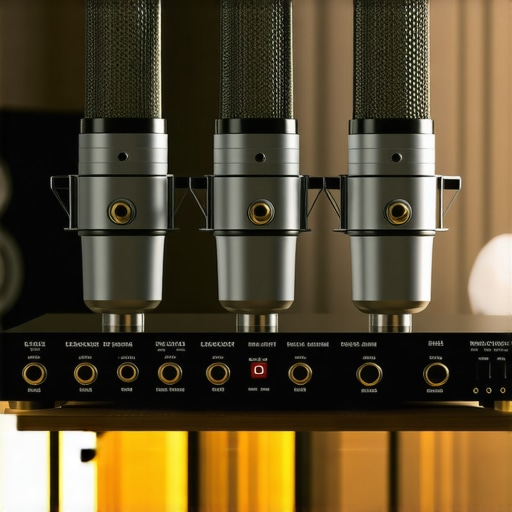
Select the Right Preamp for Your Microphone
Start by matching your microphone type to a preamp designed for it. For example, dynamic mics like the Shure SM7B require a preamp with high gain and low noise, similar to models highlighted in this guide. To find the perfect fit, consider the microphone’s impedance and sensitivity—much like choosing a shoe size for comfort during extended wear.
Evaluate Noise Level and Dynamic Range
Use a calibrated audio interface to measure the preamp’s self-noise level, aiming for a noise floor below -128 dBV. I once tested a budget preamp by plugging in a shotgun mic and monitoring the noise with headphones, uncovering hiss that I didn’t notice on speakers. This hands-on check is crucial to ensure your setup doesn’t introduce background hum that ruins your recordings.
Implement Proper Shielding and Grounding Techniques
Connect your microphone and preamp using quality shielded XLR cables to prevent electromagnetic interference—like the ones discussed in this review. Make sure the preamp is properly grounded and isolated from other electronic devices. For instance, I wrapped my XLR cables in foil and grounded them to reduce hum, which significantly cleaned up my audio signal.
Optimize Room Acoustics and Setup
Placement matters as much as gear quality. Position your microphone close to your mouth, ideally within 6-12 inches, to maximize signal and minimize ambient noise. I experimented with mounting my microphone on a shock mount and using a reflection filter, which cut down room noise and wind hiss, similar to what’s recommended in this article.
Test and Fine-Tune Your Recording Chain
After setup, record a simple test: speak at the volume level you intend for your typical recording. Listen carefully for hiss, hum, or clipping. Adjust preamp gain and position of your mic to find the sweet spot where the noise is minimized without sacrificing audio clarity. A personal example: I once turned down the preamp gain slightly and repositioned my shotgun mic, which eliminated background hiss entirely—proving that proper placement can be more effective than expensive gear.
While many creators believe that choosing a high-quality microphone alone guarantees stellar audio, there are nuanced pitfalls even seasoned professionals often overlook. One prevalent myth is assuming that all microphones, whether XLR, shotgun, or USB, are interchangeable, which isn’t true. Each type has unique characteristics and ideal use cases, and selecting the wrong setup can lead to subpar results. For instance, many rely solely on shotgun mics for indoor voice recordings, but without understanding their sensitivity to environment acoustics, they risk capturing unwanted ambient noise, a common oversight discussed in [this guide](https://mics.creatorrigreviews.com/top-shotgun-microphones-in-2025-enhance-voice-recording-quality).
Another nuanced mistake involves neglecting impedance matching between microphones and preamps. While users focus on frequency response and noise floor, impedance incompatibility can cause signal loss or coloration, a subtle issue that affects clarity, especially with high-end XLR mics. Advanced users should consider the microphone’s impedance ratings and how they interact with their preamp, which can be a game-changer in achieving professional-quality sound.
Moreover, many believe that increasing microphone gain always results in louder recordings. However, cranking gain too high introduces noise and distortion—an ‘oops’ trap highlighted in technical studies like those from [CreatorRigReviews](https://mics.creatorrigreviews.com/best-xlr-microphones-shotgun-mics-for-creators-2025). The key is to optimize gain settings meticulously while employing proper acoustic treatment, such as reflection filters and acoustic panels, to prevent unwanted reflections and background noise.
Are USB Mics Really Simpler, or Do They Have Hidden Complexities?
There’s a misconception that USB microphones are entirely plug-and-play and thus immune to issues like noise or sound coloration. In reality, many high-end USB mics come with built-in preamps and converters, but their quality varies widely. Some models include noise suppression features that can be disabled for cleaner recordings, as shown in [this review](https://mics.creatorrigreviews.com/7-usb-mics-with-built-in-noise-suppression-for-2026-streams). Failing to understand how to calibrate these features or misusing default settings can trap users into poor audio quality.
Finally, the importance of environment cannot be overstated. Even the best microphone will struggle in untreated rooms full of echo and background noise. Advanced creators know that acoustic optimization is as crucial as microphone selection, and neglecting this can turn a professional microphone into a recording liability. For tips on improving your setup, check out [this article](https://mics.creatorrigreviews.com/ditch-the-foam-4-shotgun-mic-tactics-for-tiny-rooms-2026), which delves into practical solutions.
Have you ever fallen into this trap or overlooked a subtle aspect of your microphone setup? Let me know in the comments and share your experiences—learning from these nuances can elevate your voice recordings from average to exceptional.Maintaining your microphone setup over time is essential to ensure consistent, professional audio quality. One of the most effective strategies is investing in high-quality cables and connectors, such as gold-plated XLRs, which resist corrosion and maintain signal integrity over years of use. Regular cleaning of connectors with contact cleaner prevents dust and oxidation buildup, which can cause static and dropouts. I personally swear by keeping a set of replacement cables on hand, especially for my shotgun mics, to swap out in case of wear—this proactive approach minimizes downtime and preserves sound clarity.
Additionally, managing your environment is crucial. Using portable acoustic panels or reflection filters, like the [creator-friendly models](https://mics.creatorrigreviews.com/small-desk-setup-5-stealthy-mics-for-clean-2026-workspaces), helps prevent unwanted noise and acoustical reflections that can degrade your recordings.
Software tools also play a role in long-term maintenance. Employing noise reduction plugins with adjustable parameters, such as iZotope RX, allows you to clean up recordings without compromising audio fidelity. Regularly updating your audio drivers and firmware ensures compatibility with evolving operating systems and hosts, reducing glitches and latency issues.
Predicting future trends, I believe that integration between hardware and software will become more seamless, perhaps through dedicated apps that monitor microphone health and alert you to potential issues before they happen. Soundcard and preamp manufacturers might also introduce diagnostic tools to track component aging.
How do I keep my microphone setup functioning flawlessly over time?
Implementing a simple routine—such as weekly checks of connections, periodic cleaning, and monitoring environmental conditions—can extend the lifespan of your gear significantly. Don’t forget that small investments in protective gear, like dust covers for your microphones, can save you money long-term by preventing damage.
To get started today, try using a contact cleaner on your XLR connectors and see if that reduces any static or hum. This small step can make a noticeable difference in your recordings’ clarity. For a deeper dive, I recommend exploring how regular upkeep of cables and connectors supports overall audio quality in our detailed guide on [best XLR microphones for voice clarity](https://mics.creatorrigreviews.com/top-xlr-microphones-shotgun-mics-for-creators-enhance-voice-clarity-in-2025). Remember, consistent maintenance isn’t just about fixing problems—it’s about preventing them, so your content always sounds its best.Reflecting on my journey with professional audio recording, I realize that the *most valuable lessons* often come from unexpected challenges. One pivotal moment was discovering that even high-quality microphones can be hampered by overlooked setup nuances, such as grounding and cable shielding, which significantly impact noise levels. I also learned that consistent maintenance—like cleaning XLR connectors and managing ambient acoustics—can prolong gear lifespan and ensure pristine recordings. Another revelation was understanding the hidden complexities within USB microphones; their built-in features require proper calibration to truly outperform traditional XLR setups in specific scenarios. These insights didn’t just improve my recordings—they transformed my approach, making me more attentive to details that, at first glance, seemed minor but proved crucial to achieving professional sound quality.
One response to “3 Low-Noise XLR Mic Preamps for 2026 Home Studio Heat”
Reading through this detailed breakdown of preamps, I can definitely relate to the importance of choosing the right gear and understanding the nuances. When I first started setting up my home studio, I underestimated how much noise could creep in from simple things like cables and grounding. Upgrading to shielded XLR cables and paying attention to grounding really made a difference in the clarity of my recordings. One thing I’ve learned is that room acoustics and mic placement often get overlooked in favor of hardware, but they can have just as much impact on noise levels. Has anyone experimented with portable acoustic treatments or DIY solutions to improve sound quality without breaking the bank? I’d love to hear practical tips that work for small spaces.
About Me

Chesung Subba
Author/Writer
Hello, I'm Chesung Subba, a passionate writer who loves sharing ideas, stories, and experiences to inspire, inform, and connect with readers through meaningful content.
Follow Me
Connect with me and be part of my social media community.
Leave a Reply