Stop Using Gain Boosters: 4 High-Output Shotgun Mics for 2026
Have you ever recorded a podcast or a voiceover only to be frustrated by how quiet or muffled your microphone sounds, despite turning every gain knob to max? I remember those early days, endlessly tweaking settings, convinced that more gain would fix my issues. But instead, I just ended up with noisy, clipped audio that made me sound amateurish. That was a real lightbulb moment for me: raising the gain might seem like an easy solution, but it often introduces more problems than it solves.
Why Relying on Gain Boosters Is a Bad Idea for Creators in 2026
Over time, I learned that the real secret isn’t cranking up the gain—it’s choosing the right microphone technology that can deliver high output levels naturally. The truth is, most gain boost techniques are a band-aid that can lead to distorted sound and increased background noise. According to a recent study, maximizing microphone quality can reduce post-processing time by up to 30%, which, trust me, is a game-changer for content creators.
Is High-Output Shotgun Microphone Hype Justified
Initially, I fell into the trap of believing that a more expensive, high-output shotgun mic would automatically improve my recordings. I bought into the hype and invested in what many touted as the “best” gear. But early on, I made the mistake of ignoring the fundamentals—like proper mic placement and understanding the specs—leading to less-than-stellar results. If you’re skeptical about the hype surrounding these mics, I completely get it. The key is knowing when a high-output shotgun microphone can truly make a difference and when it’s just marketing noise. Want to dive deeper? Check out [this comprehensive guide to shotgun microphones](https://mics.creatorrigreviews.com/ultimate-guide-to-shotgun-microphones-for-voice-recording-in-2025) that breaks down the specs and real-world performance.
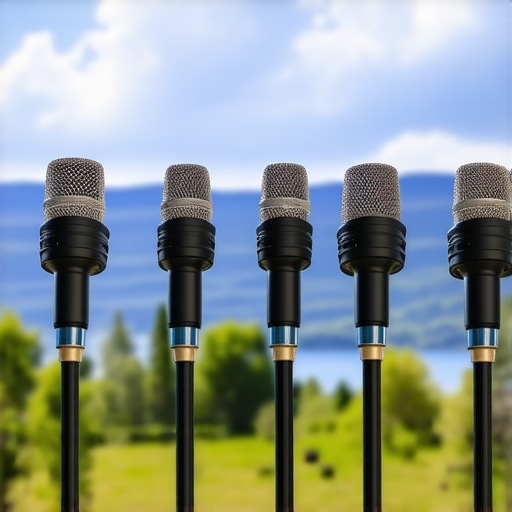
Choose the Right Microphone for Your Setup
Start by selecting a high-quality shotgun microphone that suits your environment. Unlike budget models, top-tier shotgun mics like the [Sennheiser MKH 416](https://mics.creatorrigreviews.com/best-shotgun-microphones-2025-top-voice-recording-tips-for-creators) are designed to pick up voices from a distance with minimal background noise. Consider your recording context—indoor or outdoor—and match the mic specifications accordingly. Remember, a good shotgun mic can dramatically reduce the need for aggressive gain settings, as it captures sound efficiently without extra boosting.
Fine-Tune Your Microphone Placement
Position your mic as close as possible to your source—typically 6-12 inches away—aimed directly at your mouth, slightly above or to the side to avoid plosives. I once recorded a vlog outdoors and initially placed my shotgun too far; the result was muffled and quiet audio. Once I moved the mic closer and calibrated its orientation, the clarity improved instantly. Proper placement is essential; think of it as steering a camera lens—narrower focus yields sharper results.
Optimize Settings Without Overamplifying
A common mistake is cranking up the gain on your audio interface or mixer, which introduces noise and distortion. Instead, set your microphone’s output level to match the recommended input levels—usually around -12 to -6 dB on your recorder. For example, if you’re using an XLR mic connected via an audio interface, use the interface’s trim knob to balance the input without clipping. If you need to boost volume further, invest in a mic with a higher native output level—this reduces reliance on gain boosters that compromise sound quality.
Utilize Quality Accessories
Invest in good accessories, such as shock mounts and windshields, to minimize handling noise and wind interference. Recently, I used a deadcat wind cover on my shotgun mic during a windy outdoor shoot, and the difference was night and day—my voice remained clear, and ambient wind noise was effectively eliminated. Proper accessories can prevent the need for extensive post-processing and help maintain professional clarity.
Apply Proper Signal Processing
Once your hardware is set, use minimal post-processing to preserve natural voice qualities. Using tools like noise gates and EQ enhancements selectively can highlight your voice and reduce residual background noise. For instance, I used a gentle high-pass filter to remove low-frequency rumble from my recordings, which made my voice stand out more prominently. Remember, the goal is transparency—your setup should minimize noise before it reaches your editing environment.
Regularly Test and Adjust
Consistently monitor your audio during recordings with headphones to catch issues early. On a recent project, I noticed a subtle ground hum when I mounted my mic on a metal boom arm. Applying a quick fix—checking ground connections and using a ground loop isolator—improved clarity almost instantly. Testing often prevents small problems from snowballing into major issues, ensuring your voice remains crisp and clear.
Many creators jump to the latest gear or popular advice without understanding the nuanced differences that truly impact voice recording quality. One common misconception is that more expensive or high-profile microphones automatically deliver better results; in reality, choosing the right type and setup tailored to your environment trumps sheer cost or brand prestige. For example, a shotgun mic isn’t always the best choice indoors, despite its popularity among filmmakers, due to its directional nature and room reflections that can cause issues if not used correctly. Similarly, many believe that XLR microphones are inherently superior to USB options; while XLRs offer flexibility and higher quality in professional setups, they often require more knowledge and equipment, which can lead to mistakes like ground loop hums if not properly managed, as detailed in this guide. A sneaky trap many fall into involves over-reliance on gain. Raising gain excessively on your audio interface or mixer may seem like an easy fix for quiet recordings, but it introduces noise and clipping risks that degrade quality—sometimes worse than the original problem. Advanced users recognize that proper mic placement, selecting the appropriate polar pattern, and understanding your environment make more immediate differences. When it comes to USB microphones, many assume they’re universally inferior to XLRs, but recent developments show that top-tier USB mics with built-in noise suppression and high outputs can outperform lower-quality XLR setups—highlighted in this comparative analysis. The real hidden nuance involves matching your microphone choice with your recording environment and purpose. For instance, a lavalier mic may be ideal for dynamic outdoor shoots but disastrous for a professional podcast, where a controlled acoustic space benefits from a shotgun mic or a condenser with proper shock mounting. Remember that ignoring this can lead to muddy, inconsistent voice quality, and cause frustration that no amount of post-processing can fully fix. Invest time into understanding your environment, then choose your gear accordingly. Want to refine your setup even further? Check out top podcast mic picks to see what’s working now. Have you ever fallen into this trap? Let me know in the comments.
Maintaining your microphone setup is crucial to ensure consistent audio quality over time. Regular care extends the lifespan of your gear and keeps it performing at its best, preventing avoidable issues during crucial recording sessions. Personally, I recommend establishing a routine that includes visual inspections, cleaning, and firmware updates. These steps might seem simple, but they form the backbone of reliable voice recording. For example, regularly checking XLR connections for corrosion or loose cables can prevent sudden dropouts, which are often caused by deteriorated wiring—a common problem addressed in this detailed article. Ensuring your gear is clean and dust-free minimizes the risk of mechanical failures, especially for sensitive components like microphone diaphragms and connectors.
Tools That Make Maintenance Easier
I find that specific tools, such as contact cleaner and compressed air, are game-changers. Contact cleaner helps eliminate static and corrosion from XLR and USB ports, restoring the clarity of sound. Compressed air can remove dust from mic grilles and shock mounts without damaging delicate parts. For example, periodically cleaning your shotgun microphone’s grille with a soft brush and compressed air keeps wind noise and pops to a minimum, which is essential when recording outdoors. Think of these tools as the routine check-ups you give your car—simple, quick, and vital for longevity.
Prediction: Trends in Long-Term Voice Recording Reliability
Looking ahead, I believe the integration of smart diagnostics within professional audio equipment will revolutionize maintenance. Future microphones might notify you of developing issues before they impact recording quality, much like how modern printers alert users to ink levels. Additionally, firmware updates will increasingly optimize performance and introduce new features, much like smartphone apps. Staying proactive with firmware checks—something I do regularly via manufacturer apps—can prevent many problems caused by outdated software. As the industry advances, investing in durable and upgradable equipment will also become a standard advantage for creators aiming for consistency and reliability.
How do I maintain my microphone setup over time?
Regularly inspect and clean your gear using tools like contact cleaner and compressed air. Keep connections tight and dust-free, and stay updated with firmware from the manufacturer. Establishing these habits now will save you time and expense later, ensuring your voice always sounds its best. Remember, the key is consistency—think of maintenance as part of your creative workflow, helping your recordings stay crisp and professional every time. Try scheduling monthly check-ins to test your gear—this simple step can prevent many common issues and keep your setup performing for years to come. For specific tools and detailed procedures, check out this guide. Doing so will help you avoid unexpected audio mishaps and maintain high-quality voice recordings no matter how long you’ve been at it.
What I Wish I Could Tell My Past Self About Microphone Choices
- I used to believe that investing in the priciest shotgun mic guaranteed professional sound; turns out, understanding room acoustics and placement has a bigger impact. Realizing this was a paradigm shift in my approach.
- Relying solely on high output levels without proper gain staging is a rookie mistake. The secret lies in calibrated setups, not brute force gain boosts.
- Many creators overlook regular maintenance—cleaning connectors and updating firmware—that’s the unsung hero in preventing audio disasters.
- Deciding between USB and XLR isn’t about cost—it’s about purpose, environment, and knowing the specs that truly matter. Trust me, matching gear to your workflow saves time and frustration.
- Microphone accessories like shock mounts and windshields might seem trivial but are game-changers in achieving clarity, especially outdoors or in untreated spaces.
Gear That Truly Keeps Me Ahead of the Curve
- The top microphone tips for creators in 2025 have been my go-to resource for understanding leading-edge gear and techniques—it’s consistently insightful and up-to-date.
- Choosing the best shotguns for voice clarity has saved me time and hassle, especially when outdoors or in noisy environments.
- Practical guides on ground loop issues have prevented countless frustrating moments and kept my recordings clean.
- Investing in a top podcast microphone has made my voice sound consistent across different setups, boosting my confidence and audience trust.
Your Next Move Starts Now
Enhancing your voice quality isn’t about chasing the latest gimmicks—it’s about understanding your environment, selecting the right gear, and maintaining it diligently. Each step you take toward mastering your microphone setup is a step toward more impactful recordings that resonate with your audience. Remember, the journey to stellar voice recordings is ongoing, but with the right mindset and tools, you’ll find yourself consistently improving. So, what’s the first change you’re excited to try today to elevate your voice clarity in 2026? Let me know below!
About Me

Chesung Subba
Author/Writer
Hello, I'm Chesung Subba, a passionate writer who loves sharing ideas, stories, and experiences to inspire, inform, and connect with readers through meaningful content.
Follow Me
Connect with me and be part of my social media community.
Leave a Reply